
How can Architects incorporate timber frames into their designs?
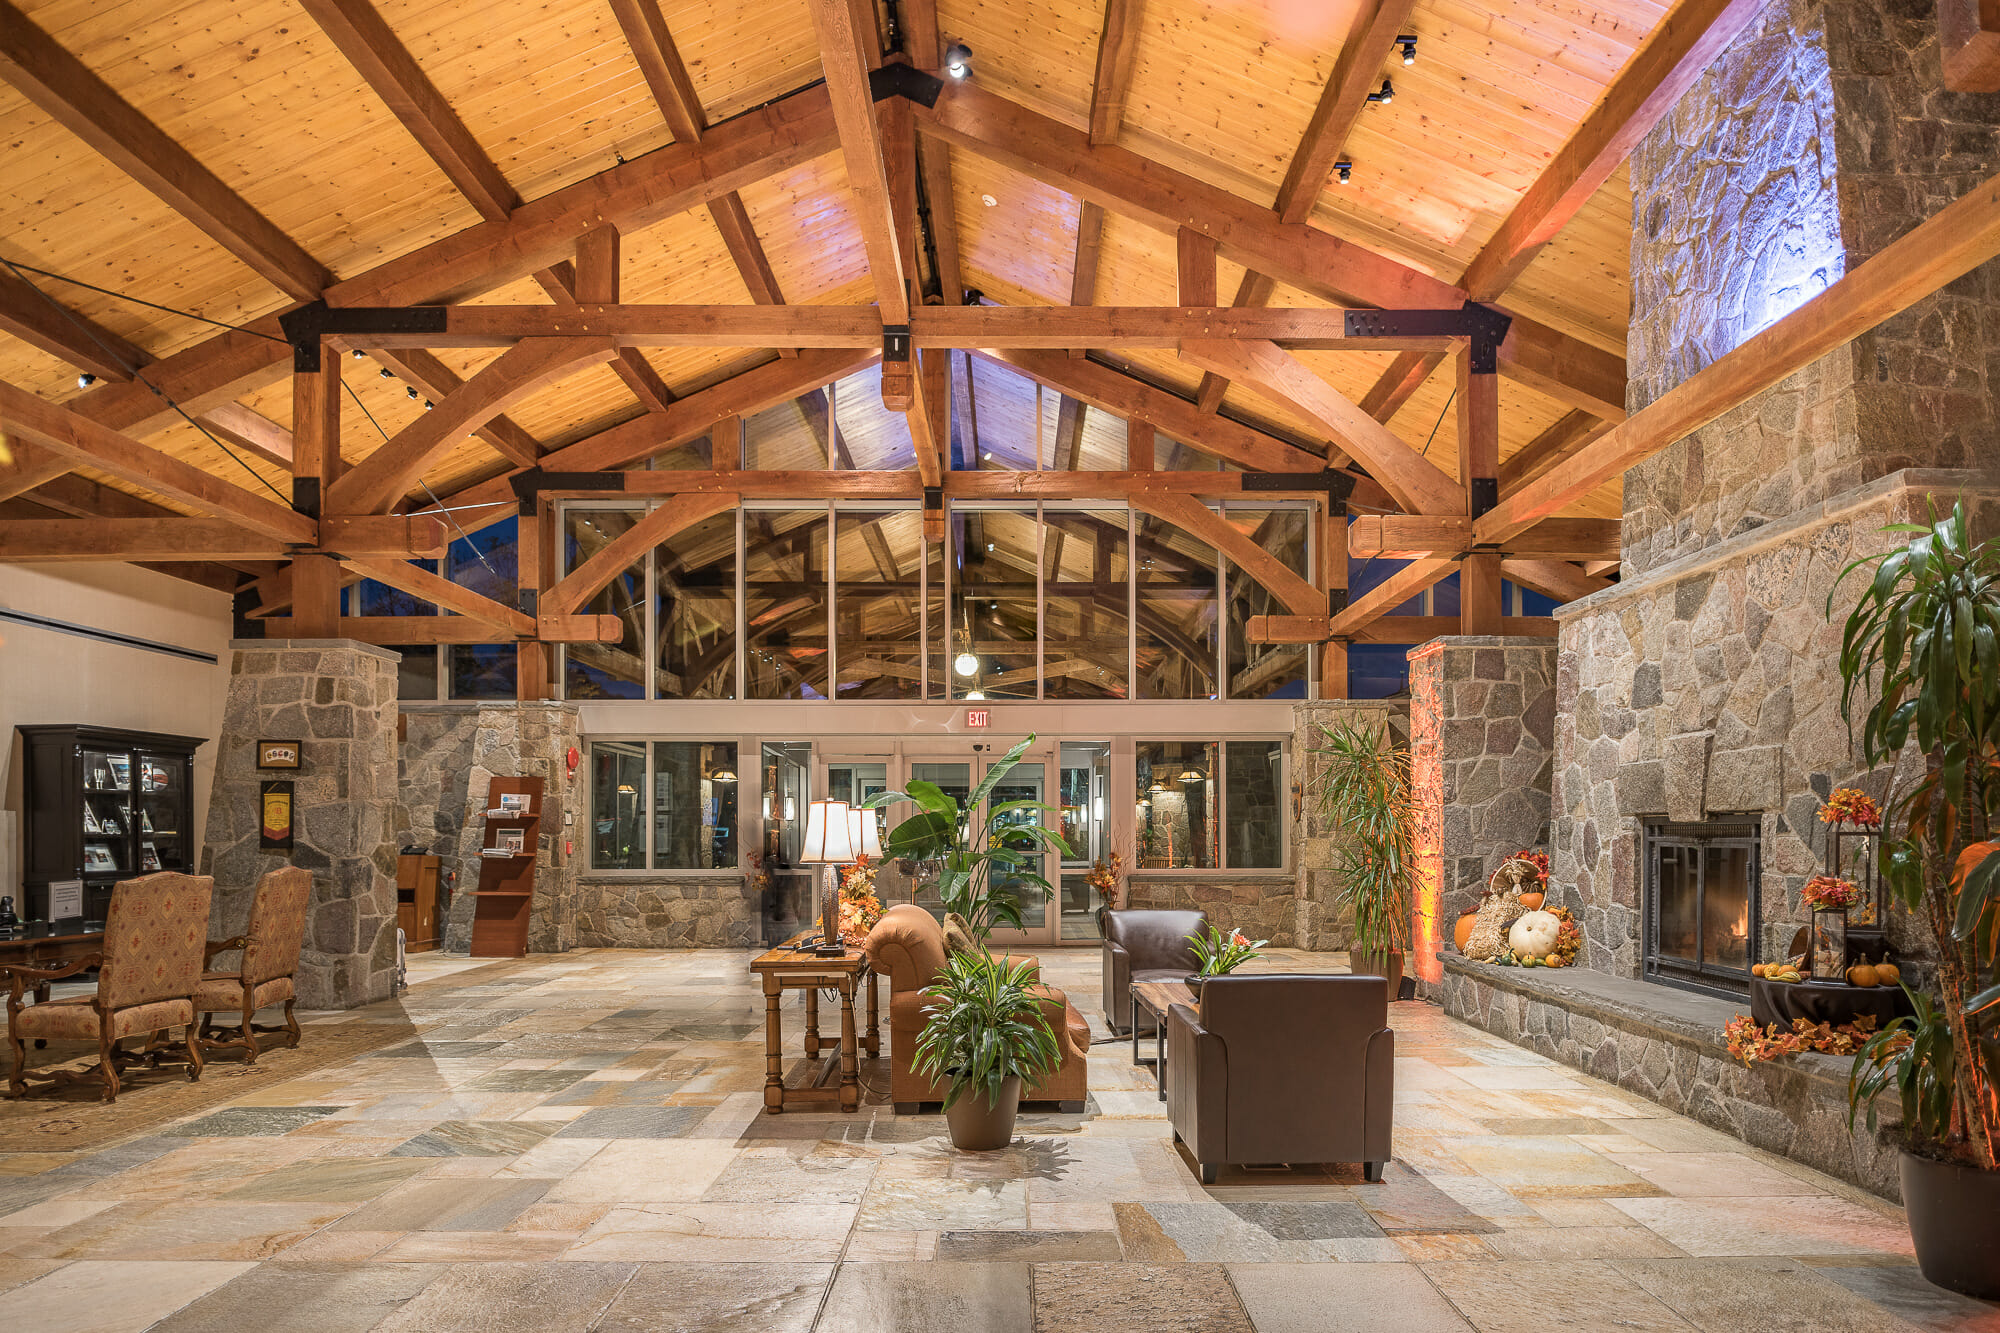
Architecture is the art of designing spaces that inspire and relax the mind in new and interesting ways. Timber brings elements of nature and strength into buildings while showing the natural structure of the building. Timber trusses open up the roof space to cathedral ceilings and arched timbers, corbels and decorative finials bring an elegance. Architects can design buildings with full timber frames, timber trusses or simply decorative accent beams.
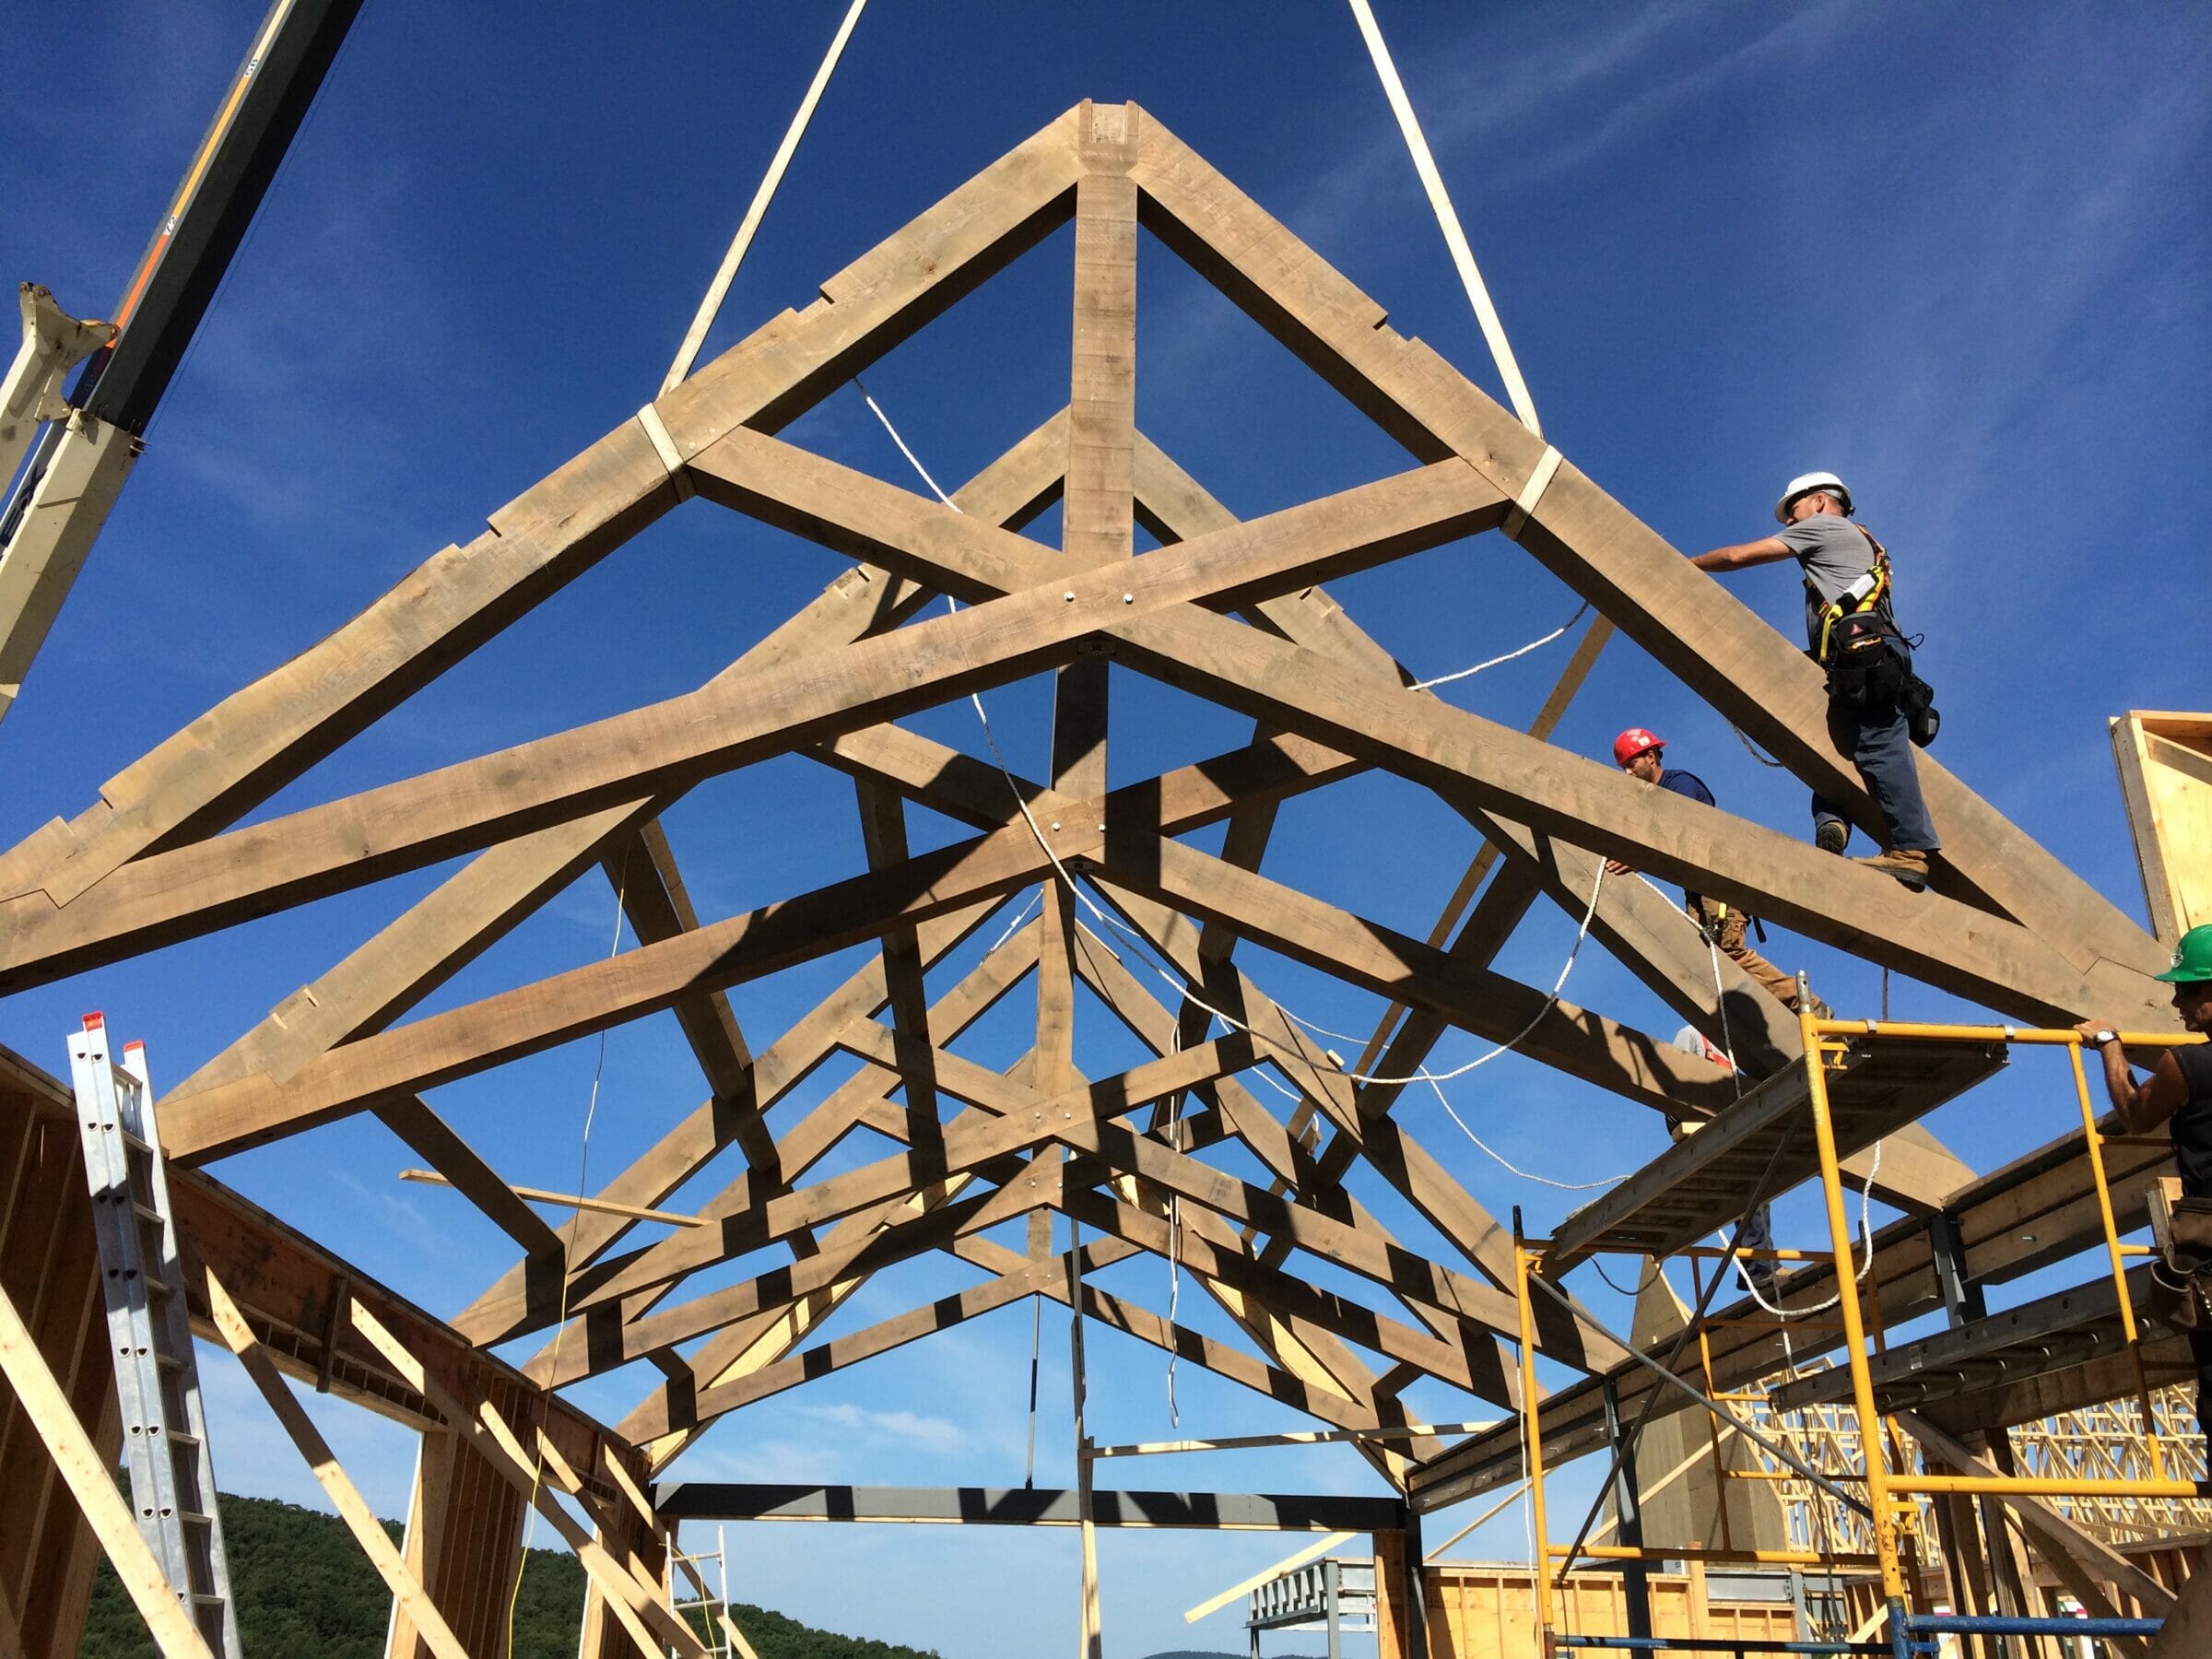
I want to design a timber truss for my building - how do I start?
The easiest way to start designing a heavy timber truss is to visit Vermont Timber Works’ timber truss page where you can see many different types of trusses that can be used. Briefly, a king post truss is the most economical, a modified king post truss raises the bottom chord up for more visual space, a queen post truss has two vertical elements spaced apart, a hammer beam truss, with its arches, is reminiscent of old European cathedrals, a girder truss consists of parallel top and bottom chords, and a scissor truss raises the bottom chords of the truss at an angle to open up the space below. There are many variations of all of those trusses.
If you don’t see what you have in mind on our Timber Trusses page, send us a sketch of what you are hoping for and we will give you a free consultation on whether or not it will work structurally. We will also make suggestions on how to modify the idea to get it to work.
What kind of finishes are available for timber frames?
We like to use Vermont Natural Coatings to finish our timbers. We also use Benjamin Moore WoodLuxe for exterior surfaces and occasionally Minwax products for interior work. It is important to finish the timber on all sides and surfaces prior to shipping to protect the wood – that means that early in to process we will be asking for a finish type and a stain color so that as soon as each timber is cut it can also be finished.
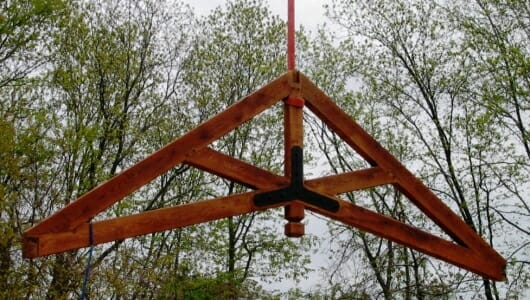
To help you make a final decision, we will send out samples with the different colors you select. Keep in mind that all timber is different with different ways the stain is absorbed – even within the same timber. Stain colors will be lighter when applied to the sap wood and darker when applied to the heartwood. Knots will take the stain differently than the surrounding wood and when timbers are stained a dark color checks can develop which will show up with a lighter color. The variation is what gives wood its beauty. See our Wood Finishes page for more information.
What wood textures are available for timber frames?
Timber comes in a variety of textures depending on the clients’ tastes.
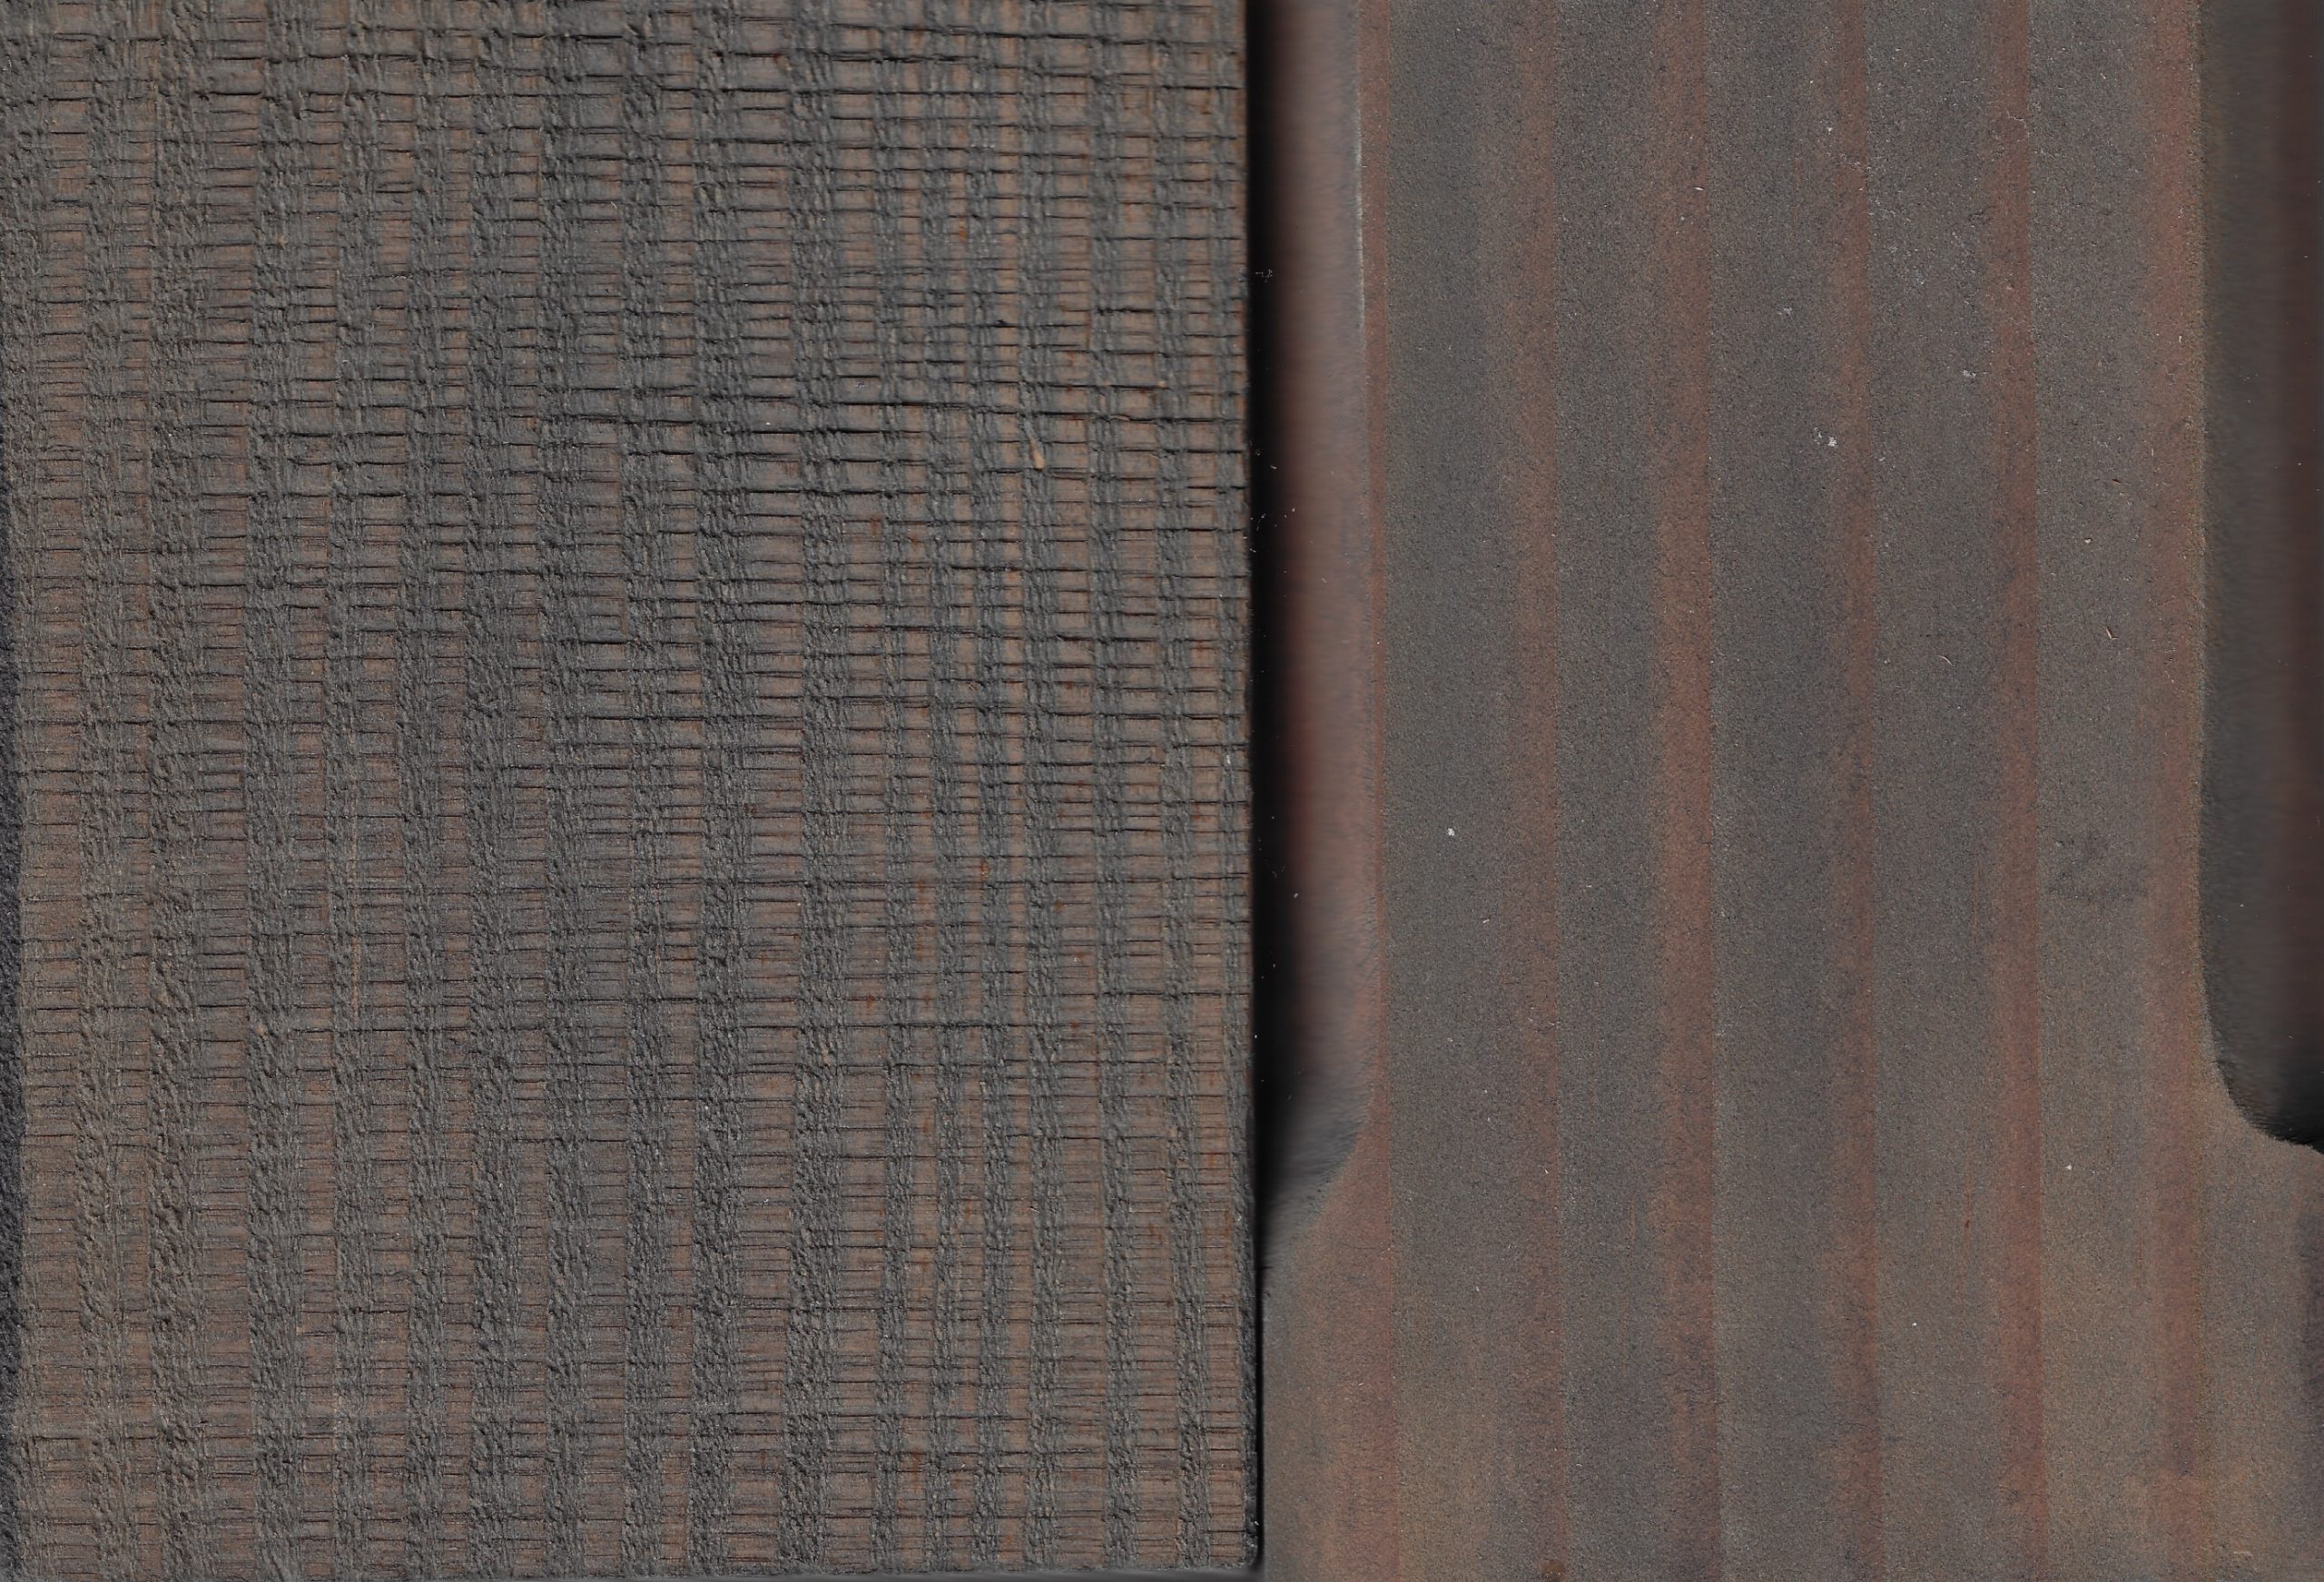
The most common texture in timber framing is planed smooth, or S4S – surfaced four sides. The timber comes to us in a uniform size, typically 1/2″ under the specified size. An 8×8 will finish out to 7 1/2″ x 7 1/2″ and an 8×12 will be 7 1/2″ x 11 1/2″. Normally we will put a 1/2″ chamfer on the edges of S4S timbers to soften the sharp edge and dress them up a bit. Other embellishments, like deeper chamfers, round overs and beads are also available.
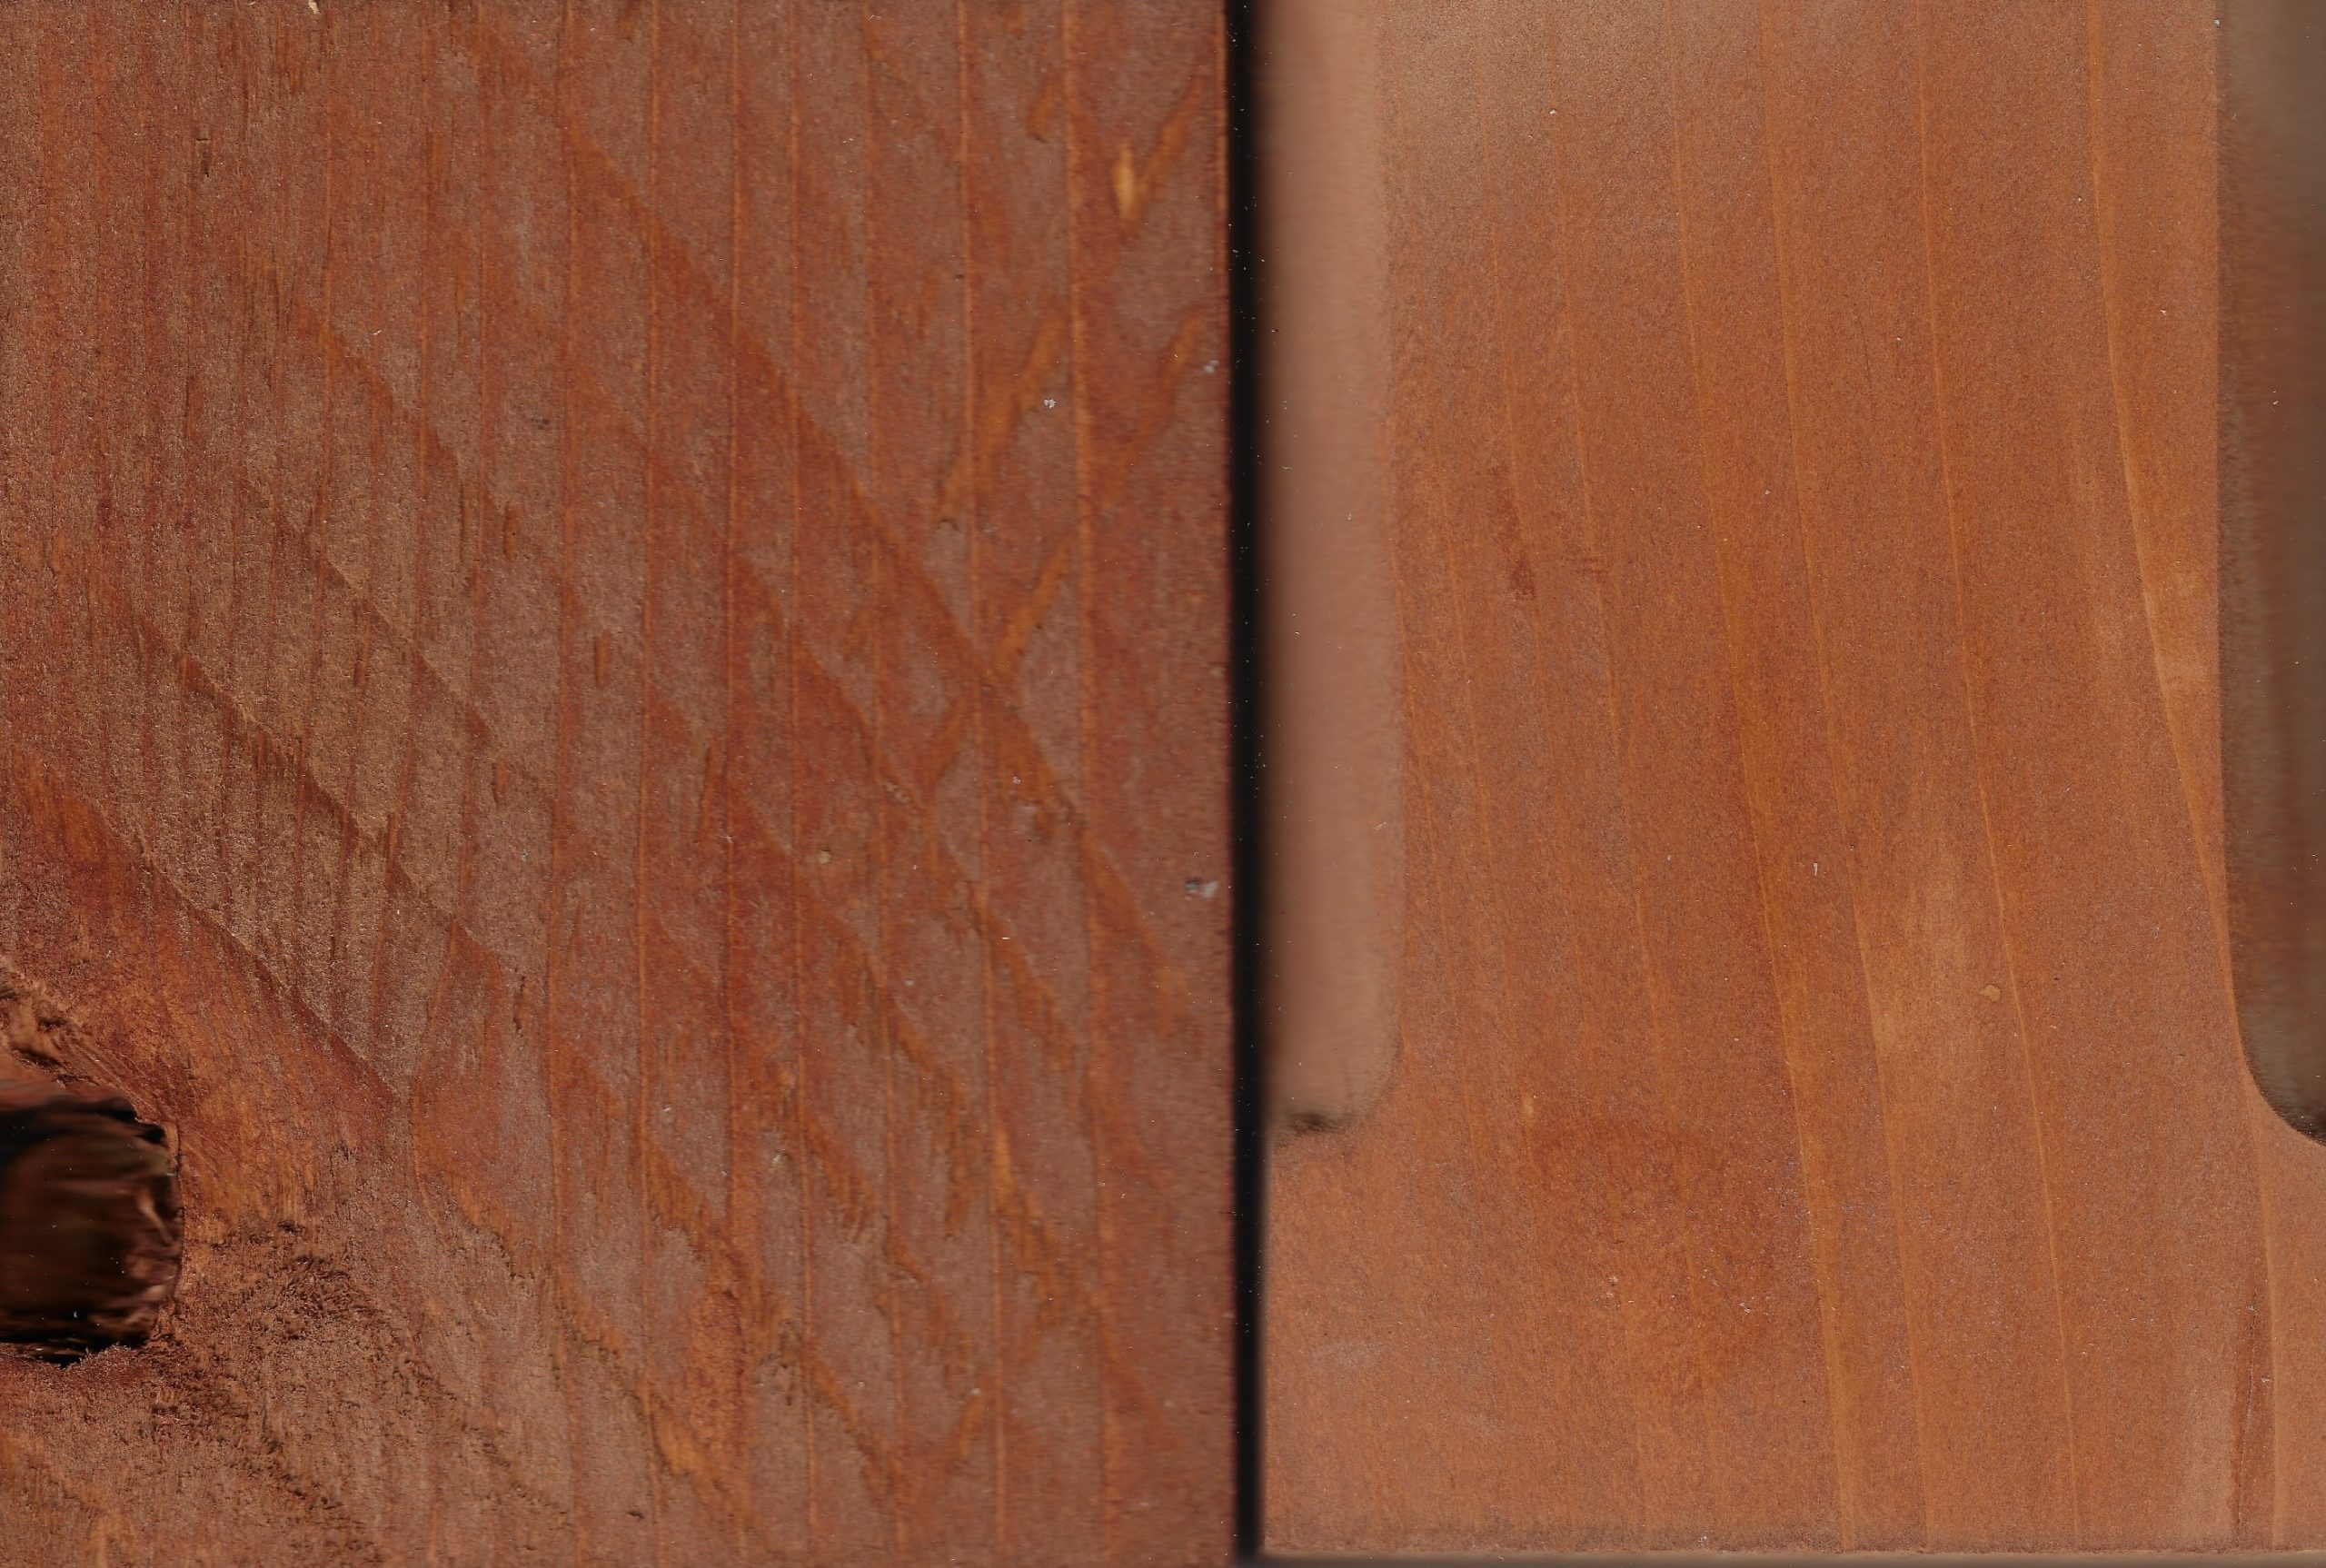
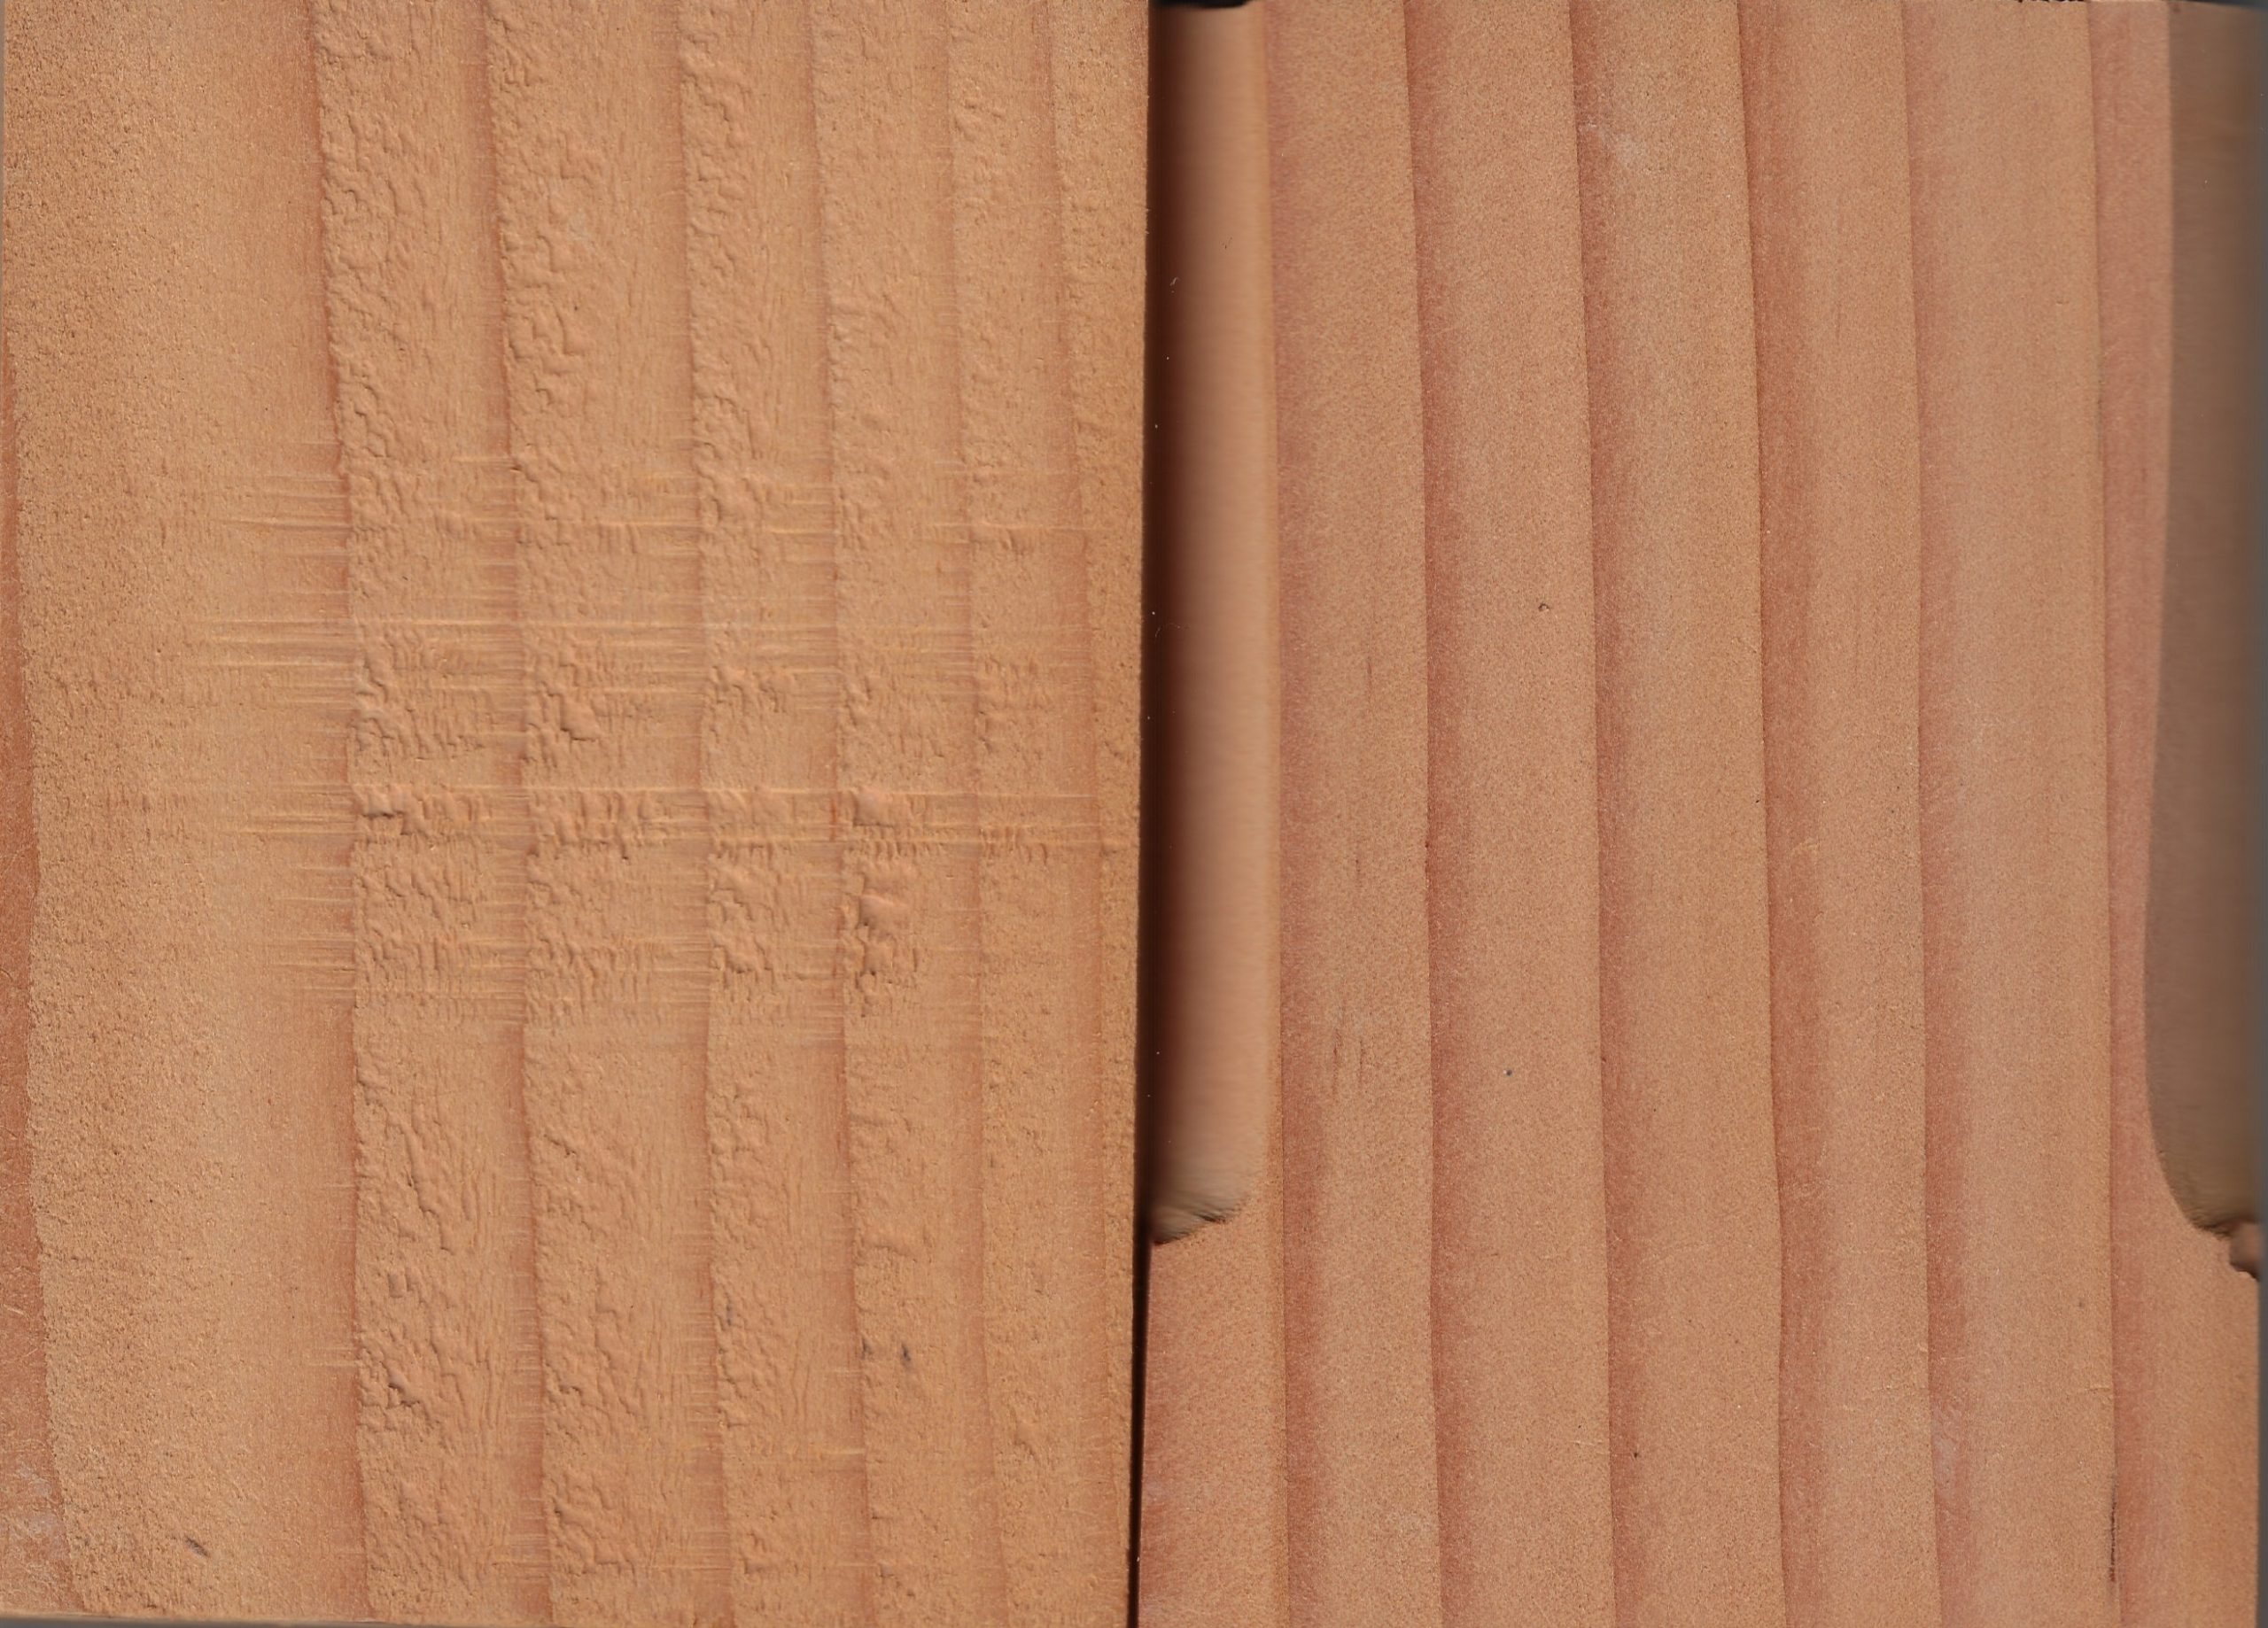
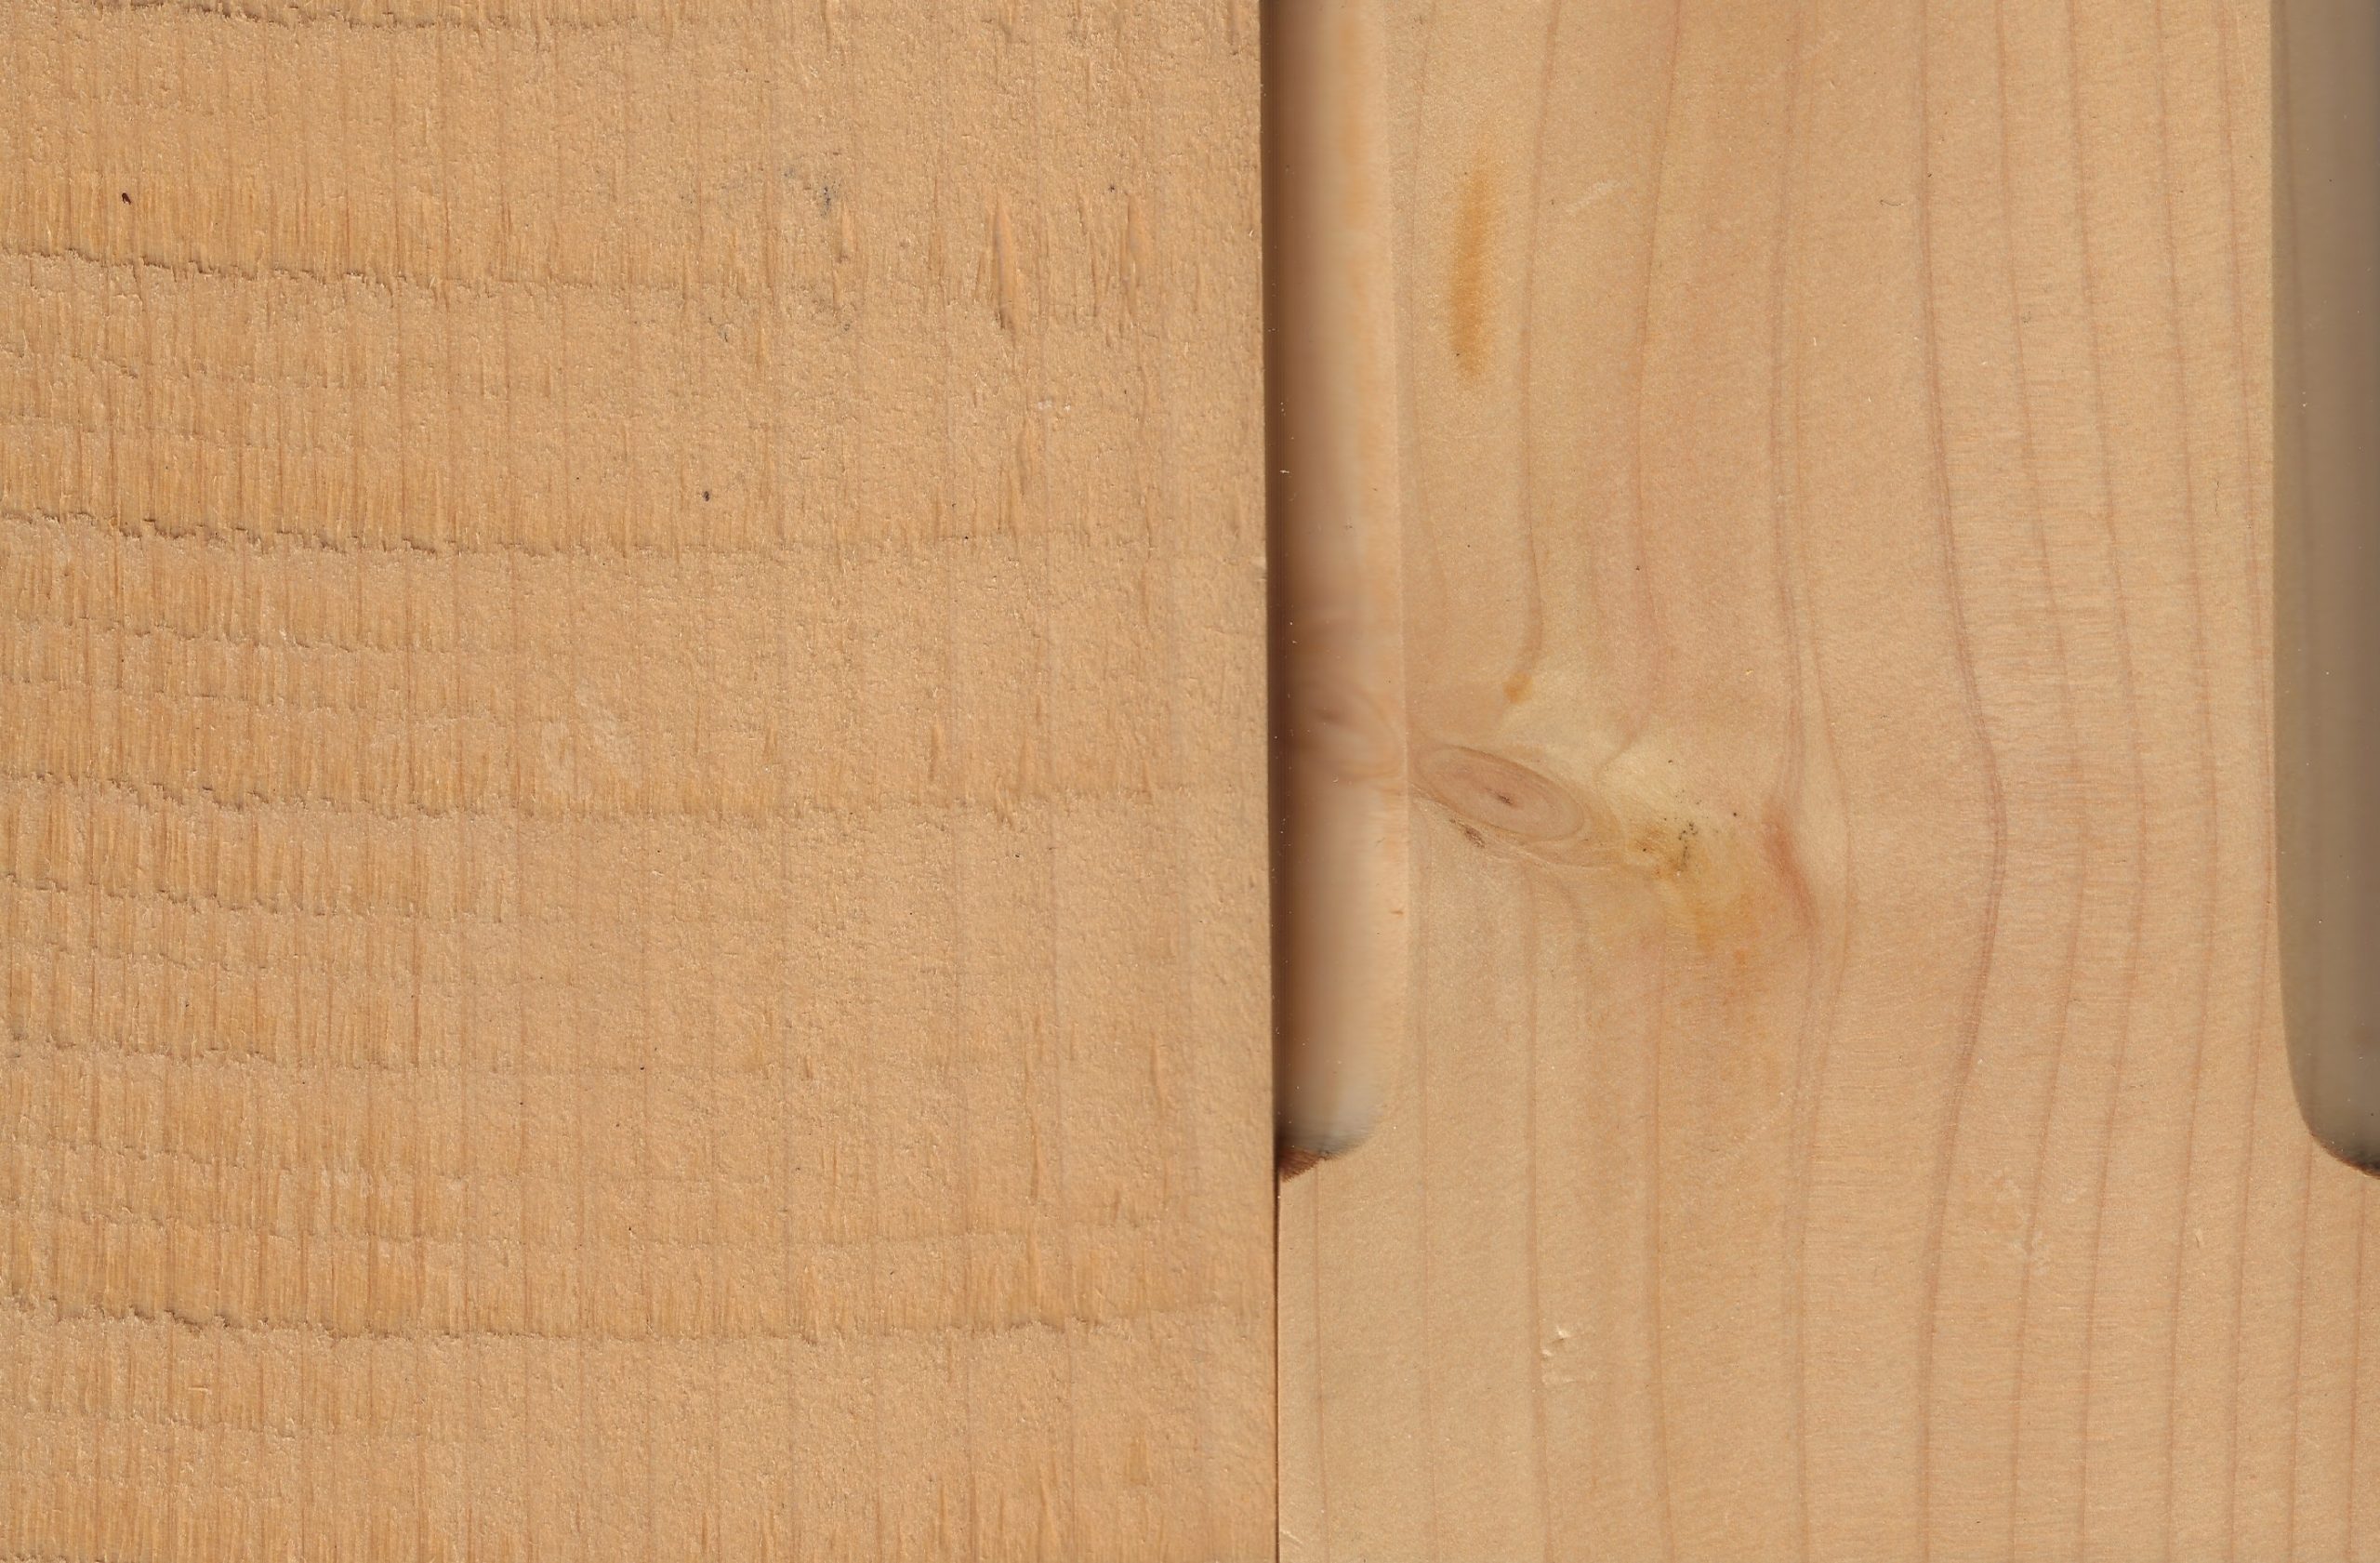
A second choice is rough sawn timber. The timber comes to us in its rough form, as it looked after it was sawn at the mill. Most mills are using band saws now which give straight saw marks. Mills local to Vermont still use circular saws which give a round, or semi circular saw mark. The texture is nice and rustic, but it does come with marks and blemishes that are seen rather than sanded out as in S4S timber.
A third choice is hand hewn timber. We hand hew our timber the old fashioned way, with a slick and an adze to give it an authentic look. There are different ways to hand hew some people like a very deep and rough look while others prefer a lighter texture. Because we are hewing by hand, we can give each client the texture they like – of course we will send samples for approval prior to starting.
See our Wood Textures page for more information.
What wood species works best with timber frames?
Douglas Fir is the species that we use most in timber frames these days. Longer lengths and sizes are available in fir and it is a strong wood structurally. It is a pretty wood that ranges from light red to blond in color, often in the same timber. The heartwood is red and the sap wood is yellow or blond. Fir is susceptible to rotting if it is used in an exterior application and if it is exposed to constant moisture. There is a clear pressure treatment available called Klear-Gard that helps protect douglas fir against the weather.
Local hemlock is a good choice for barns and rough sawn jobs. It is locally available, but is harder to find the longer lengths and bigger sizes these days. Hemlock doesn’t plane as nicely as fir and it often has a defect called “shake” that is a de-lamination around the ring lines that looks like a peeling onion skin if it is planed smooth. Still, hemlock is a great utilitarian, rot resistant wood for barns shed and stables.
White, red or mixed oak used to be quite popular for timber frames. Oak is more of a rustic wood. It does plane and hand hew well. It has a pretty grain, but it checks and twists much more than fir or hemlock. Larger sizes are also harder to come by and very expensive. Some clients love the look of oak, and we are happy to provide it when we can.
White pine is a great local choice for timber frames. It is light and versatile. Pine planes, hews and also looks great as rough sawn timber. It is available in larger lengths and sizes, but it is not very strong structurally. Where an 8×8 might work in Douglas fir or oak, we might need to use an 8×10 or 8×12 in white pine.
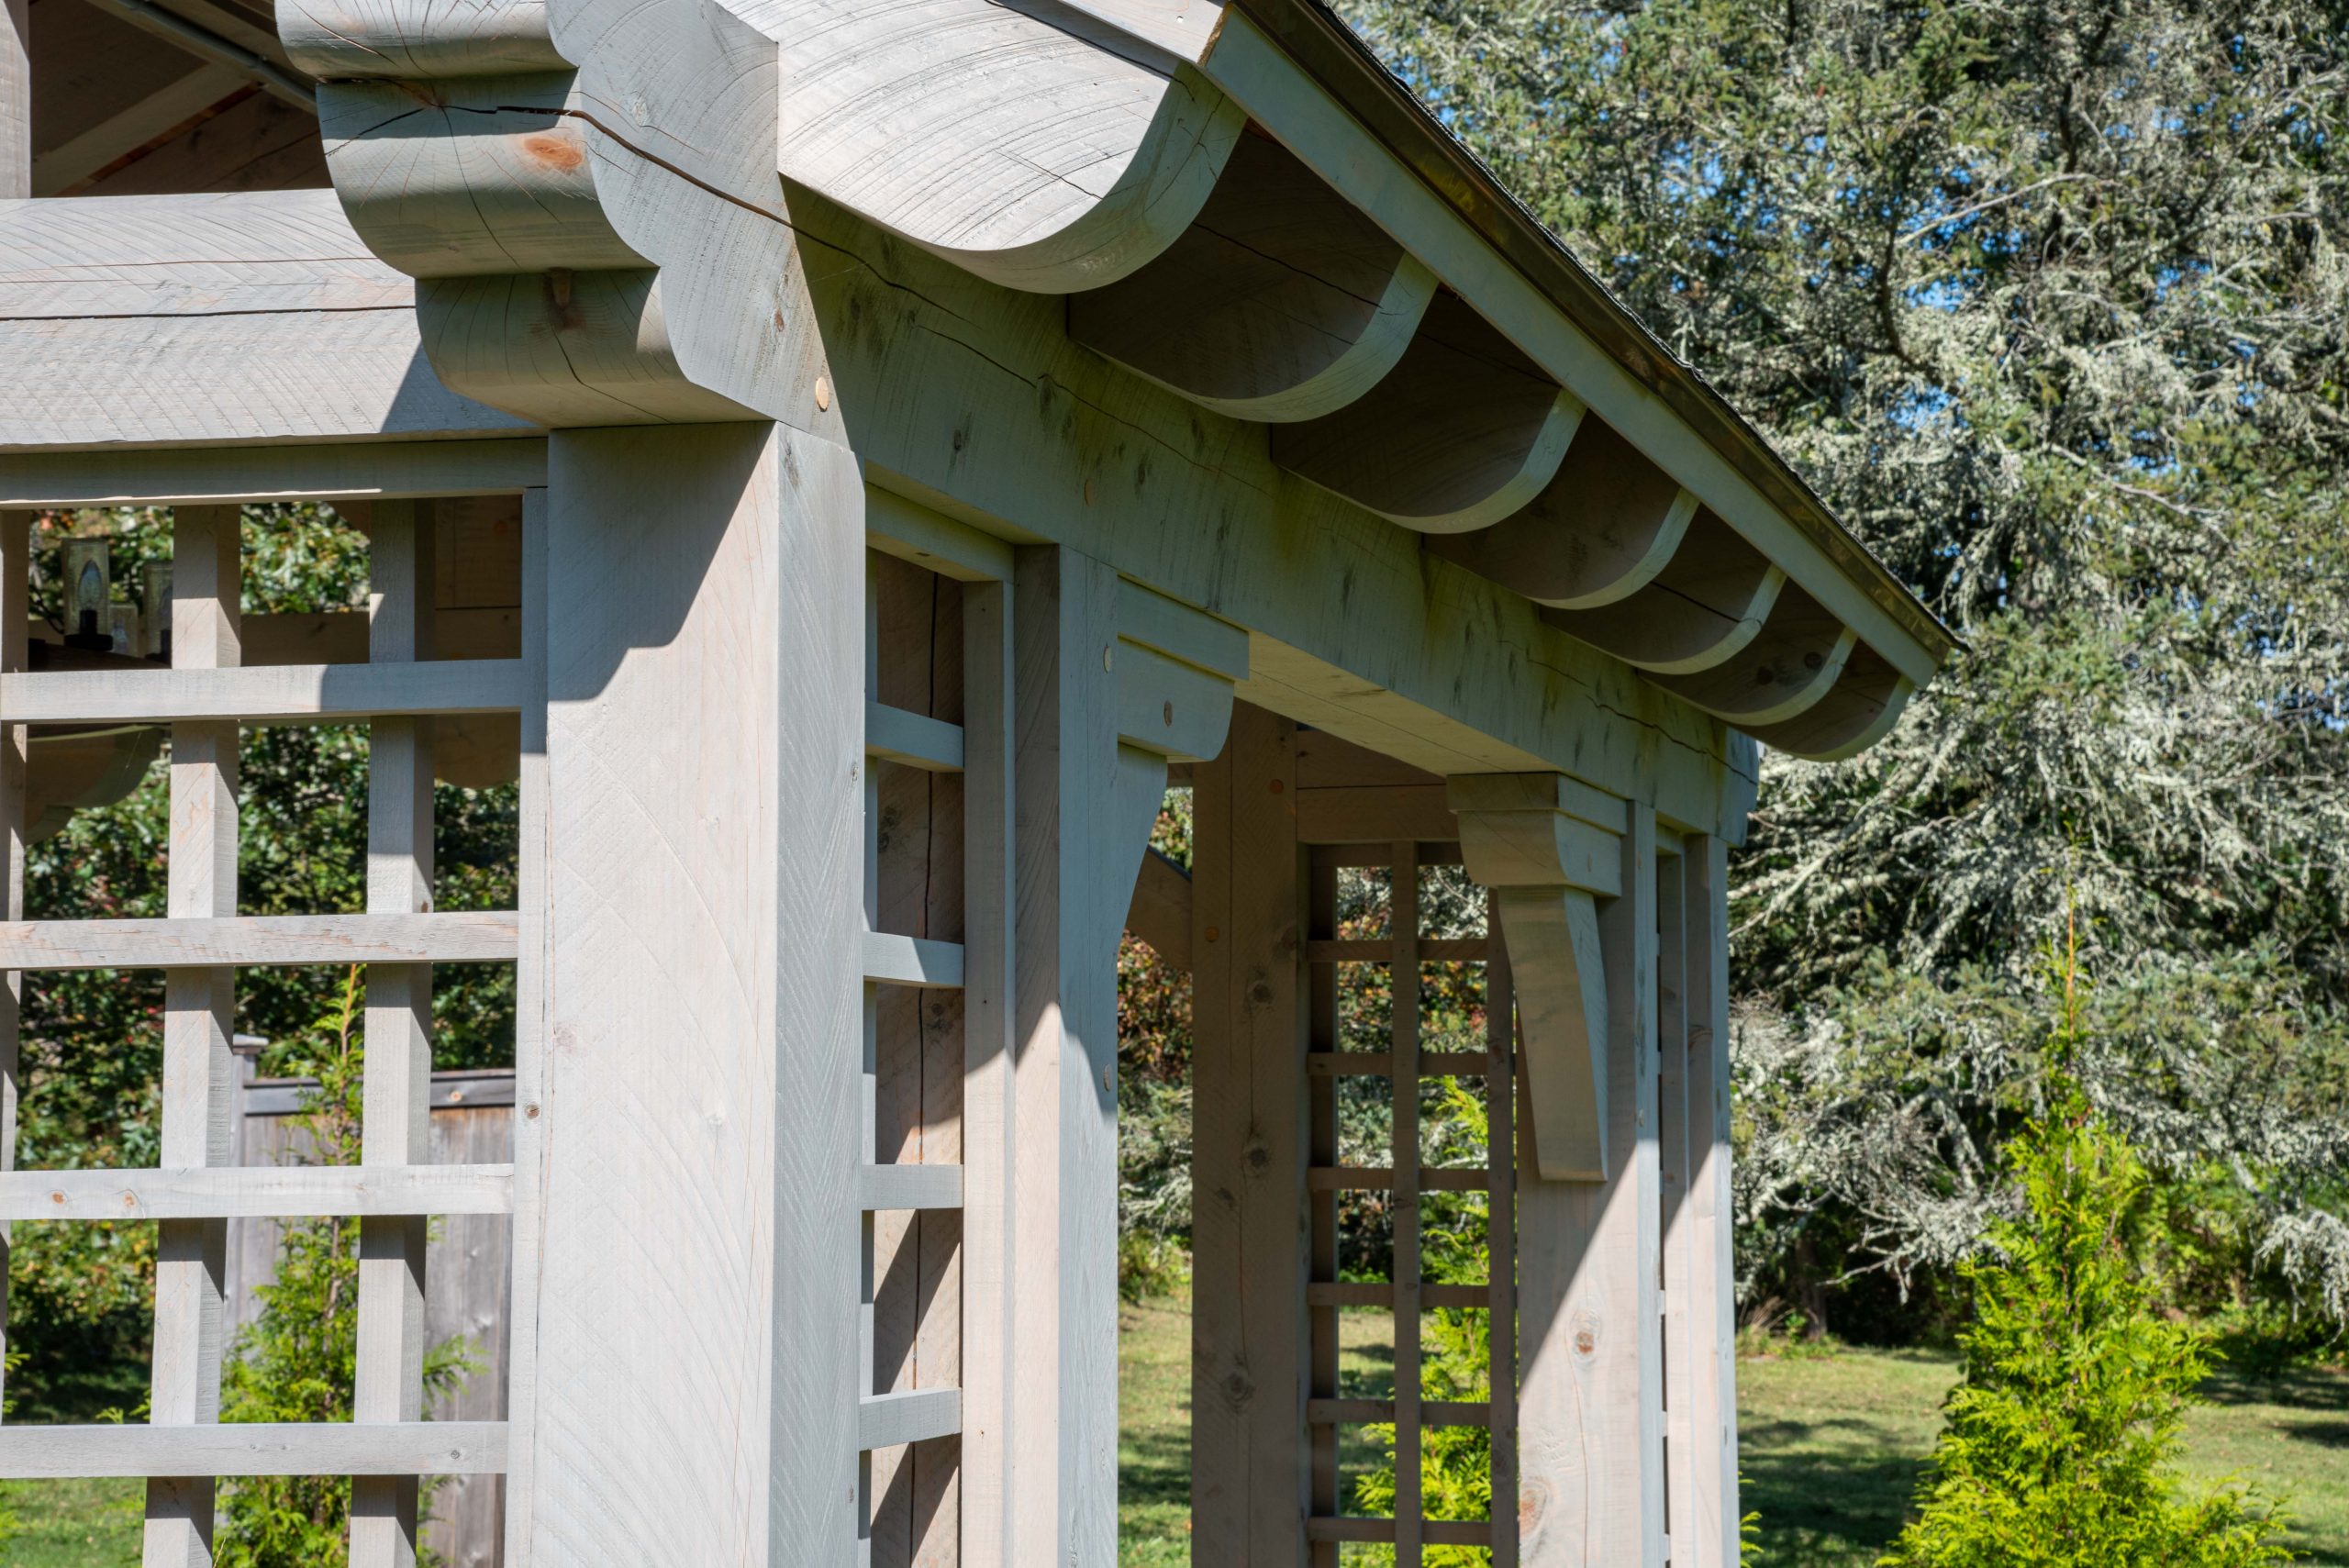
Port Orford Cedar is a great rot resistant wood that is strong and versatile. It planes well and looks good in the rough. It is also relatively strong. It is good for outdoor structures, pergolas and entry ways.
We have also worked with Ipe, cedar, maple, southern yellow pine, Alaskan yellow cedar and cypress. If we can get a particular species that the client wants, and if it works structurally, we are happy to use it.
Douglas Fir
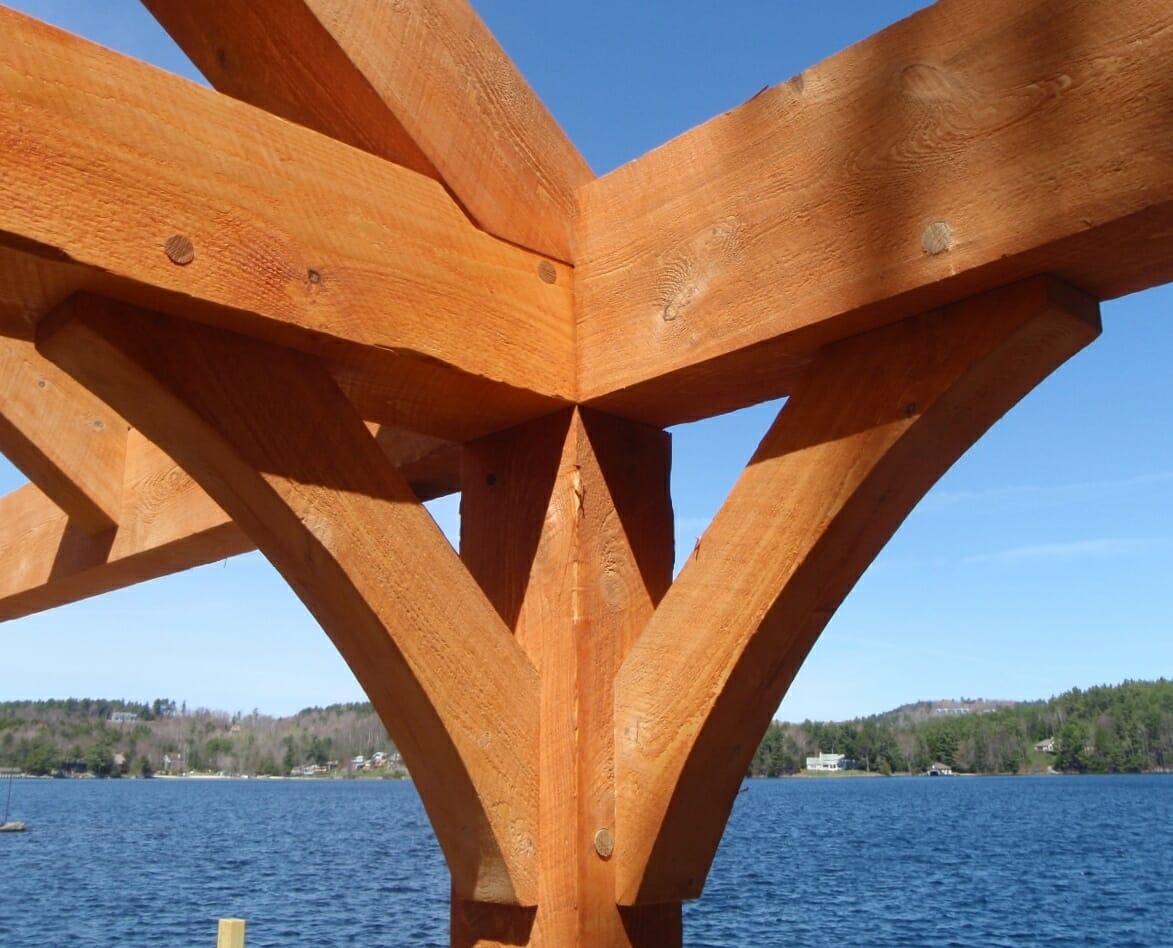
Port Orford Cedar

Oak
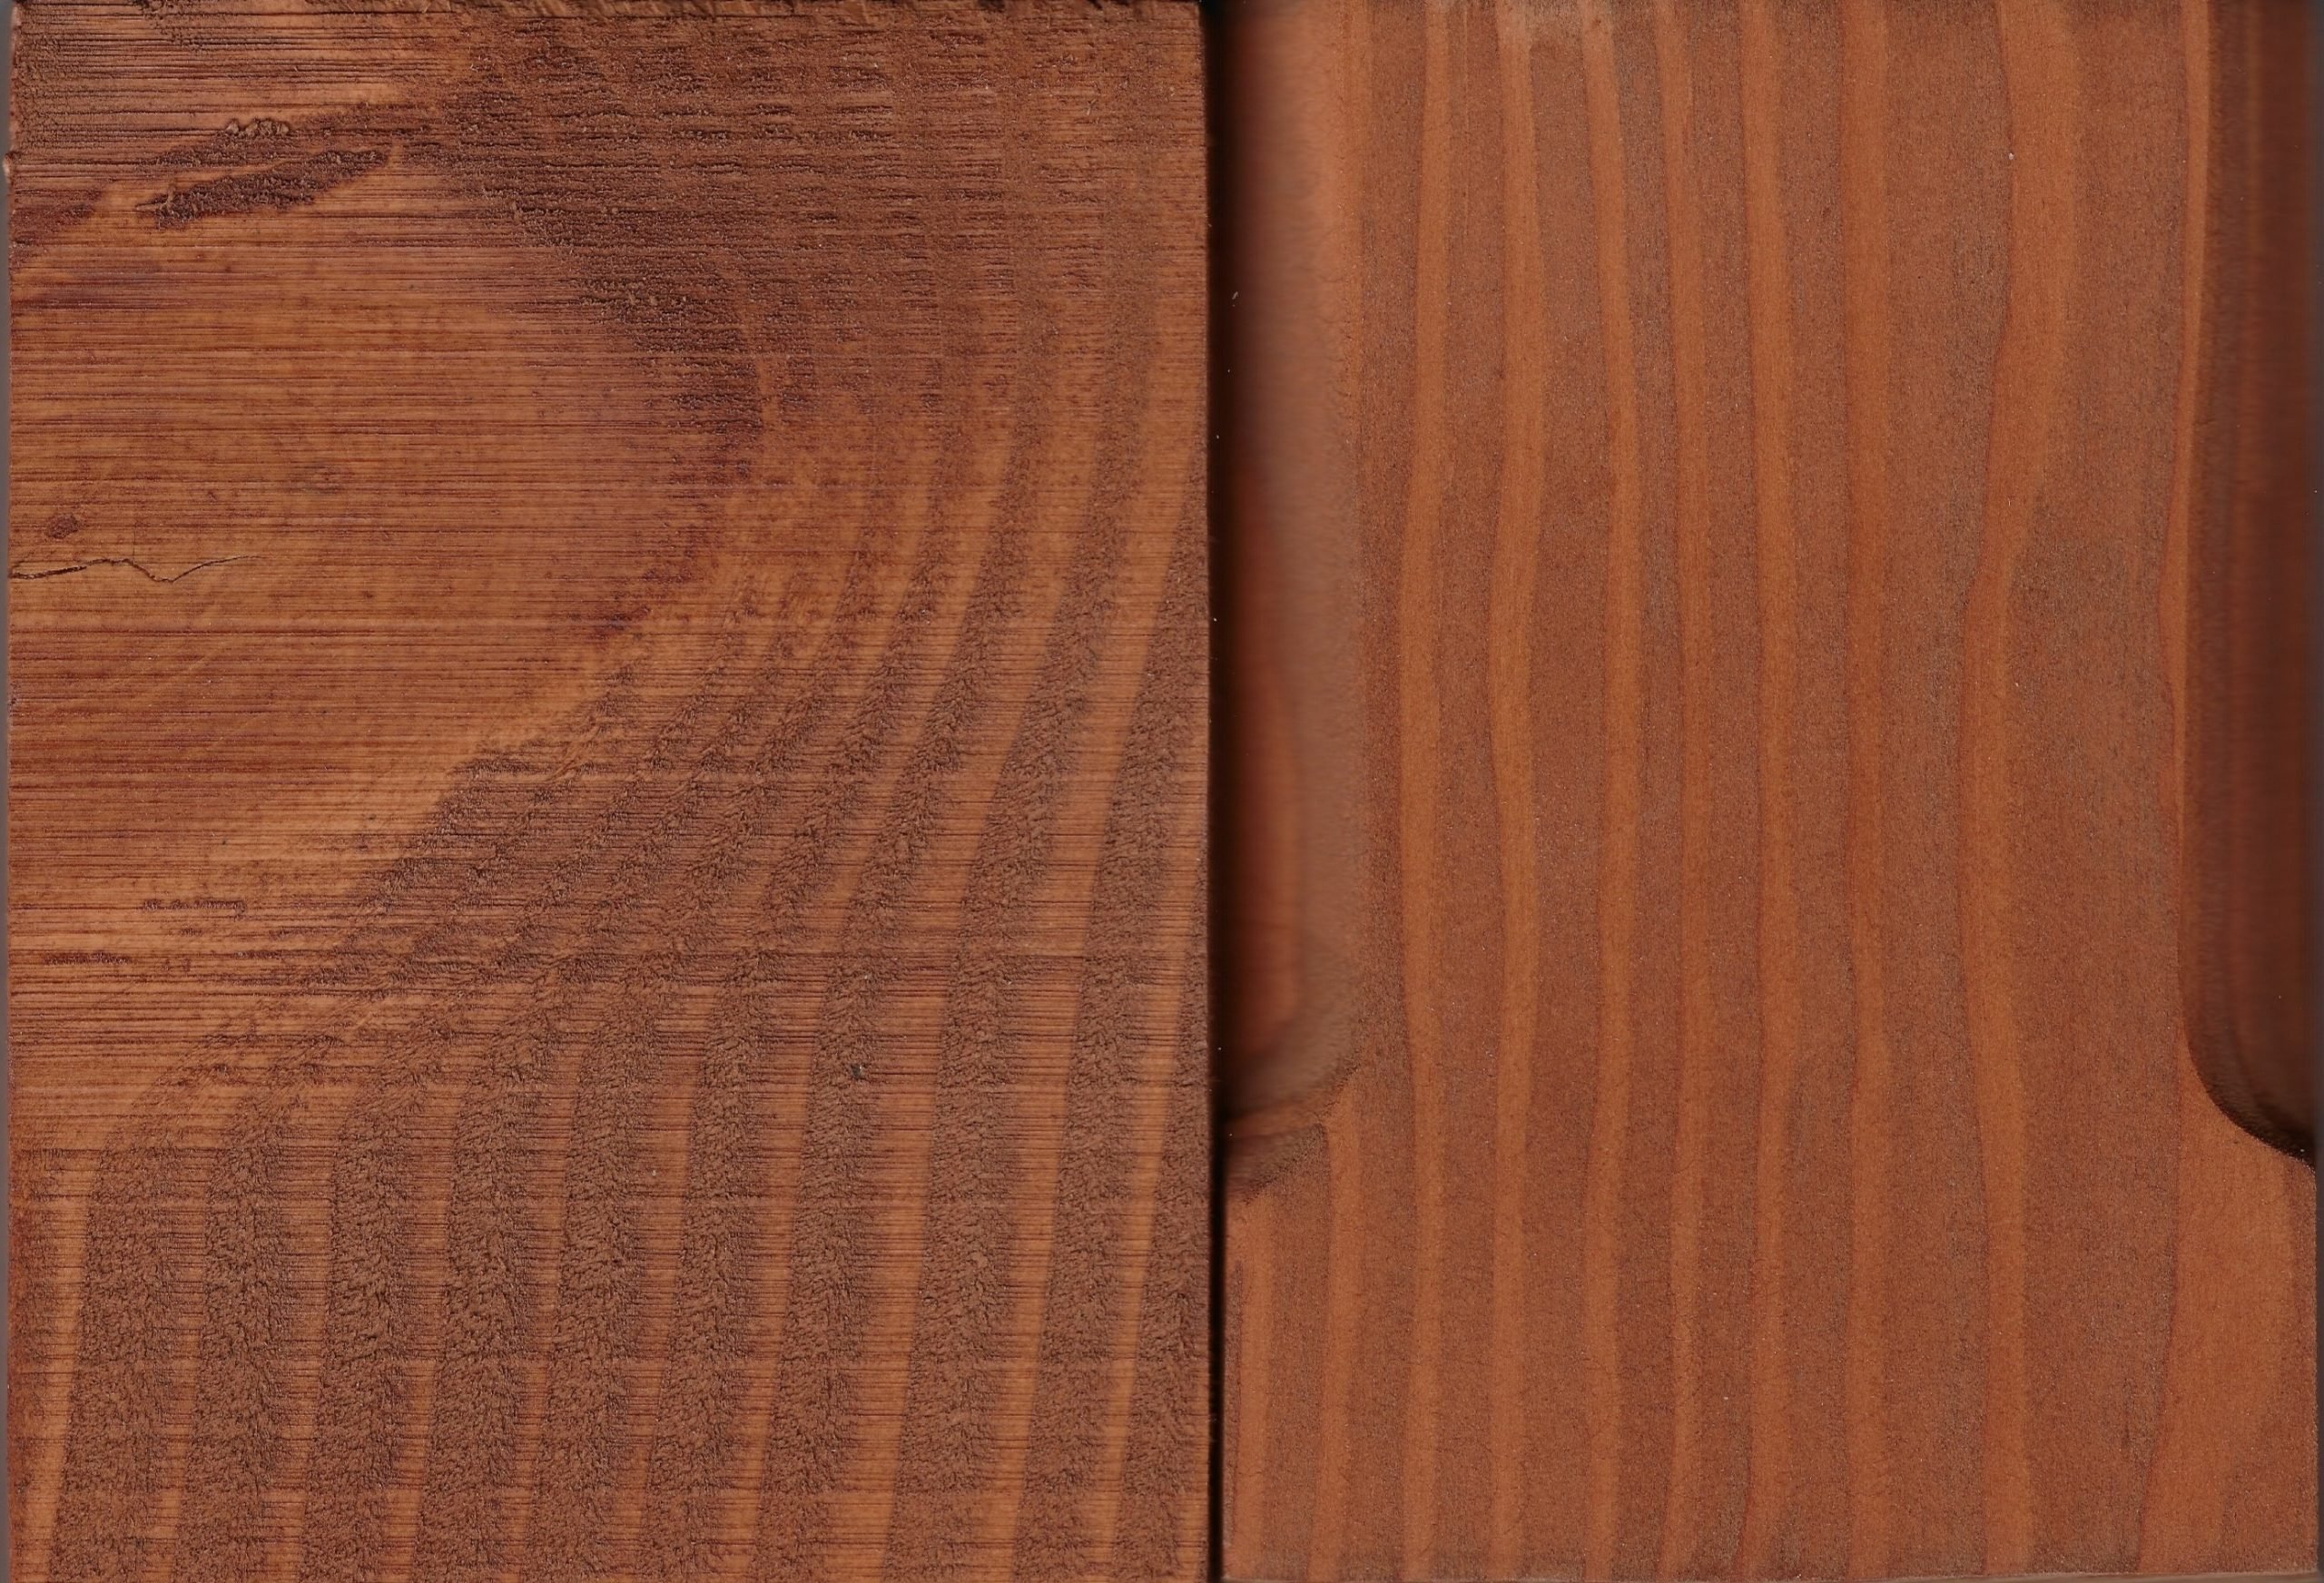
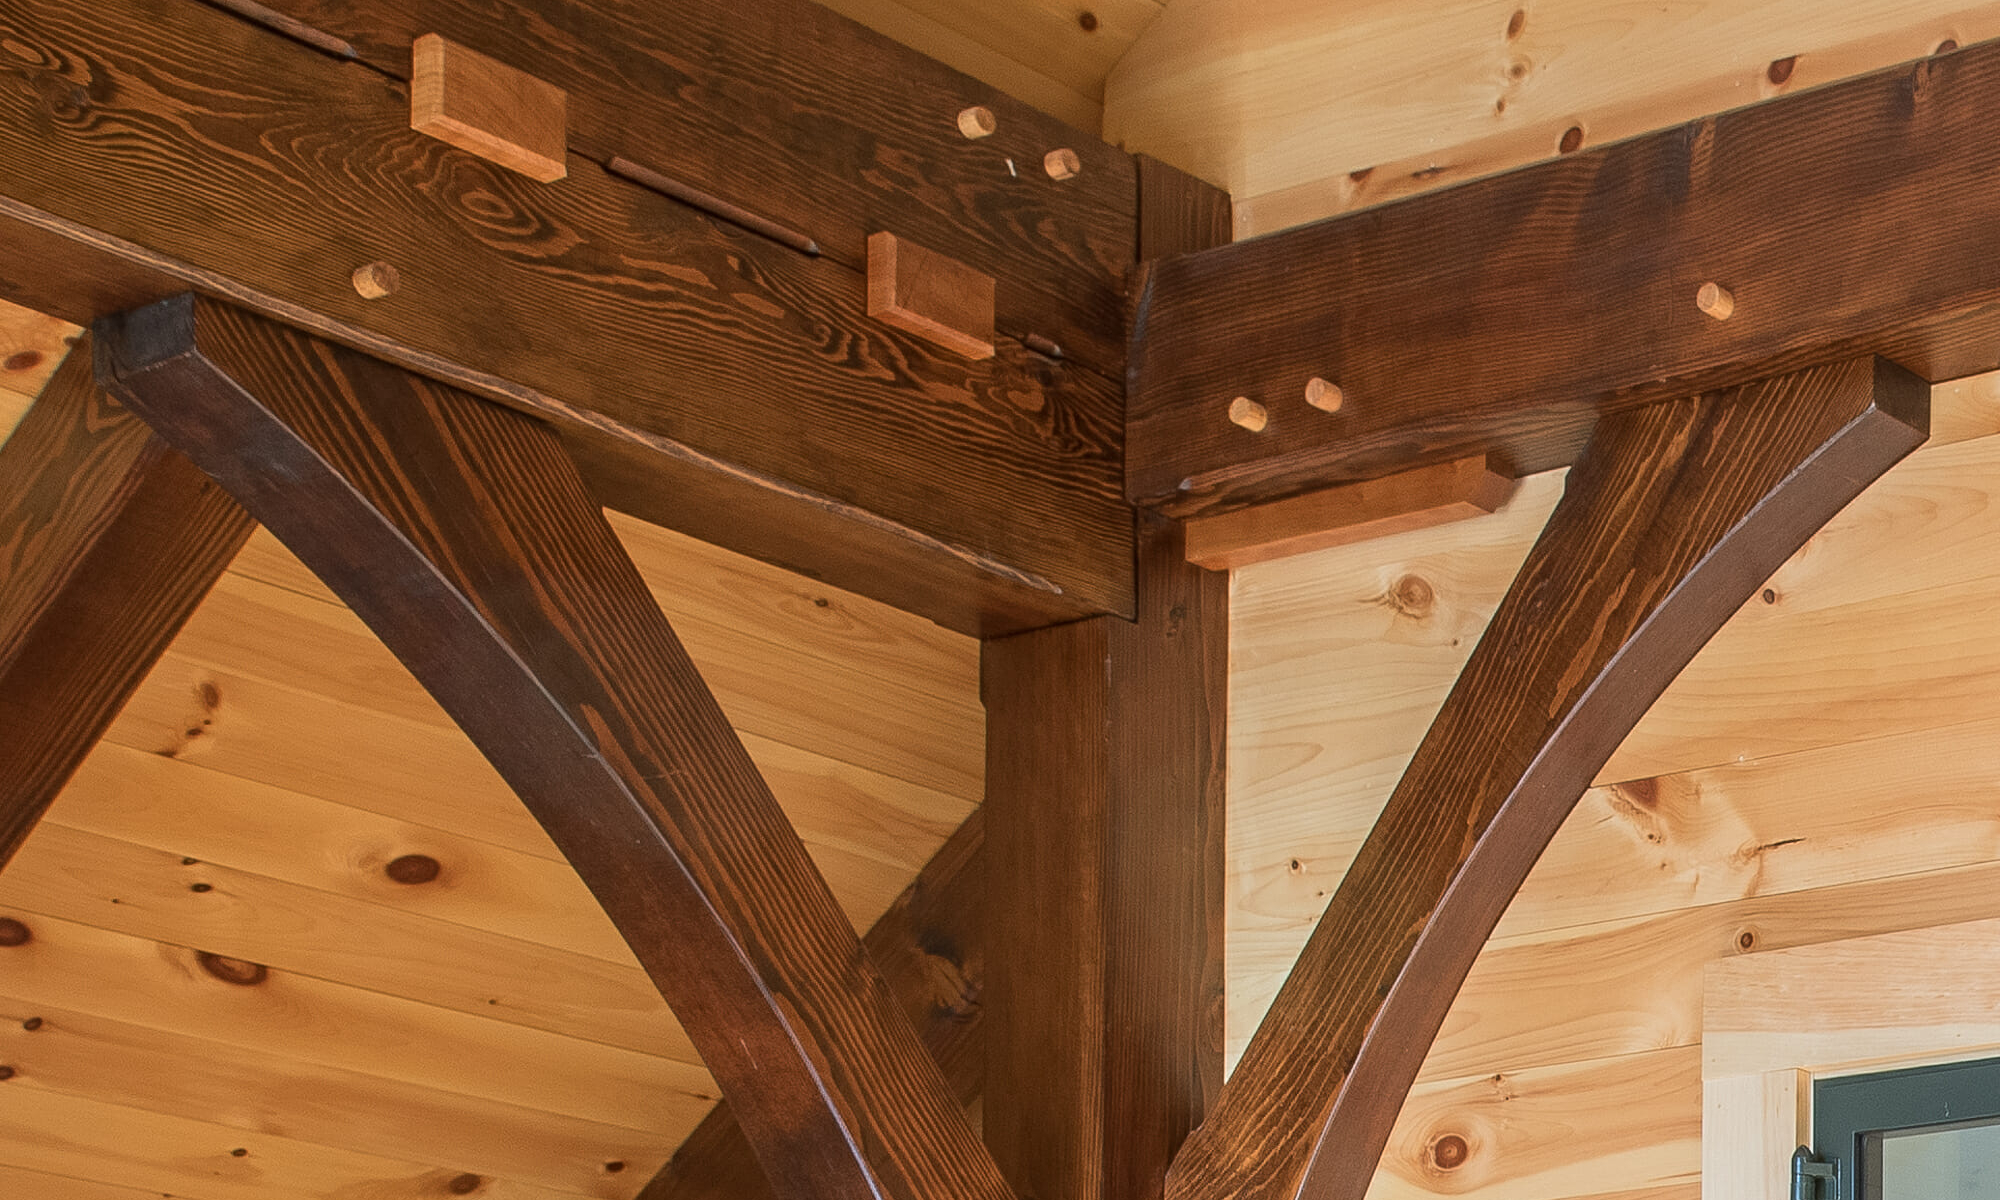
Stained Douglas Fir
How close together should the beams be in a timber frame?
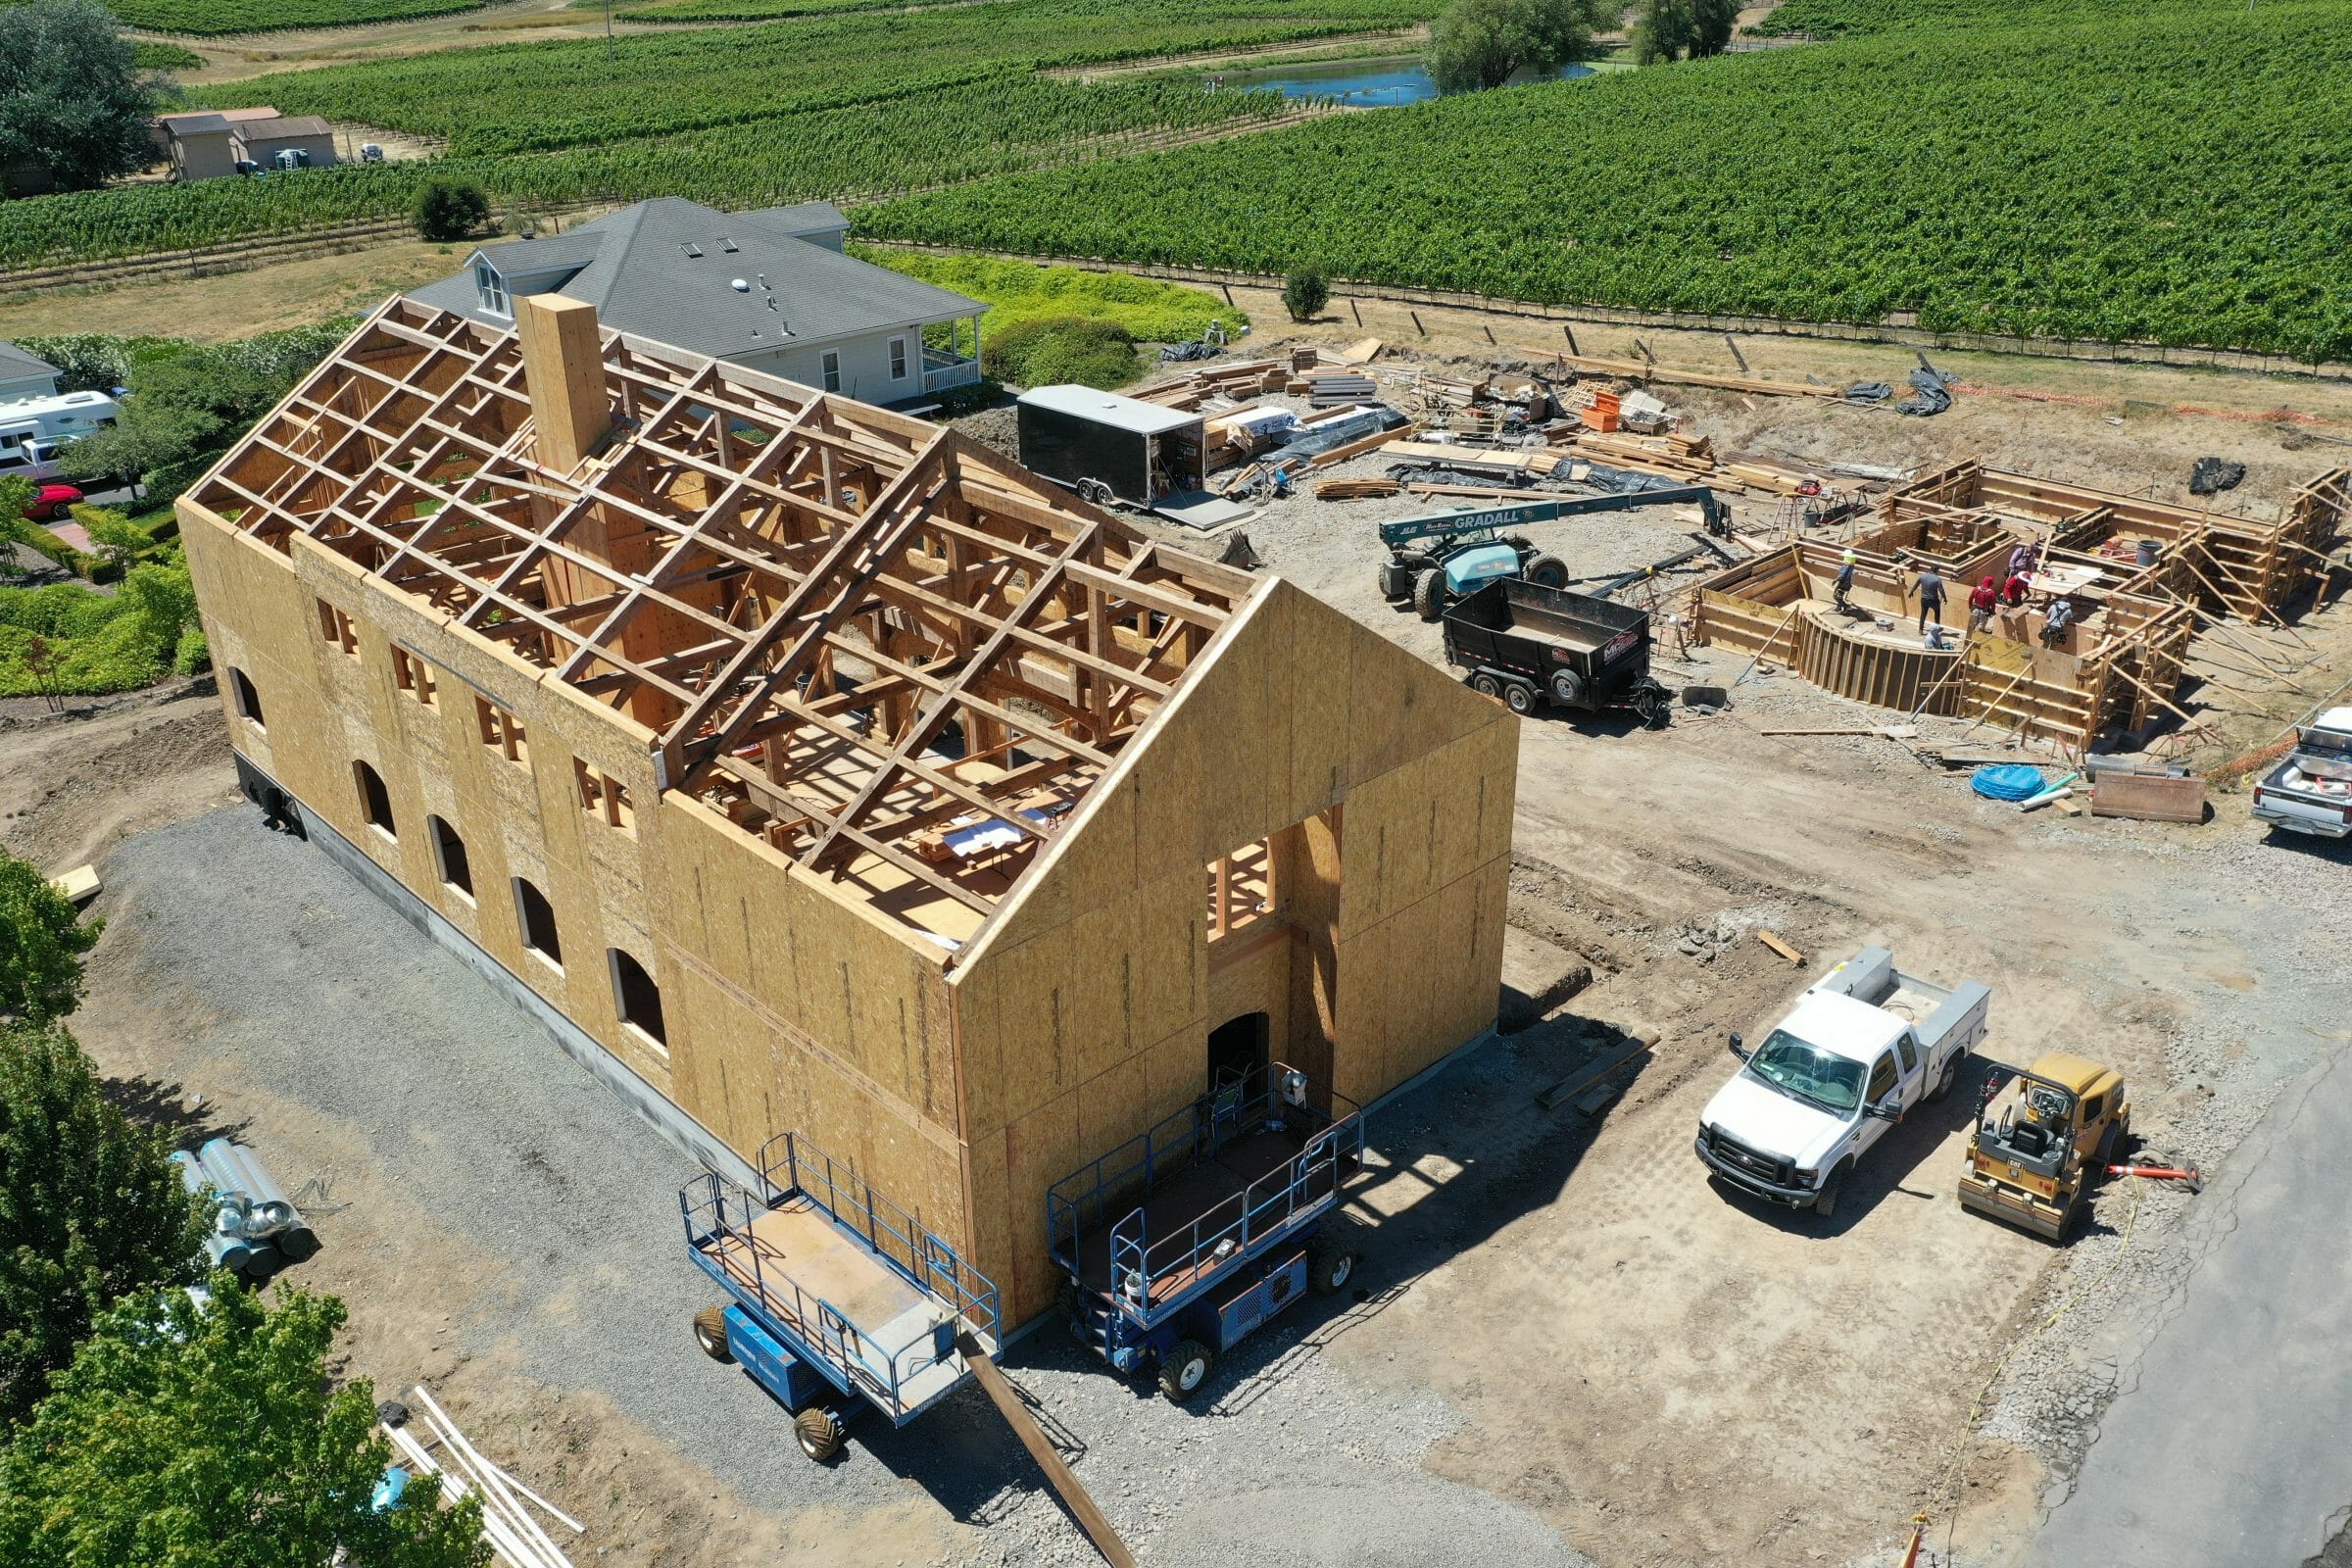
In stick framing, 2×4’s and 2×6’s are often spaced 16″ to 24″ apart. In timber framing, those distances get much larger. Floor joists can be spaced 32″, 36″ or even 48″ apart. Rafters and purlins (members that hold up the roof) are typically 48″ apart because that is the standard width of structural insulated panels (SIPs) and rigid insulation. Bents, the main building blocks of the structure, can be spaced anywhere from ten feet to twenty feet apart.
Deciding how far apart the beams should be is a structural and aesthetic consideration. If the beams are too close together, the timber frame will look cluttered and be confusing to the eye. If the beams are too far apart, they may not be strong enough to withstand the building’s own weight plus the weight of snow wind and seismic loads.
At Vermont Timber Works, we like to start with bent spacing’s of twelve to sixteen feet, joist spacing’s of 32″ to 36″ and rafter or purlin spacing’s of 48″. Heavy Timber Trusses can span anywhere from 12′ to 48′ or more. Those distances usually strike a good balance between keeping an open feeling of a timber frame and the structural requirments of resisting the various loads the building will encounter. In the mountains, we may need to use larger beams and pull them a bit closer together, in the south where there isn’t much snow all the beams can be spaced further apart.
Do timber frames need to be designed on a grid system?
Using a grid system for the basic layout of a building is very helpful in timber framing, but not absolutely required. Like steel construction, using a grid concentrates the loads to specific points and simplifies the structural design. “Bents”, the building blocks of a timber frame, are put on the grid lines and the rest of the frame is built off of the bents. The grid can be modified in length or width. When changing width at a grid line, a double bent or a custom bent may be required to pick up framing members from both sides.
Bents can be placed perpendicular to one another to create hips and valleys. Offsets can be used to make the facade of the building more interesting. Each change in the grid does come with a cost in increasing the complexity of the timber frame. A rectangular grid is the simplest and most cost effective design.
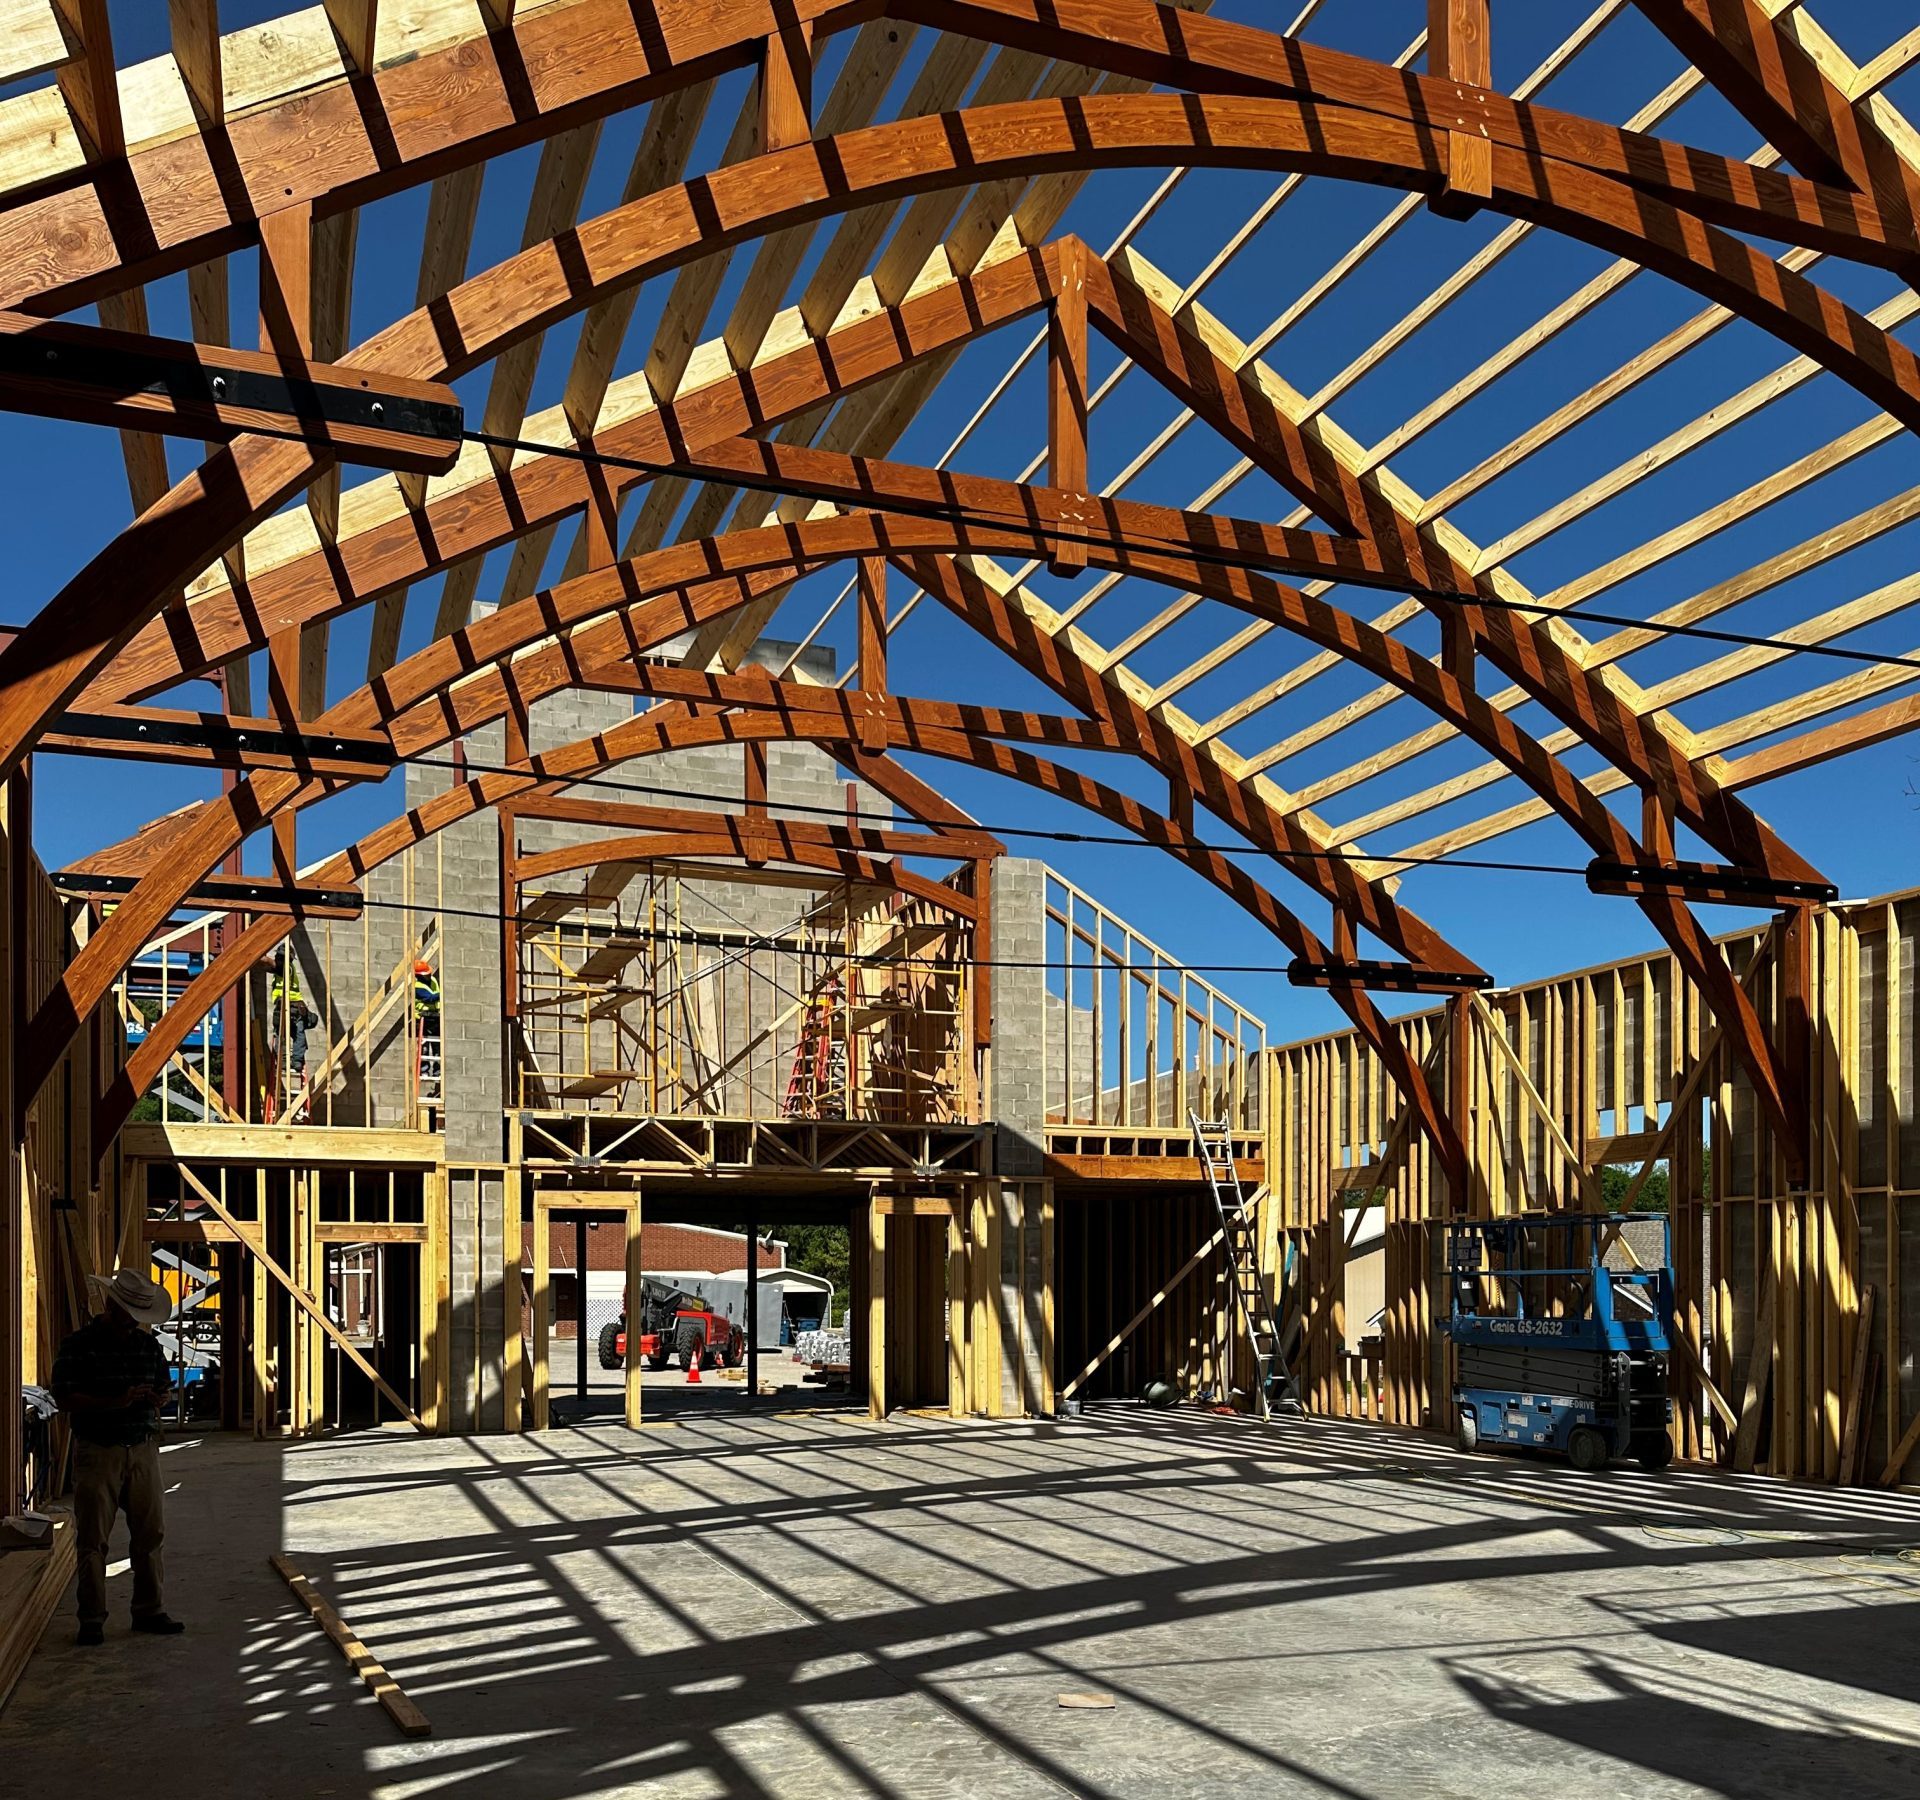
Timber framed barn with a twelve foot x forty two foot grid and a transitioning bent.
Standard Timber Truss Grid with a thirty two foot truss.
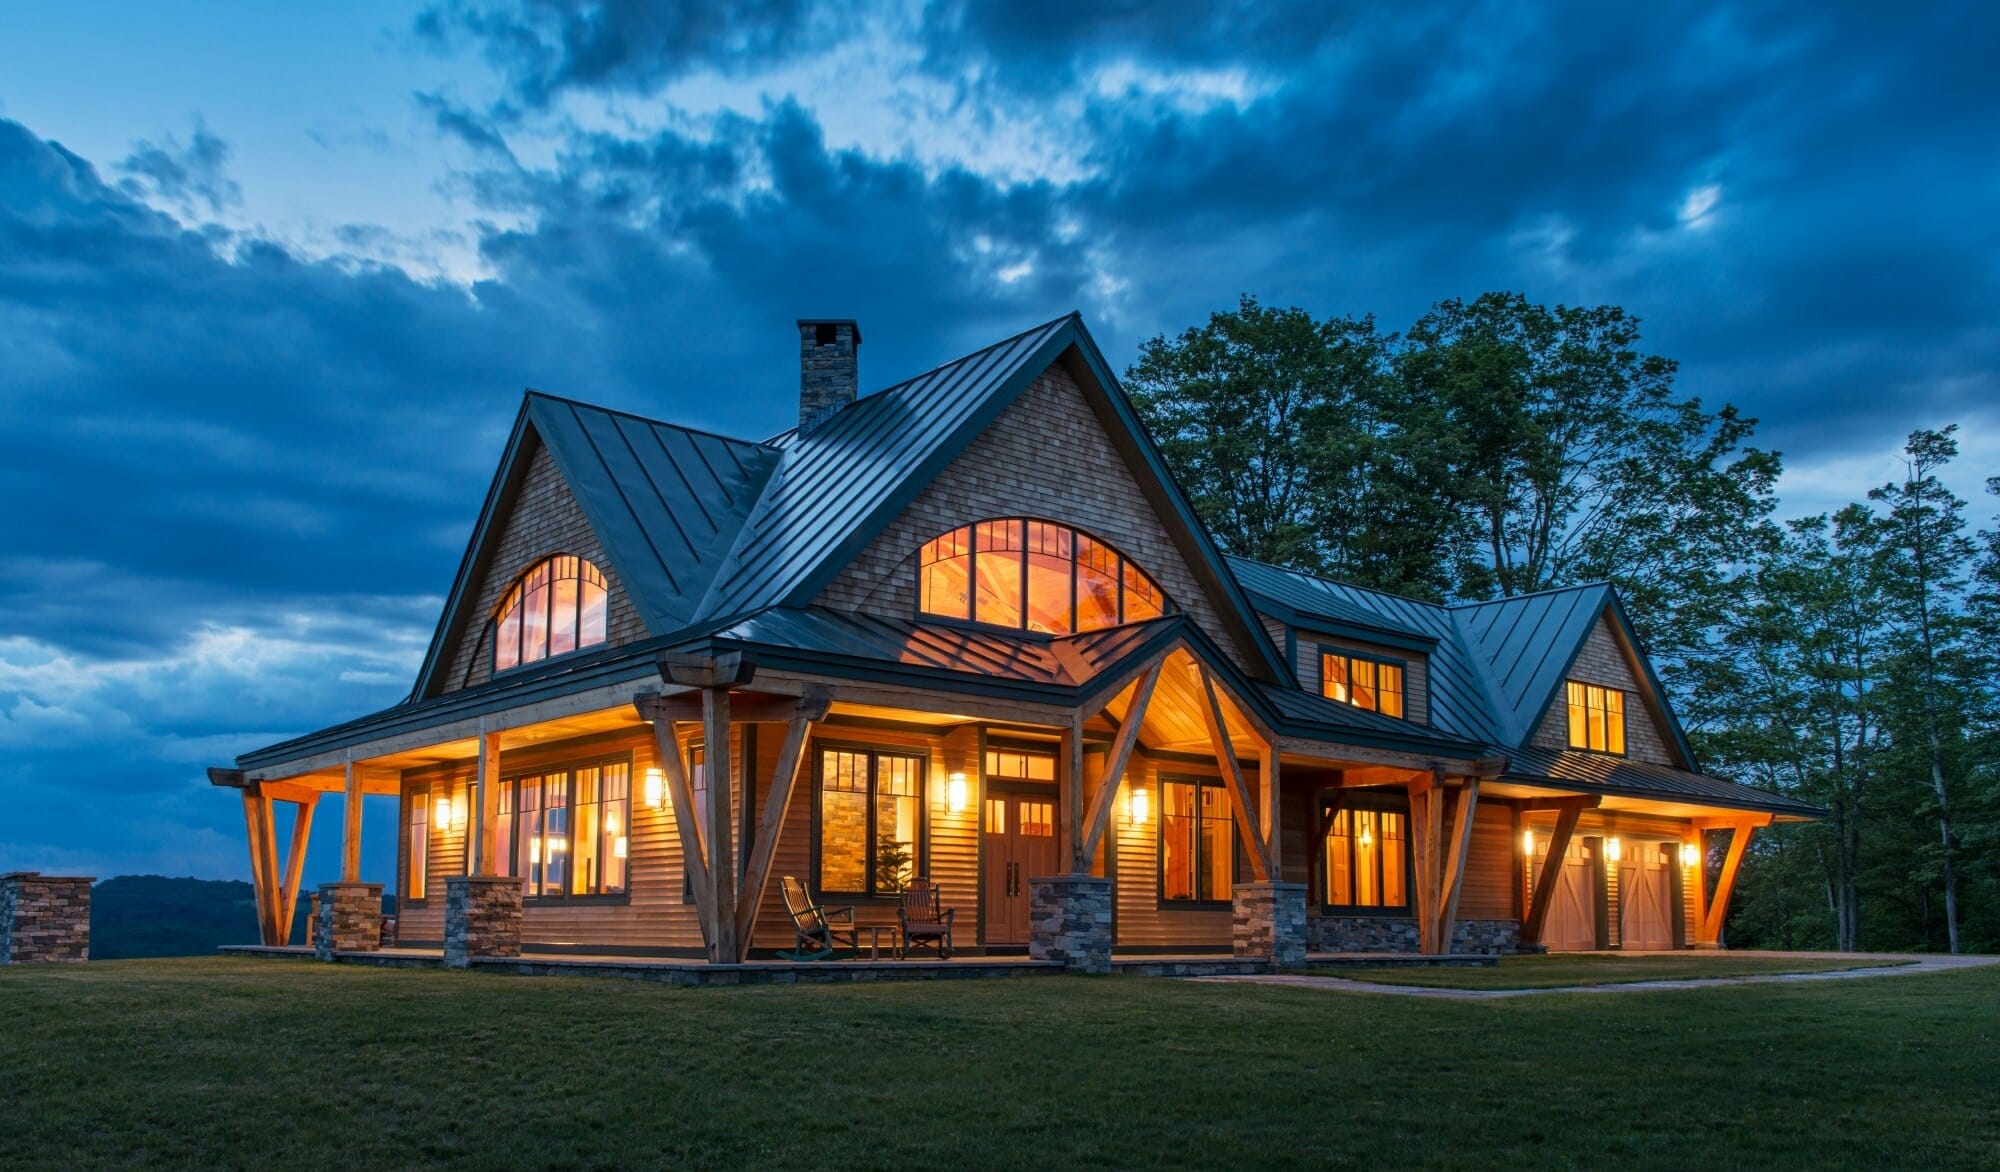
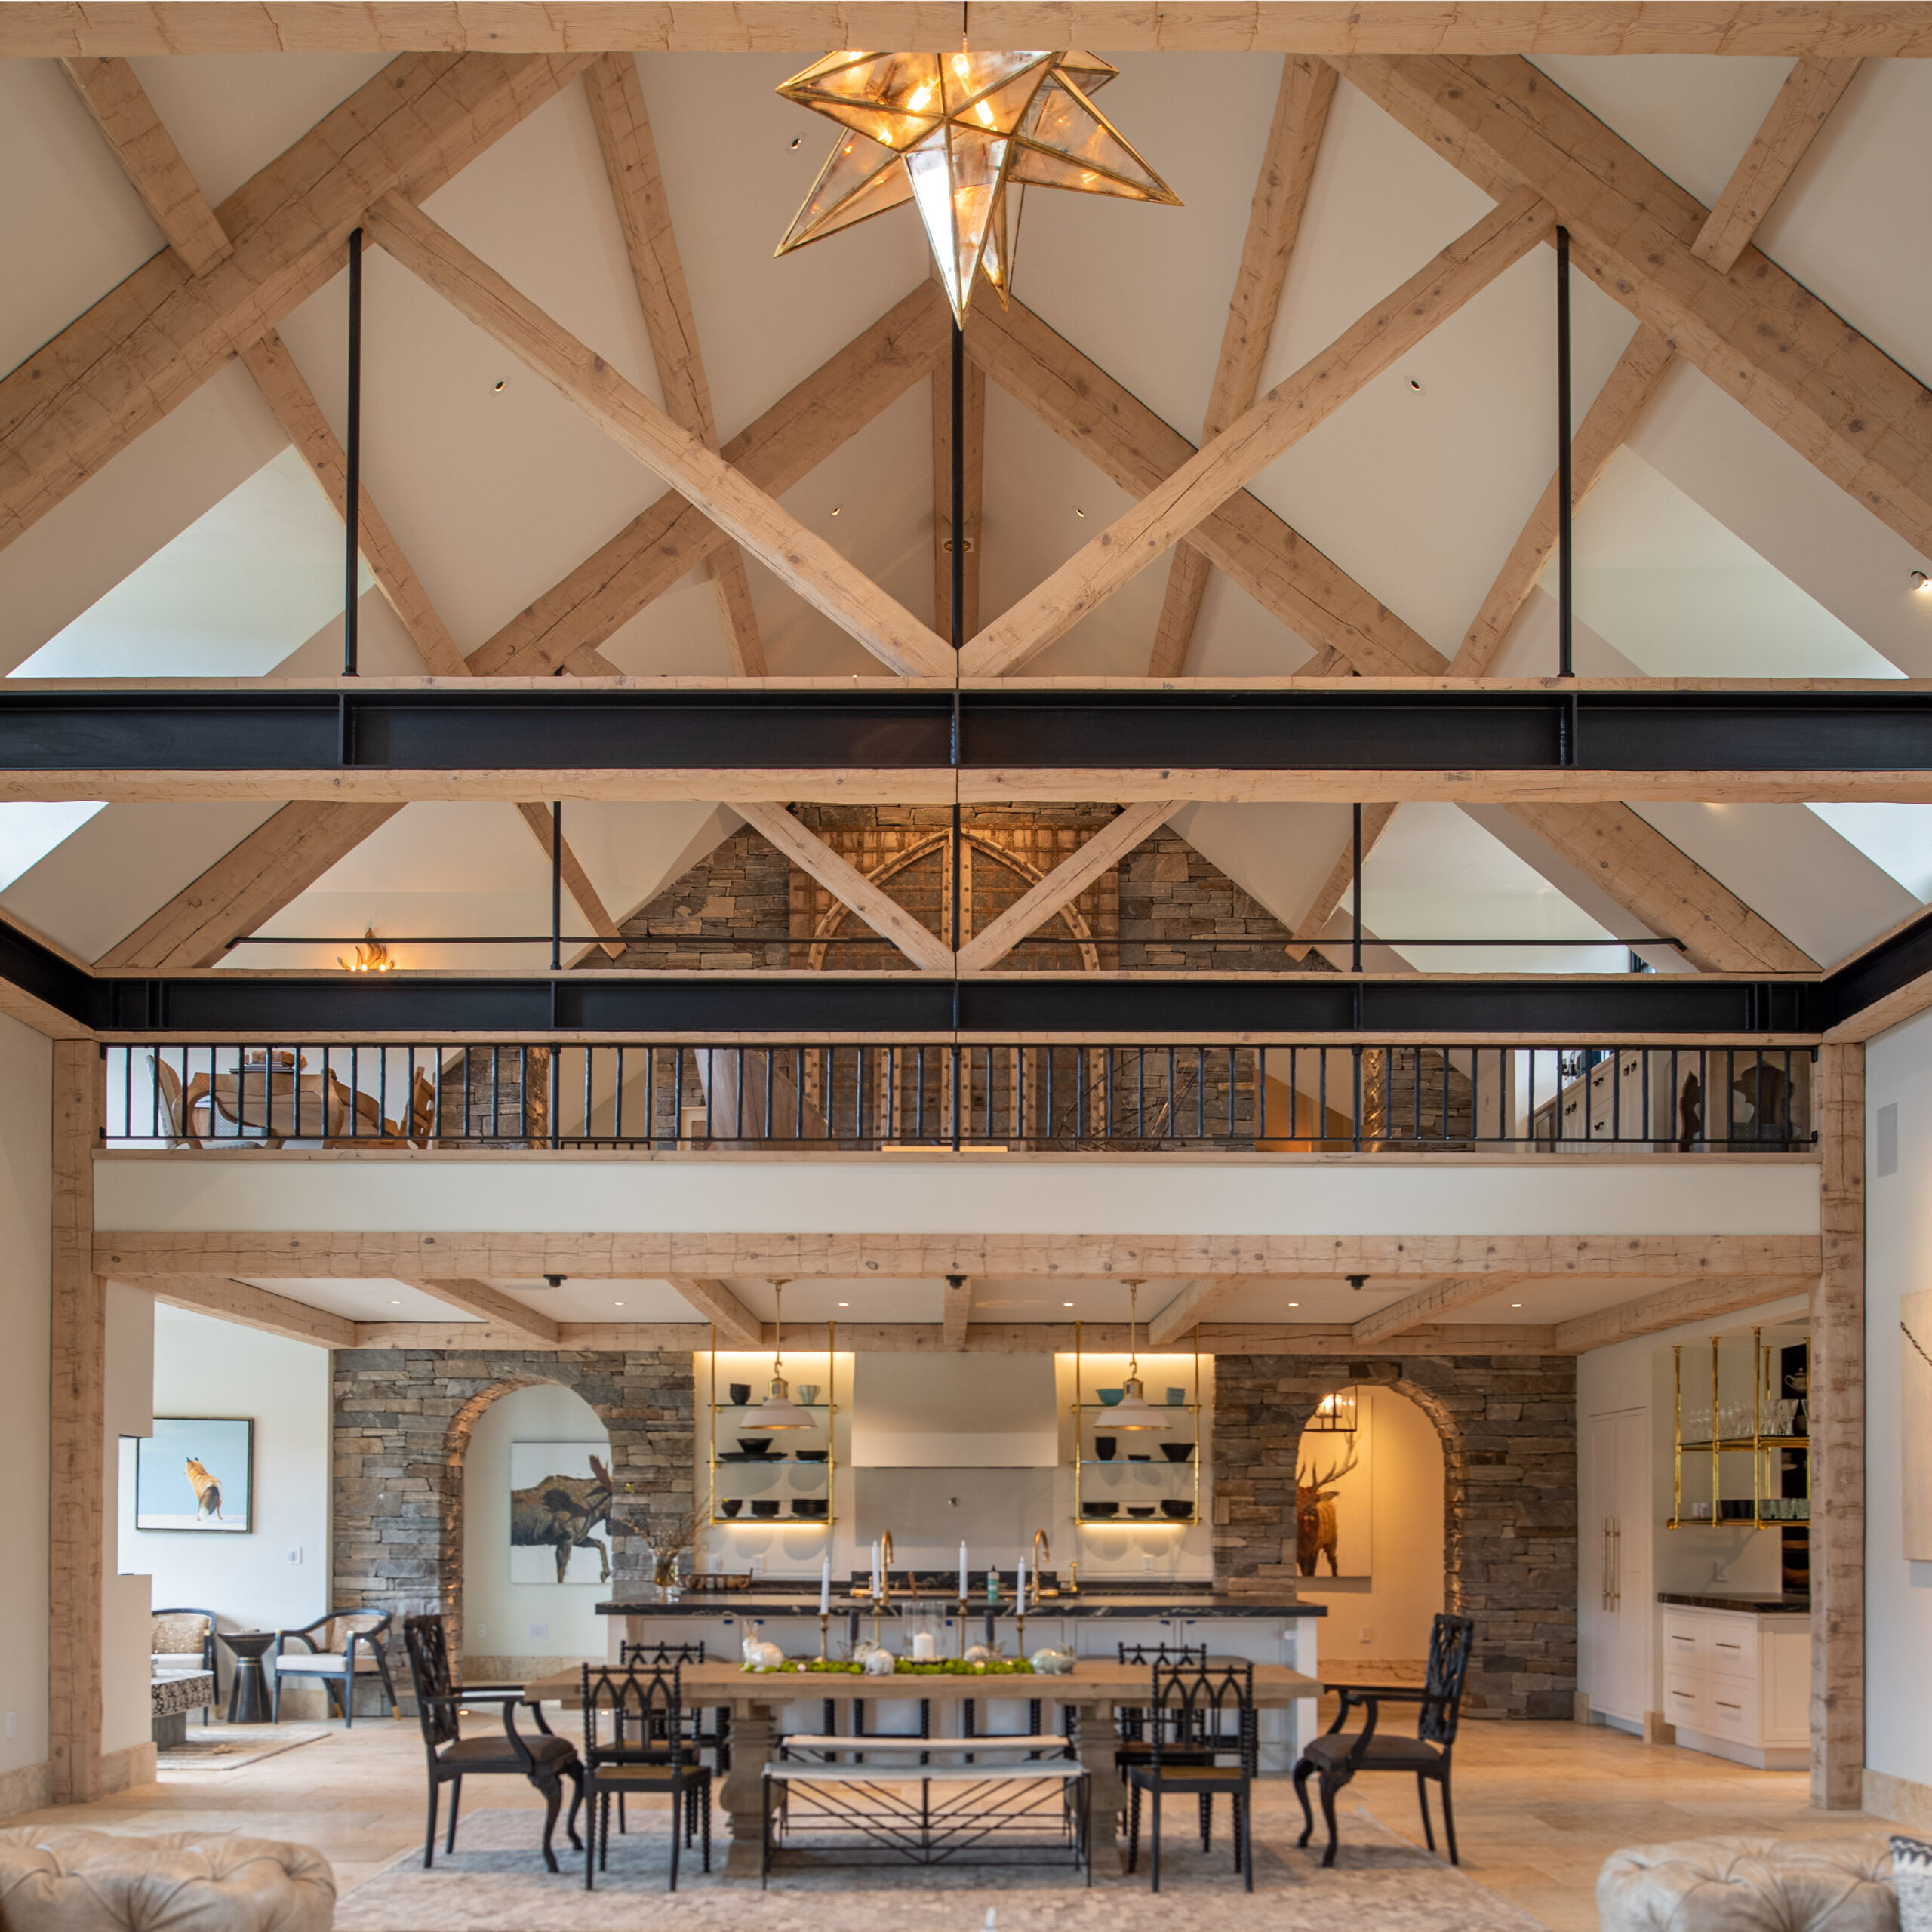
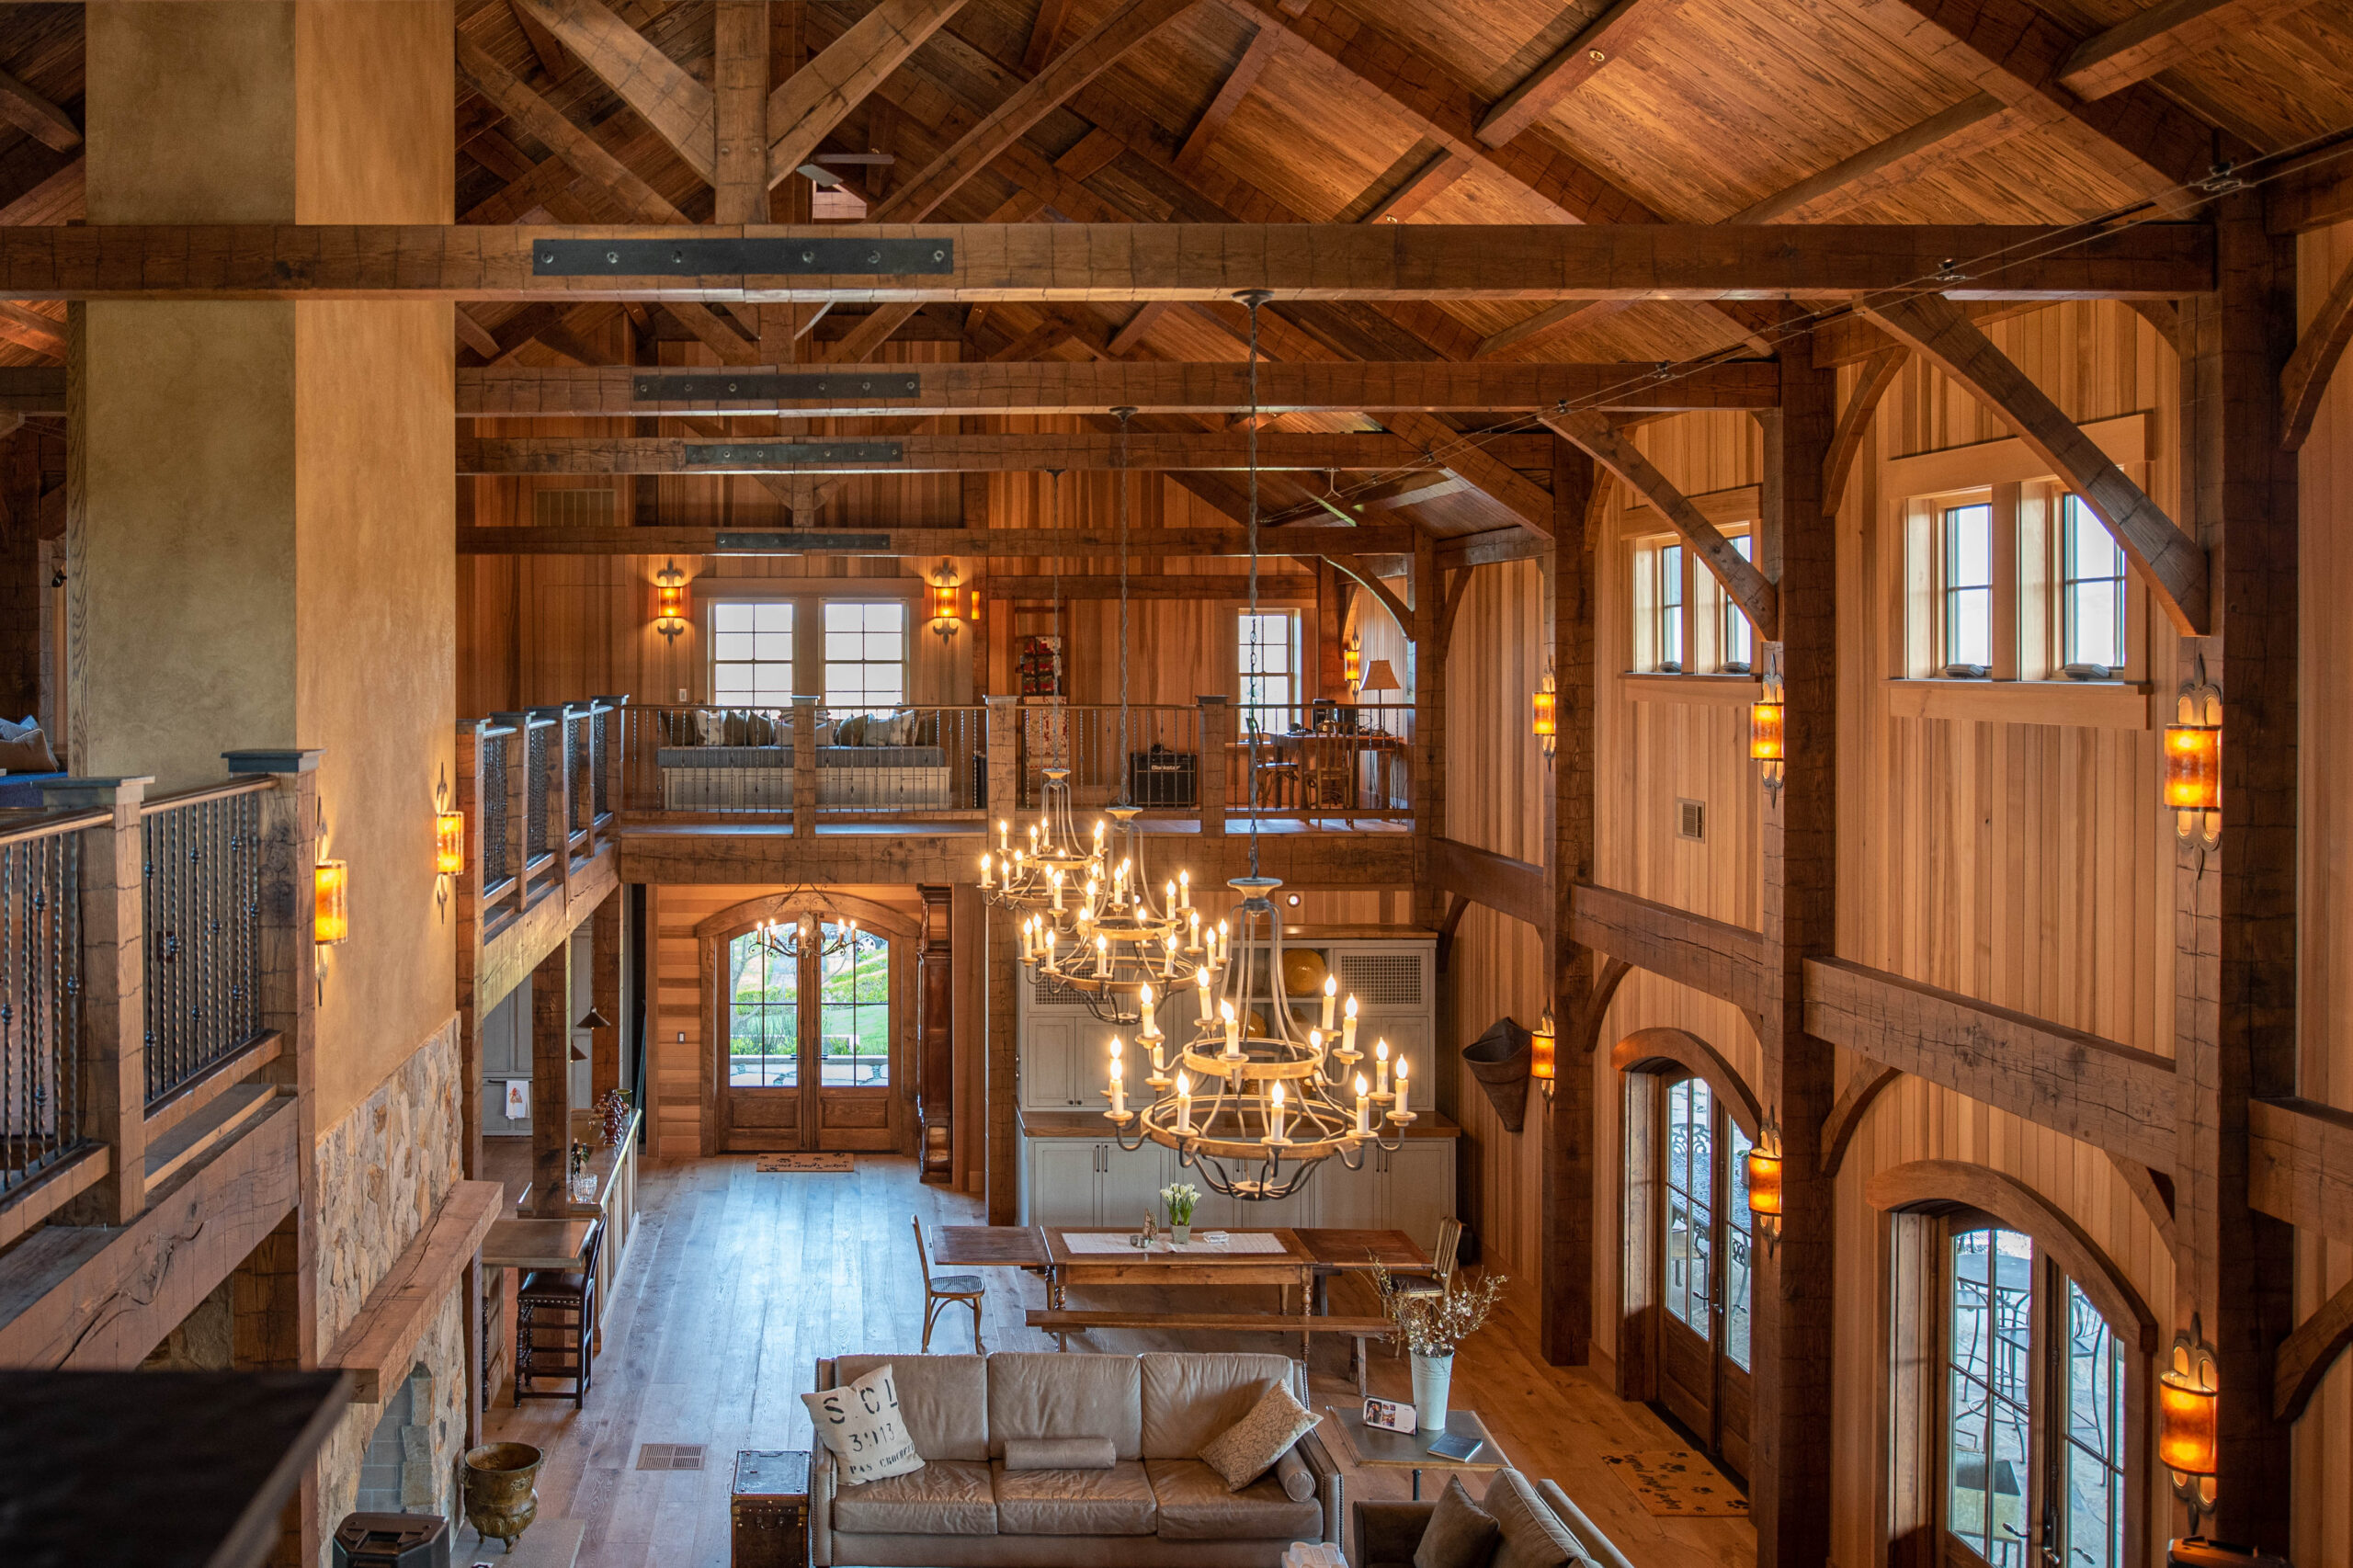
Timber framed home without a standard grid.
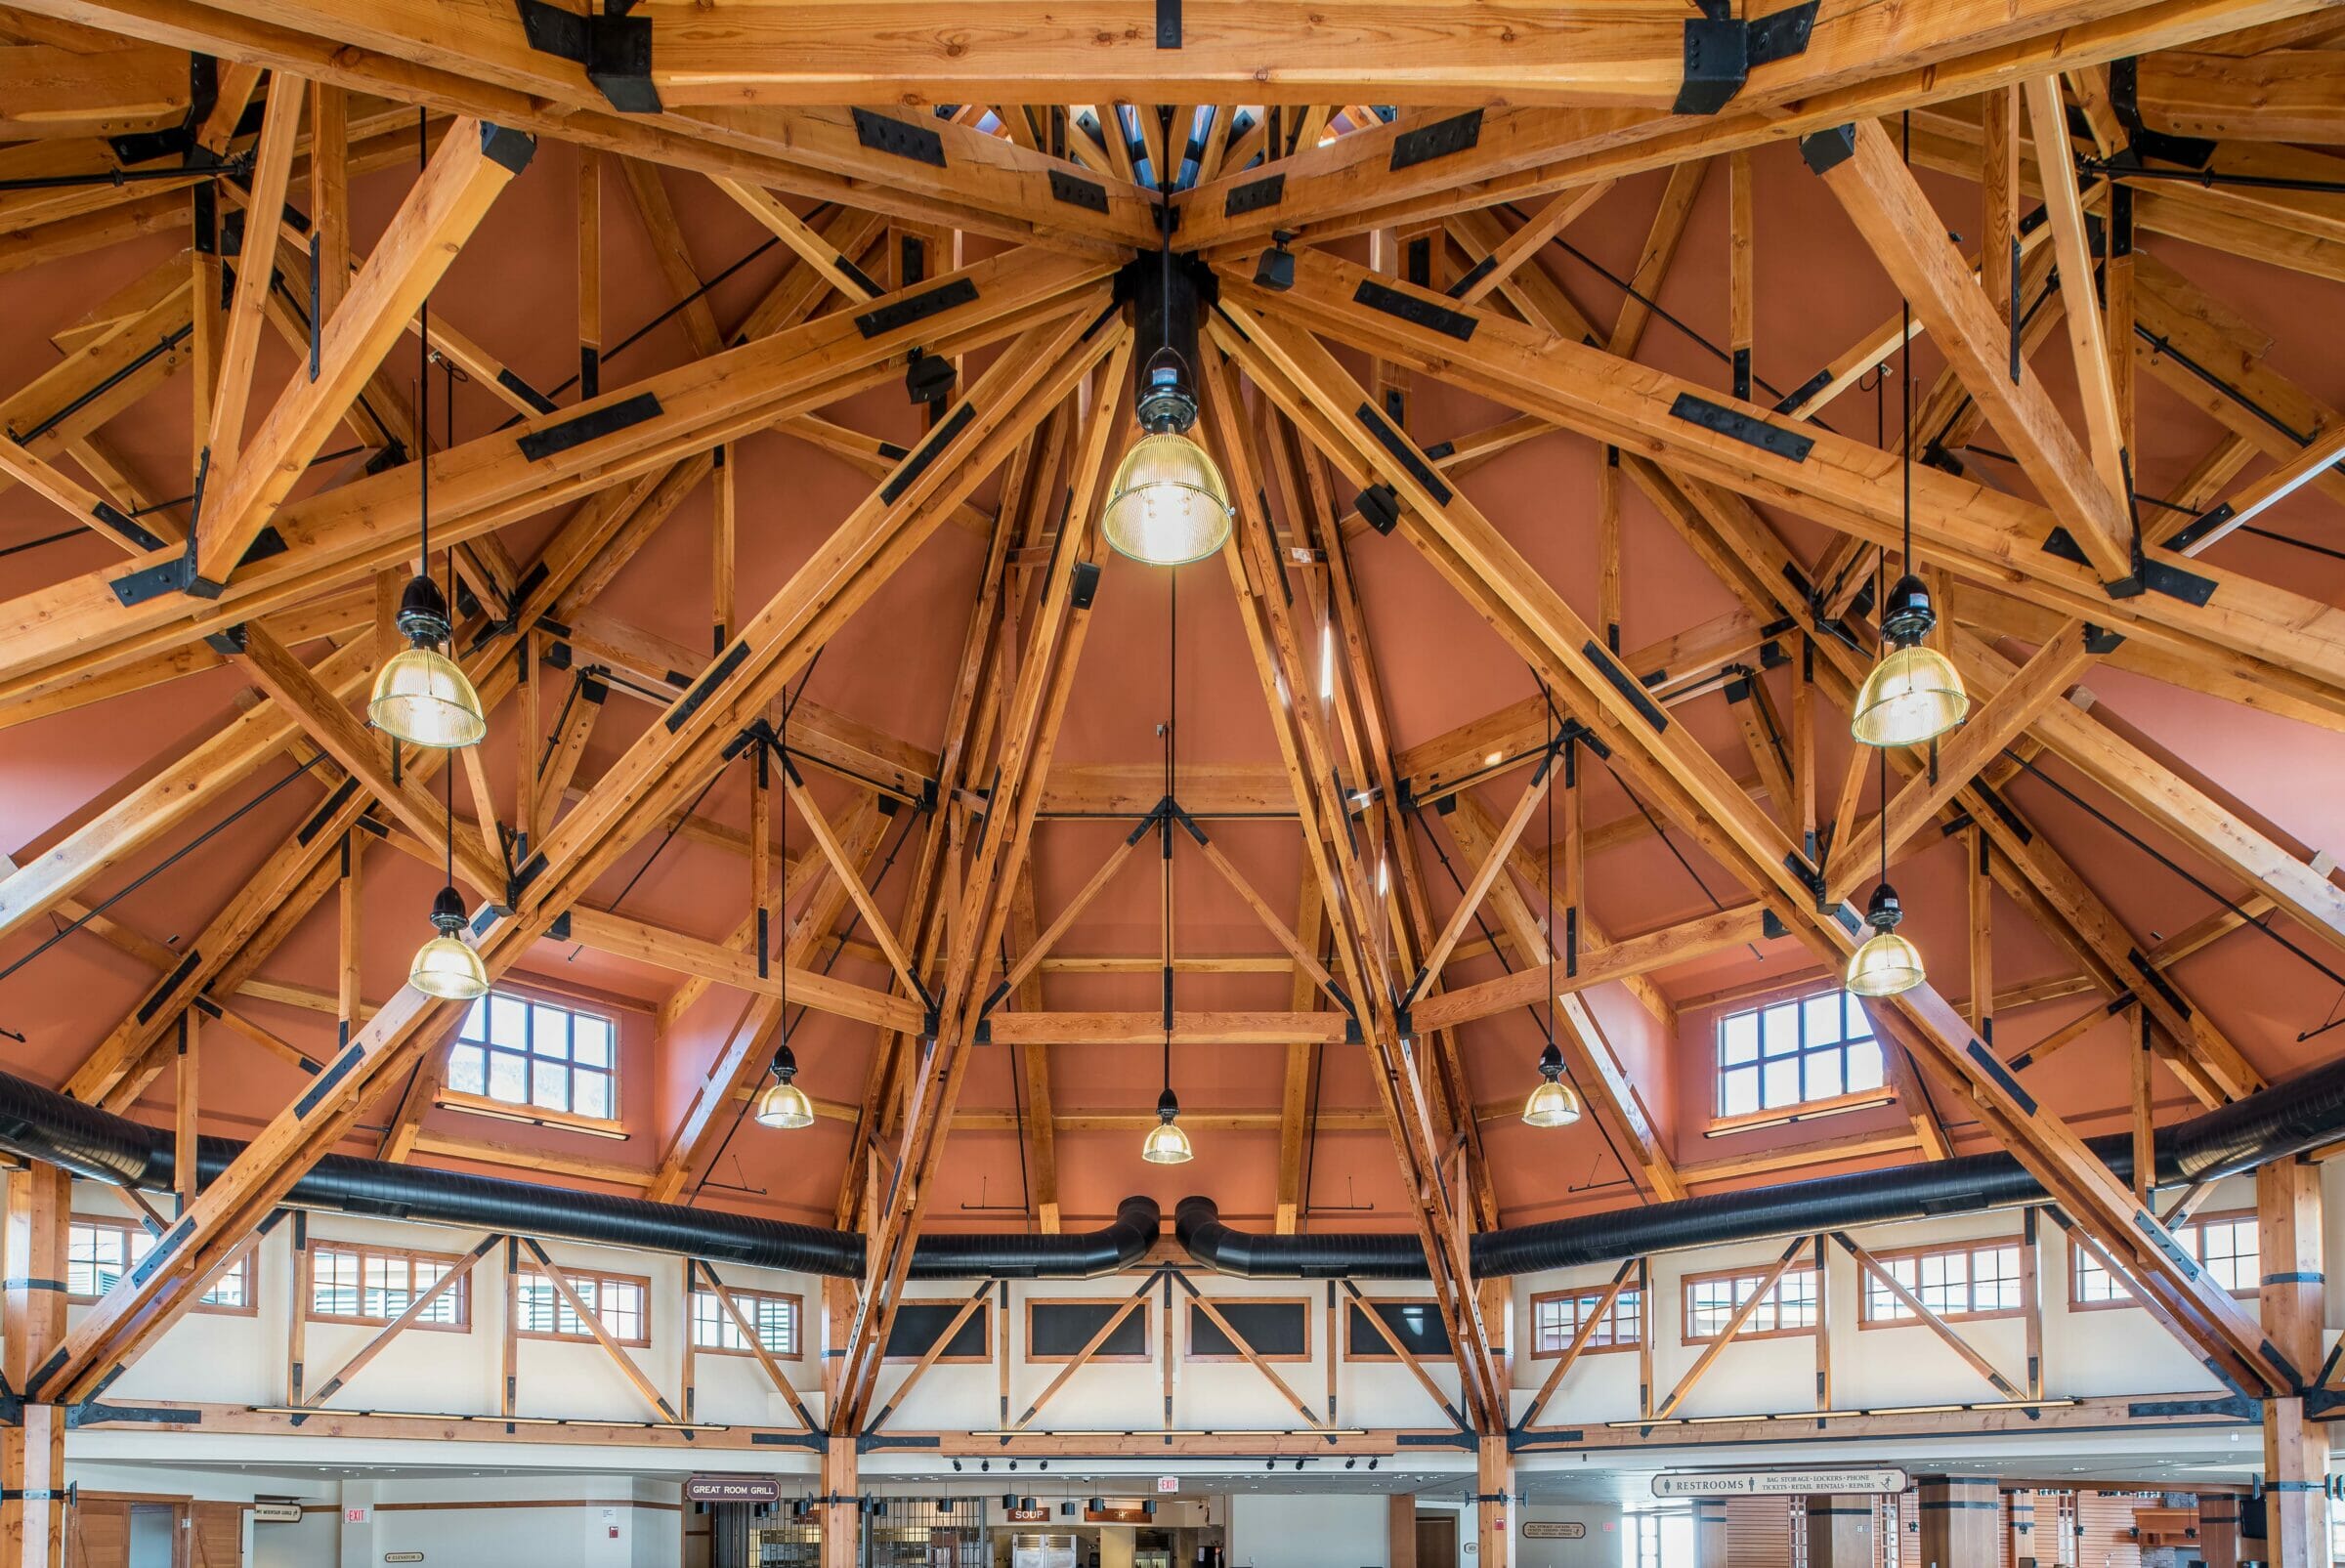
Timber framed ski lodge with an 80′ Octagon Grid
What size grid should I start with when designing a timber frame?
When designing a timber frame, the space between bents is often the critical dimension. A grid spacing of twelve feet to sixteen feet generally works pretty well. grids can be spaced up to twenty to twenty four feet, but then the sizes of the connecting members gets pretty large. Conversely, grid spacing can go down to six feet, but the timbers start to look crowded together when the bents are spaced close together.
The width of the grid (the span of the trusses) can start at sixteen feet or less and go up to forty, fifty or sixty feet. The bigger the span of the truss, the more expensive it is to build. Grid widths that are forty feet and below are generally pretty economical.
Often buildings are set up with multiple grid widths. For instance, a dining hall or a church could have two twelve foot sheds with a forty foot center grid with the grids spaced twelve to sixteen feet apart.
Purlins vs. Rafters in a Timber Frame - which are more visually appealing?
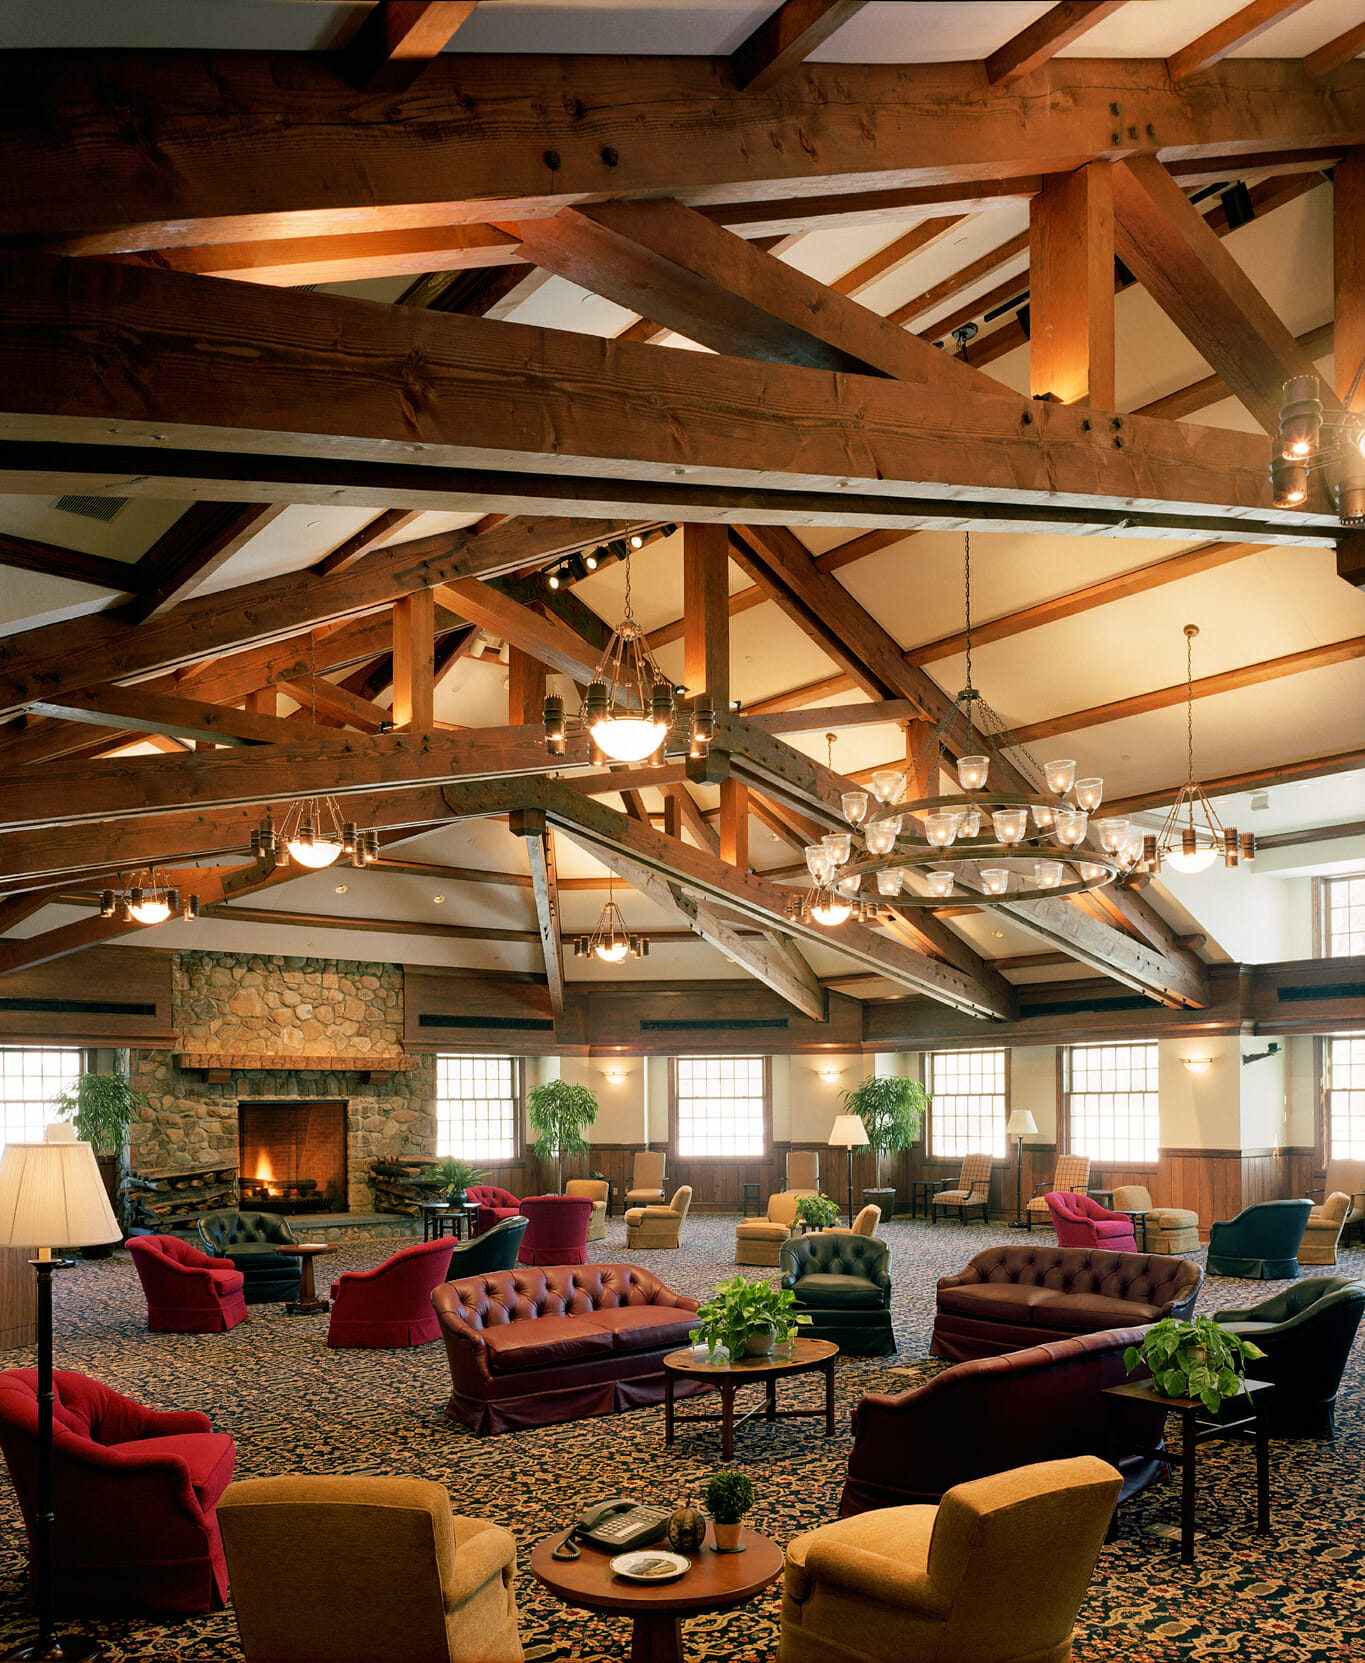
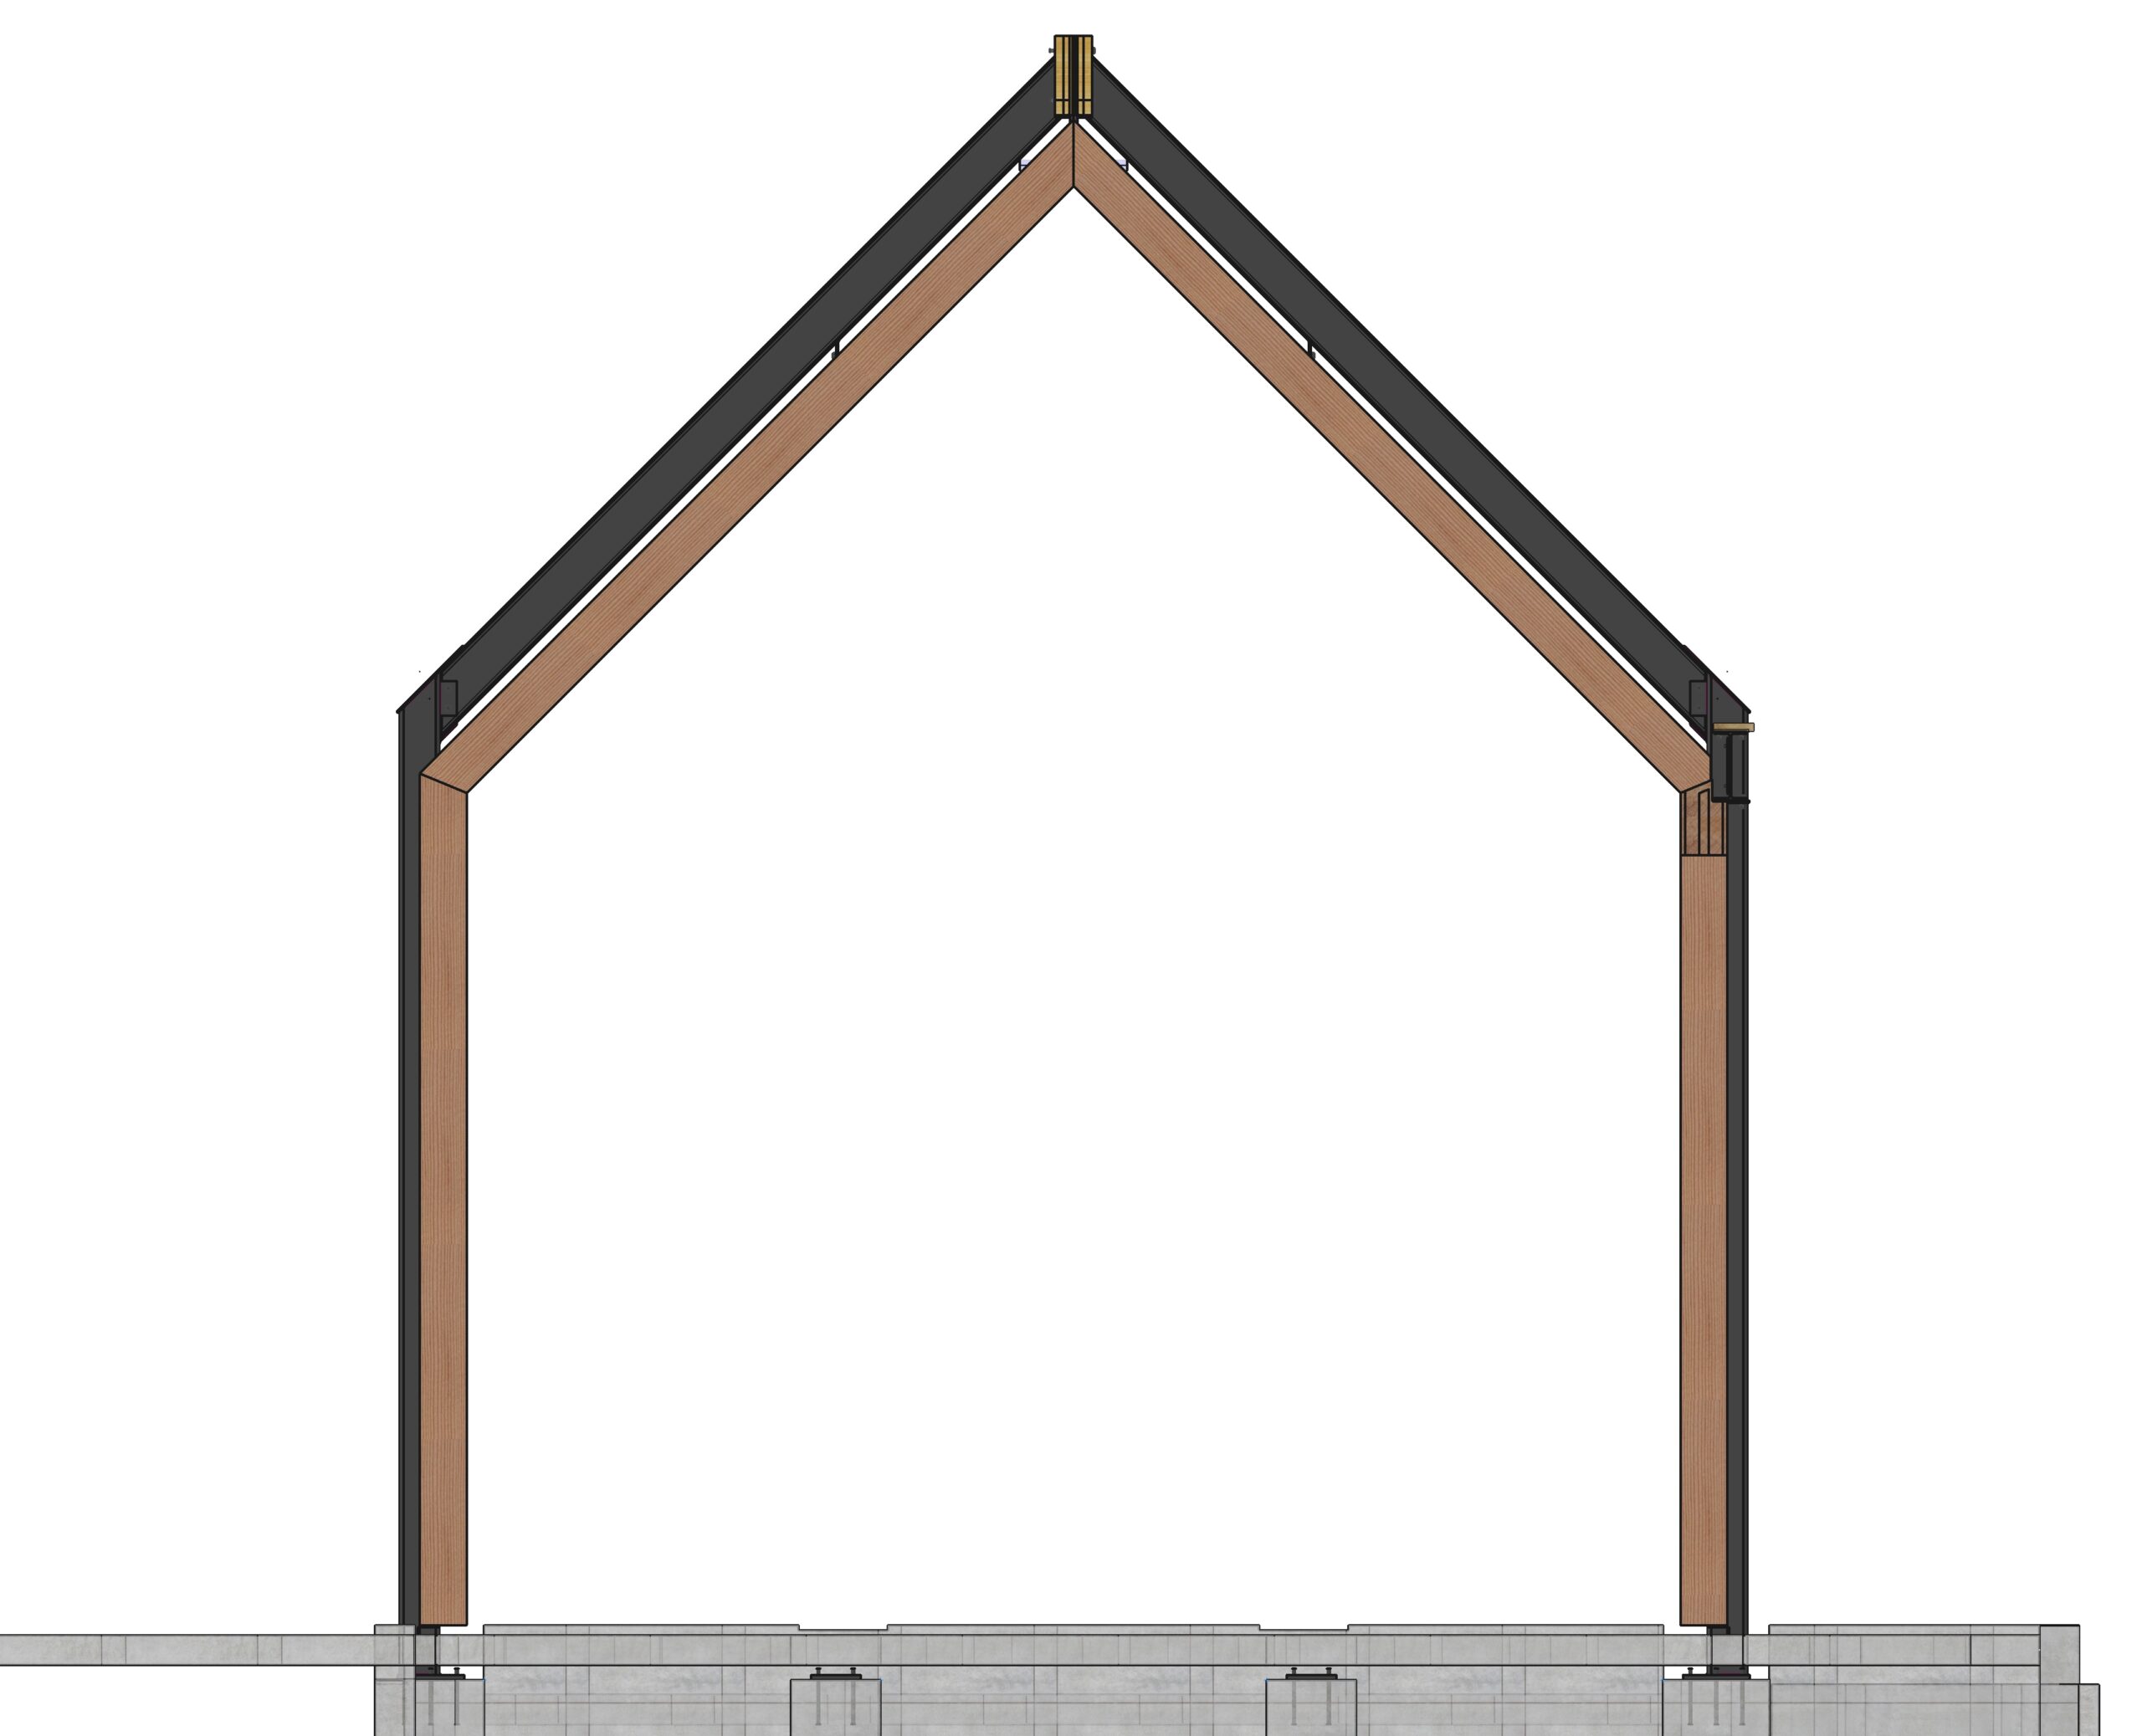
Both purlins or rafters are visually appealing in a timber frame. Like all things aesthetic, the choice of using purlins, which are horizontal roof framing members that span from bent to bent or rafters, which are vertical roof framing members that span from the eave to ridge, depends on the designer’s goals in designing the visual space.
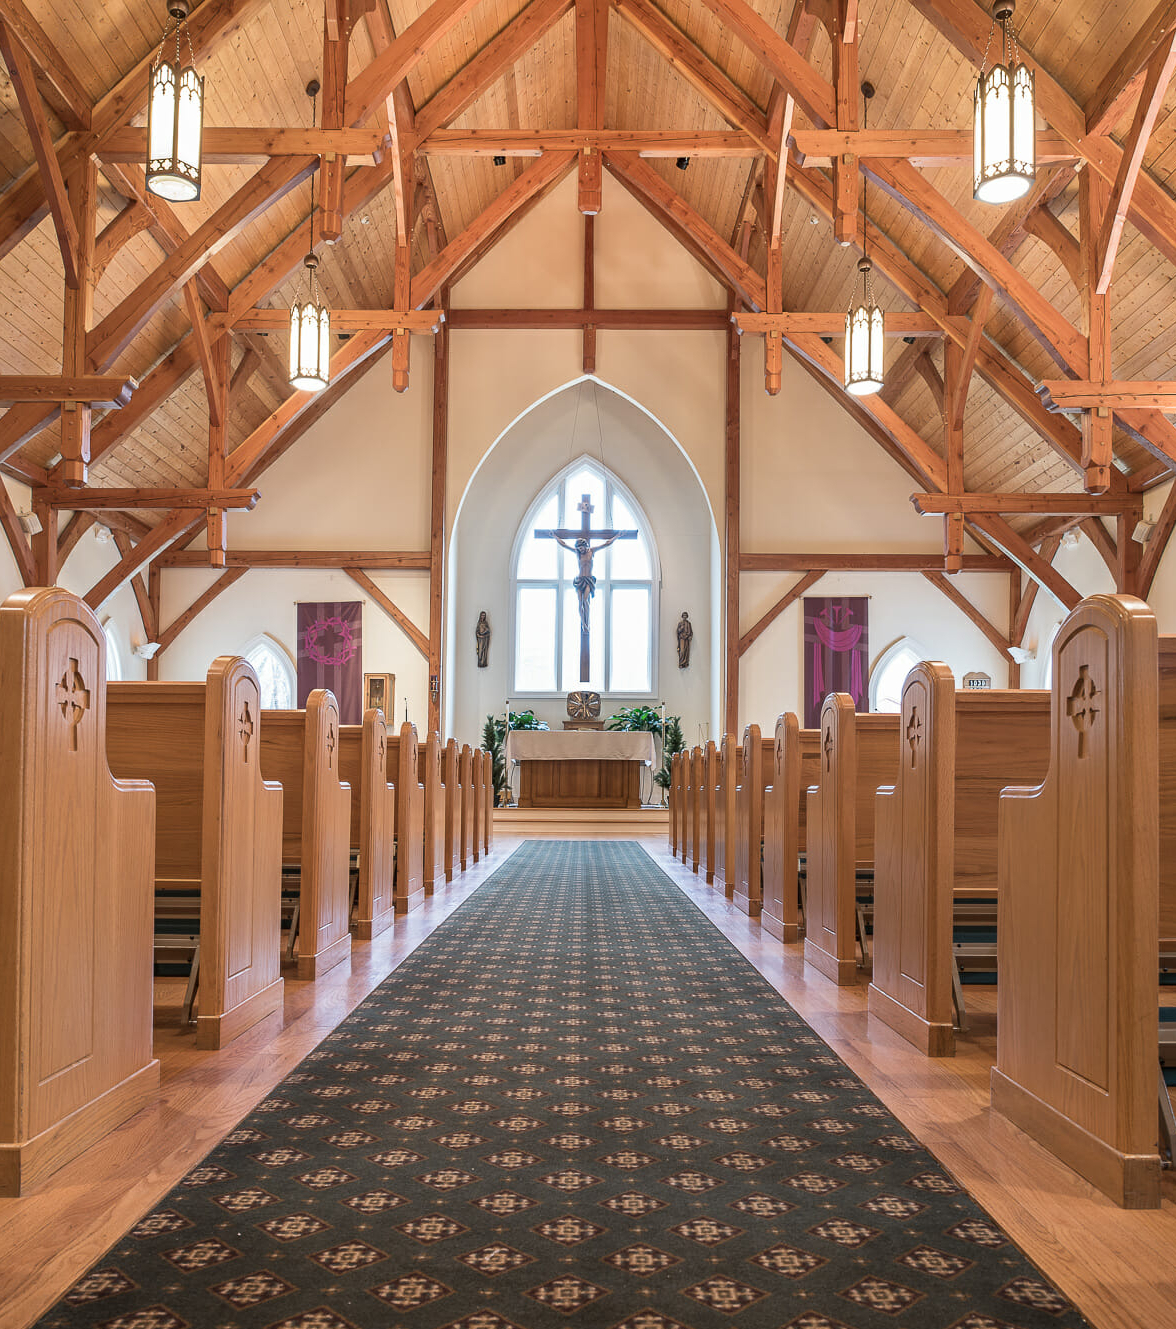
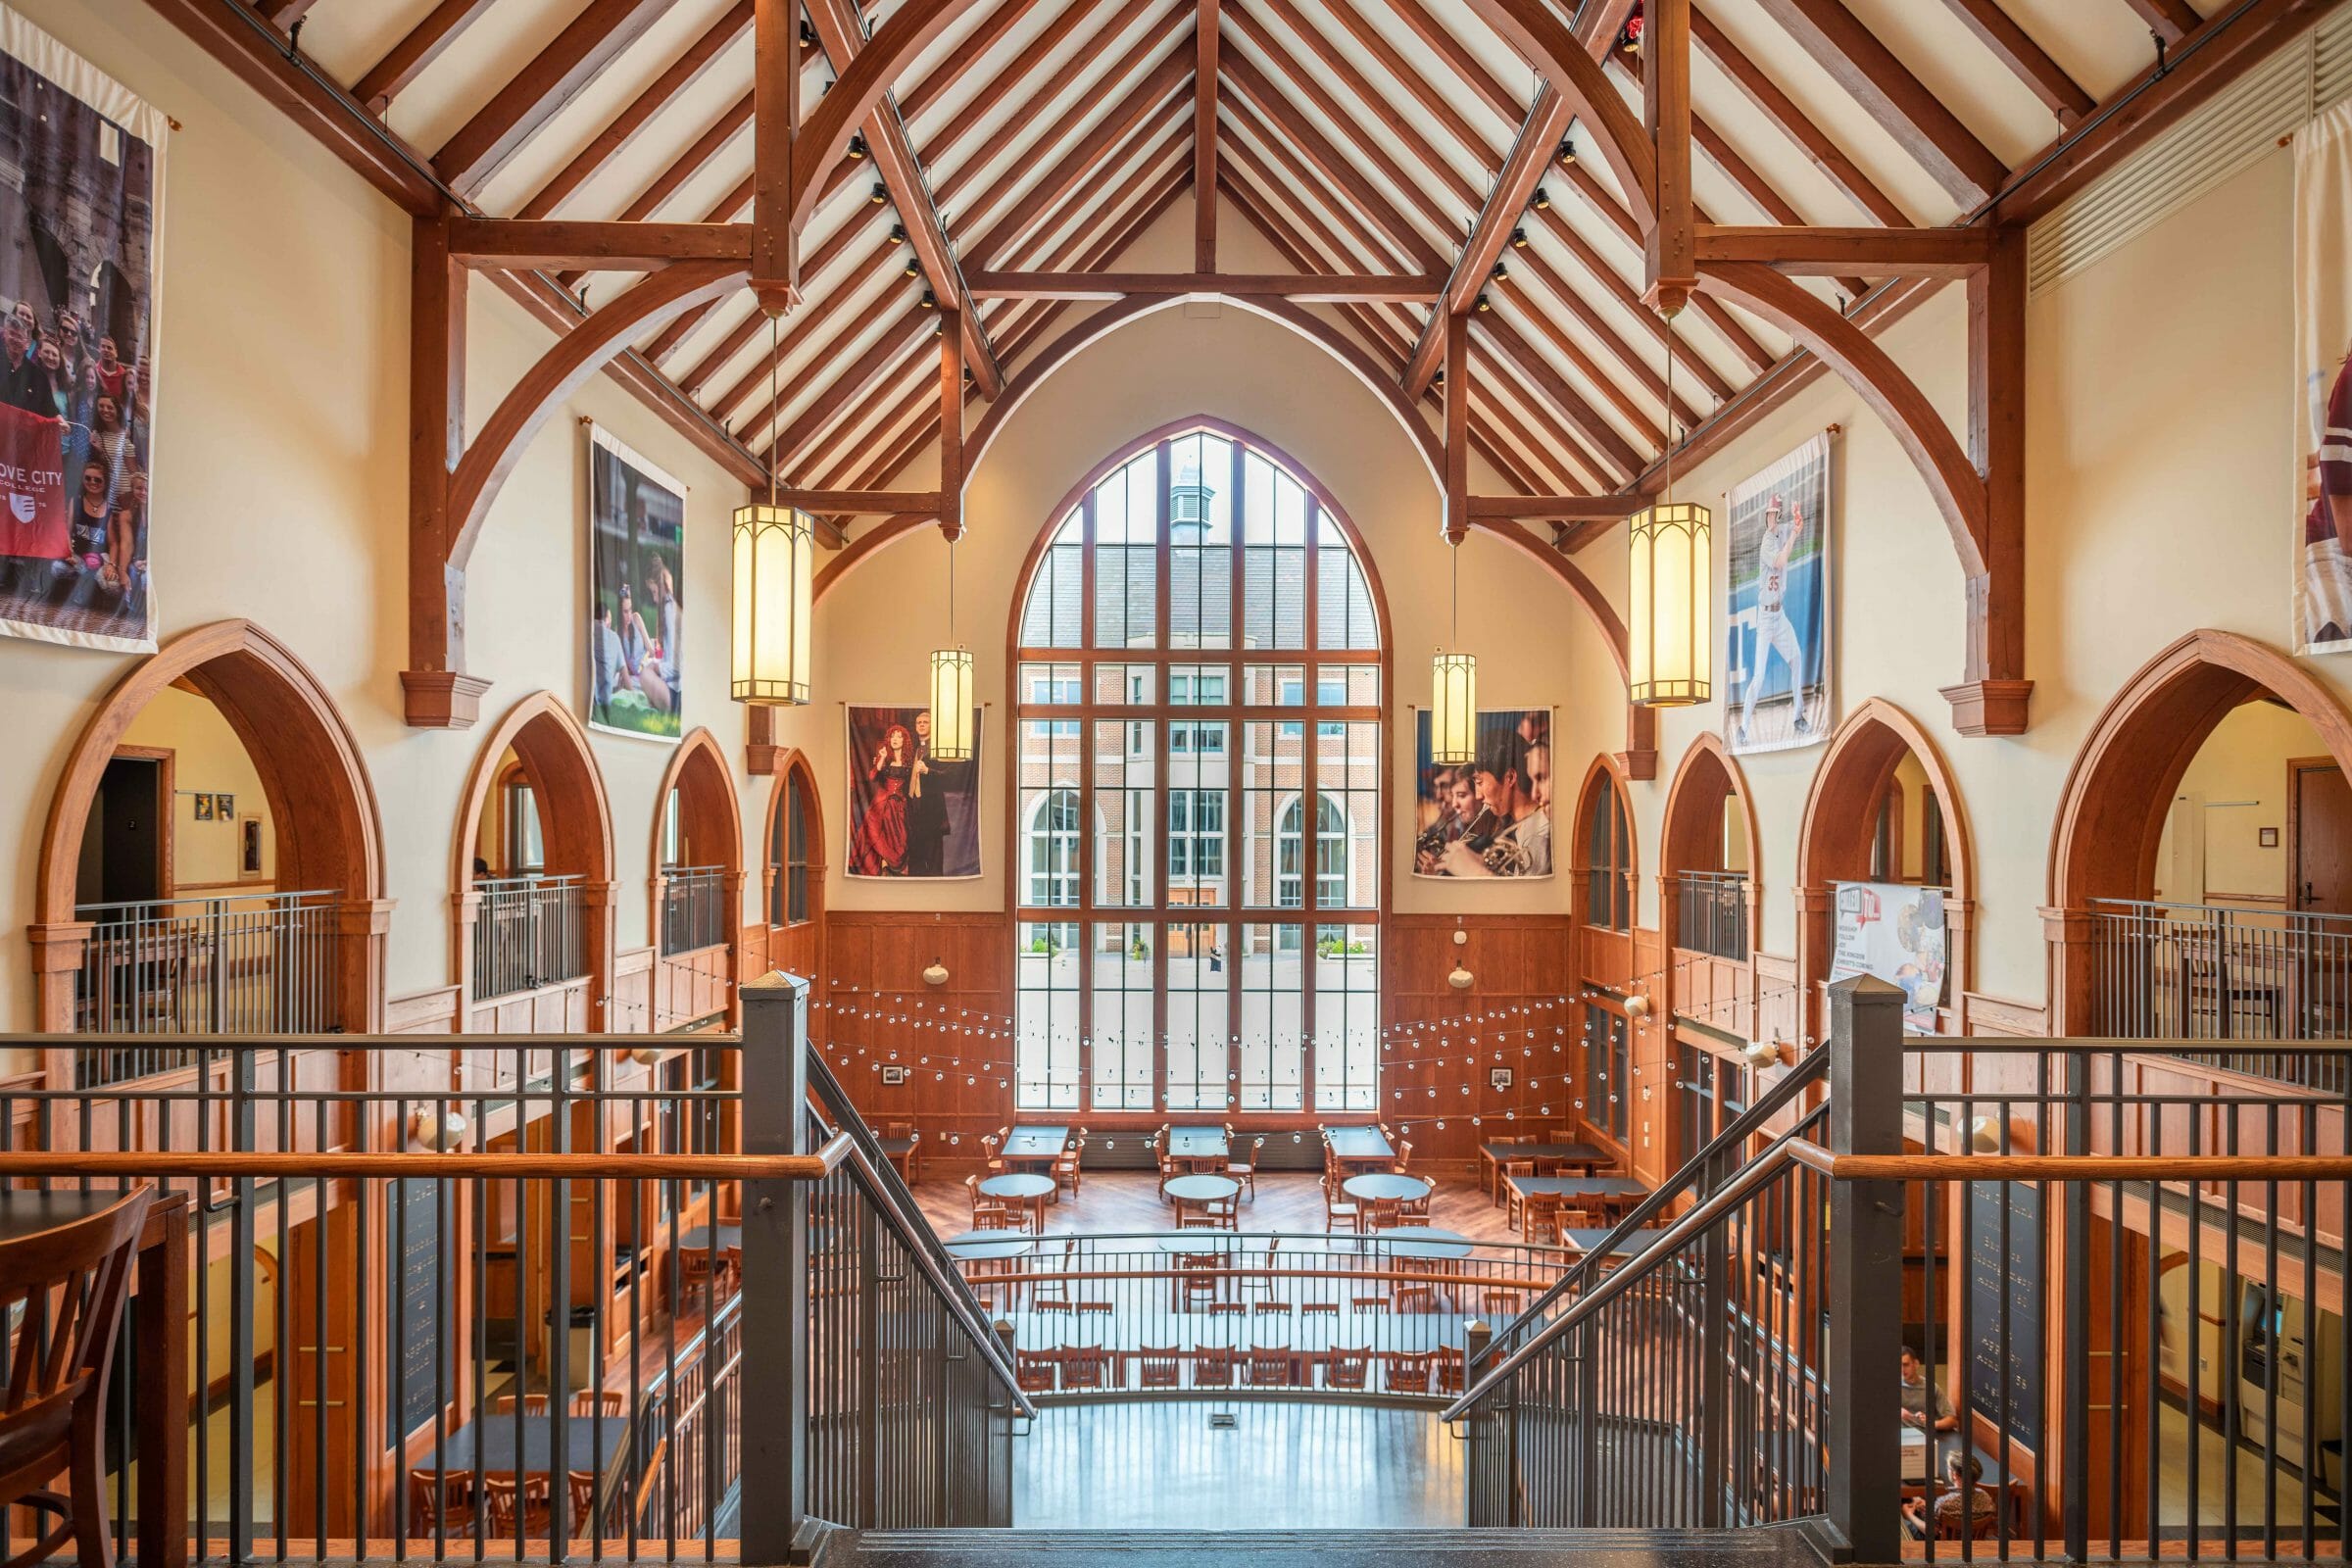
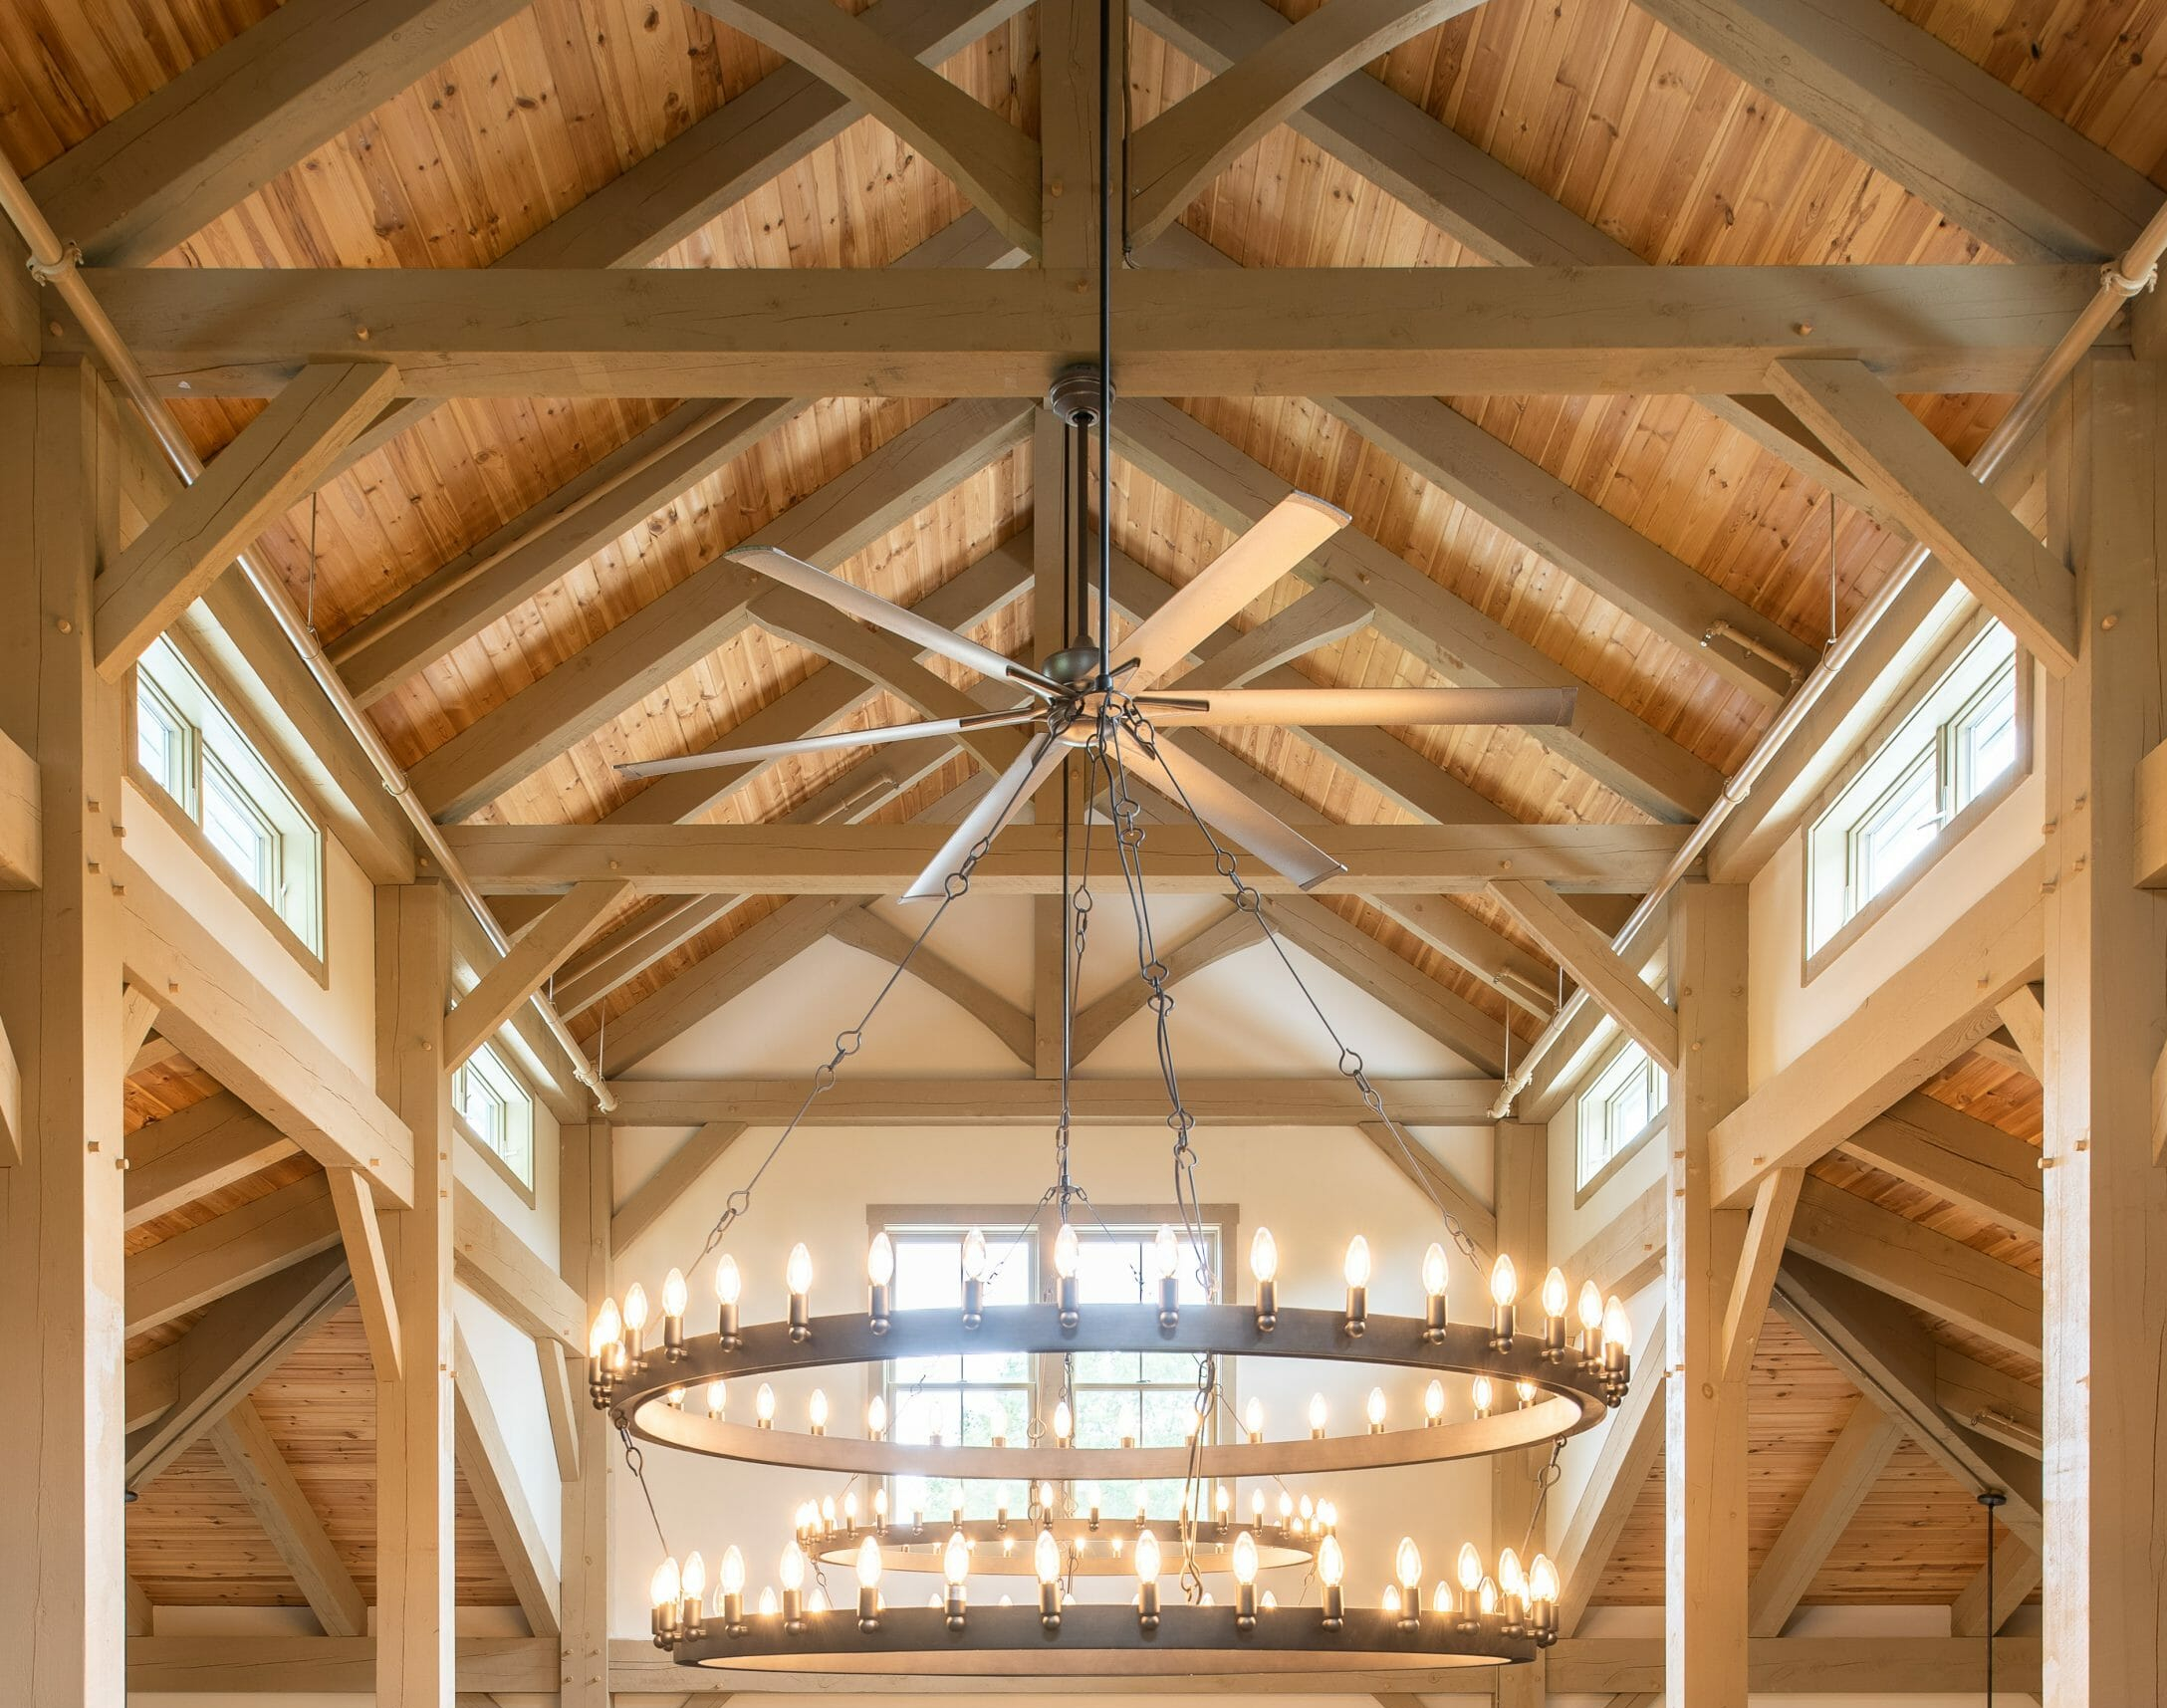
Because rafters run vertically they raise the visual appearance of the room, drawing the room up and giving it visual height. Purlins run horizontally and tend to make the room appear less tall visually. In a room with a very high ceiling and roof pitch, purlins will make the room feel more intimate. In rooms that are low with a low roof pitch, rafters will give the room a more open and lofty feeling.
Another consideration is which way the wood decking will run. Often, architects like the look of wood decking on the ceiling of a timber framed room and have a preference on which way it runs. The decking runs in the opposite direction of the intermediate framing members. With purlins, the decking will run vertically, with rafters the decking will run horizontally.
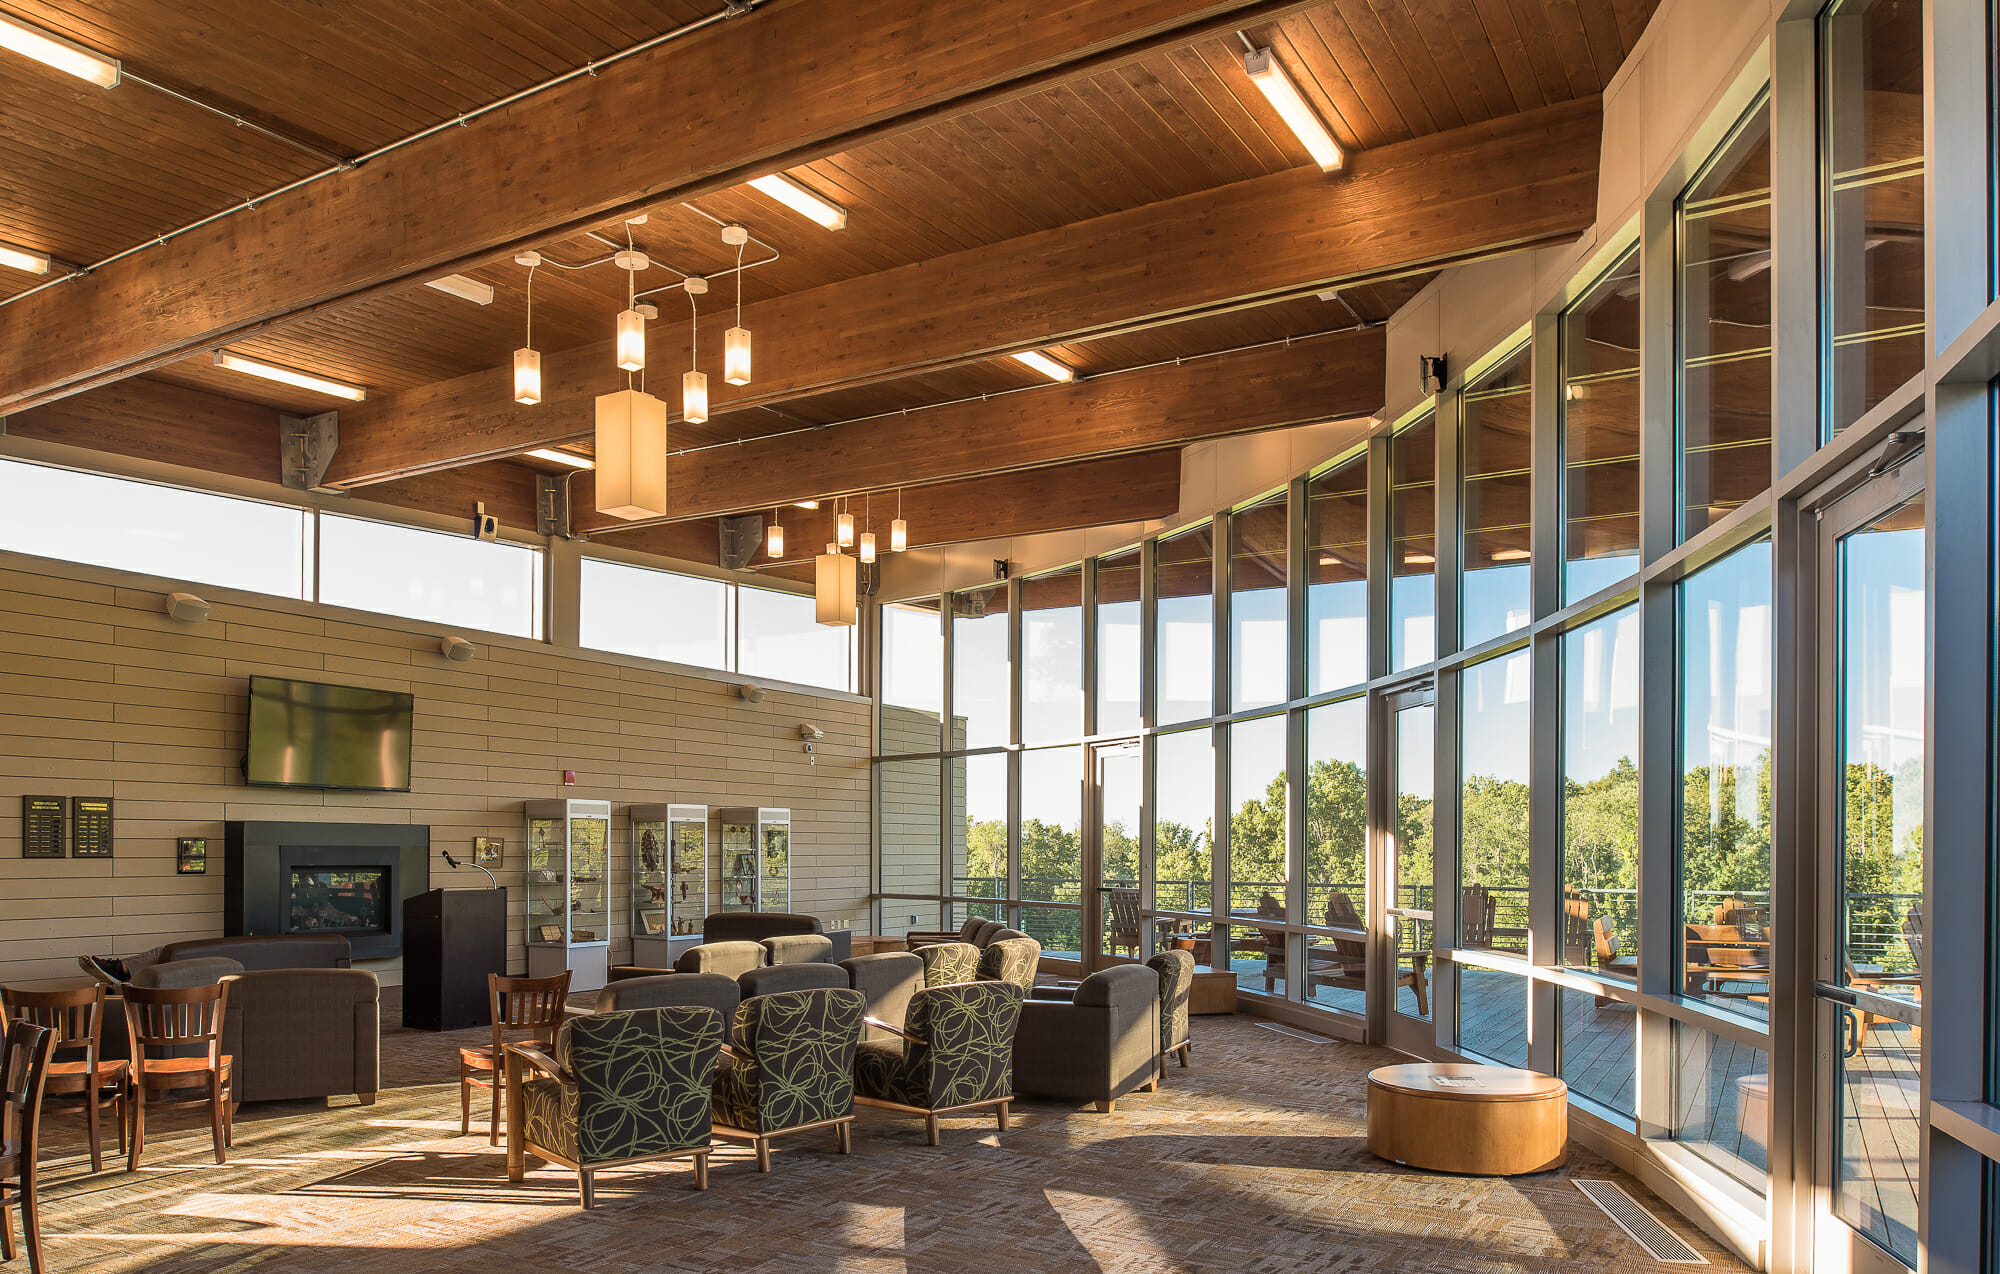
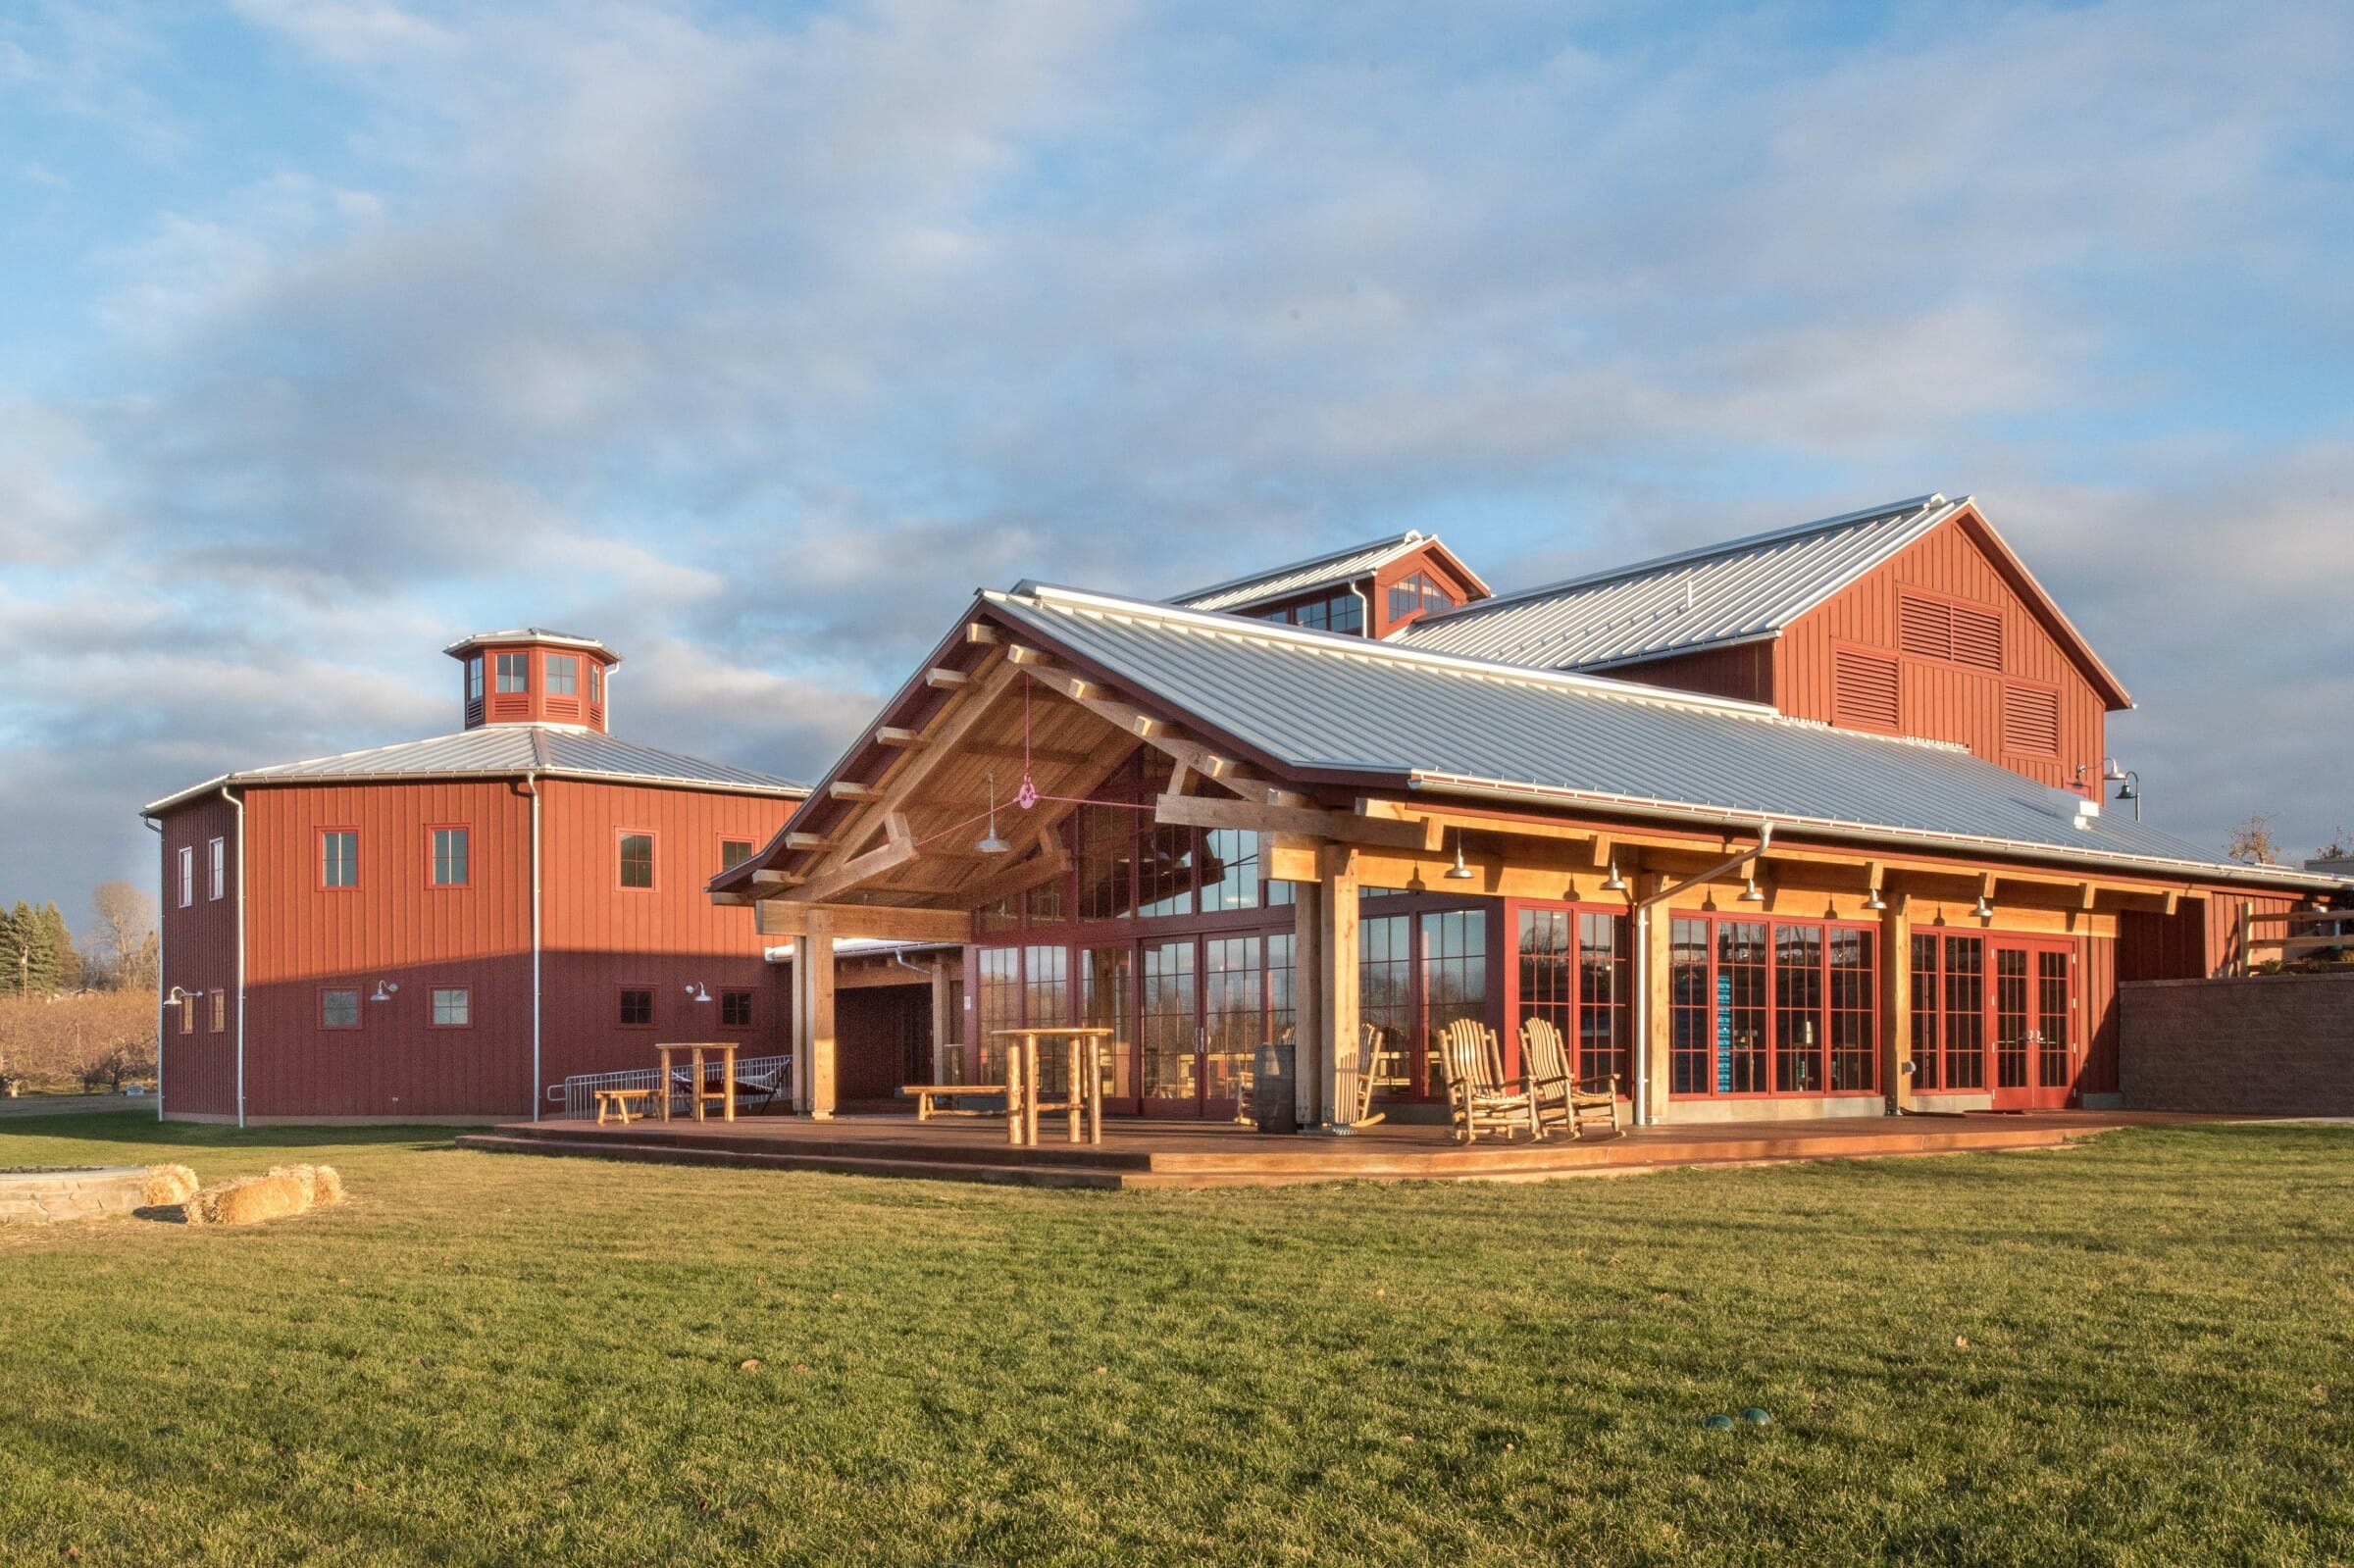
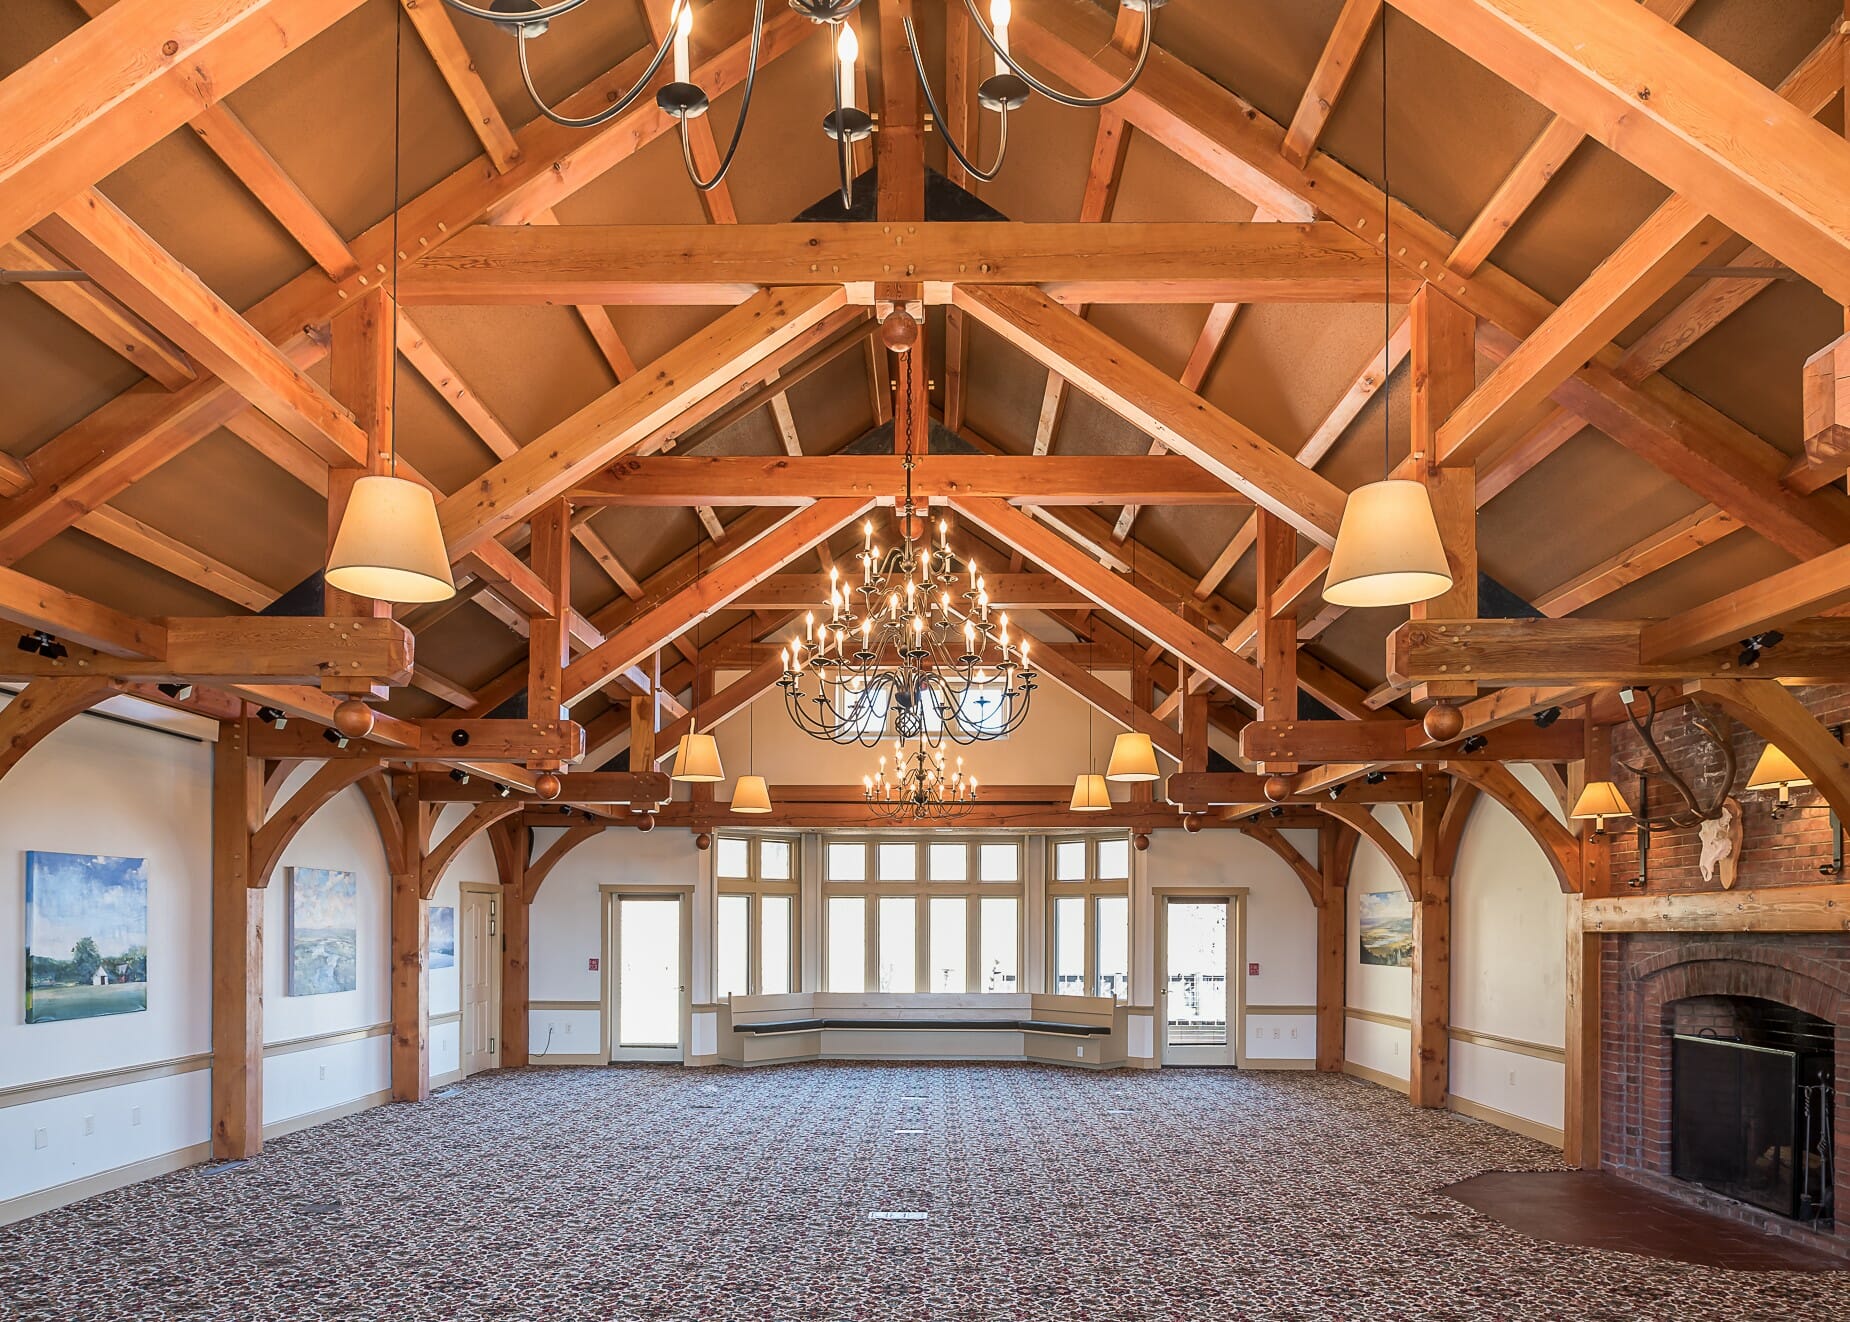
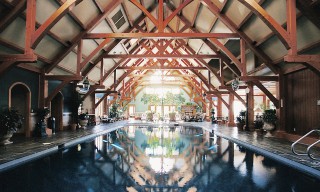
Sometimes both purlins and rafters can be used, like in the Bechtel Dining Pavilion shown below. Purlins were used on high ceiling and the wrap-around lower roof used rafters. (Notice the difference in how the decking runs.)
The choice between rafters or purlins is in the eye of the designer – both rafters or purlins will look great in a timber frame.
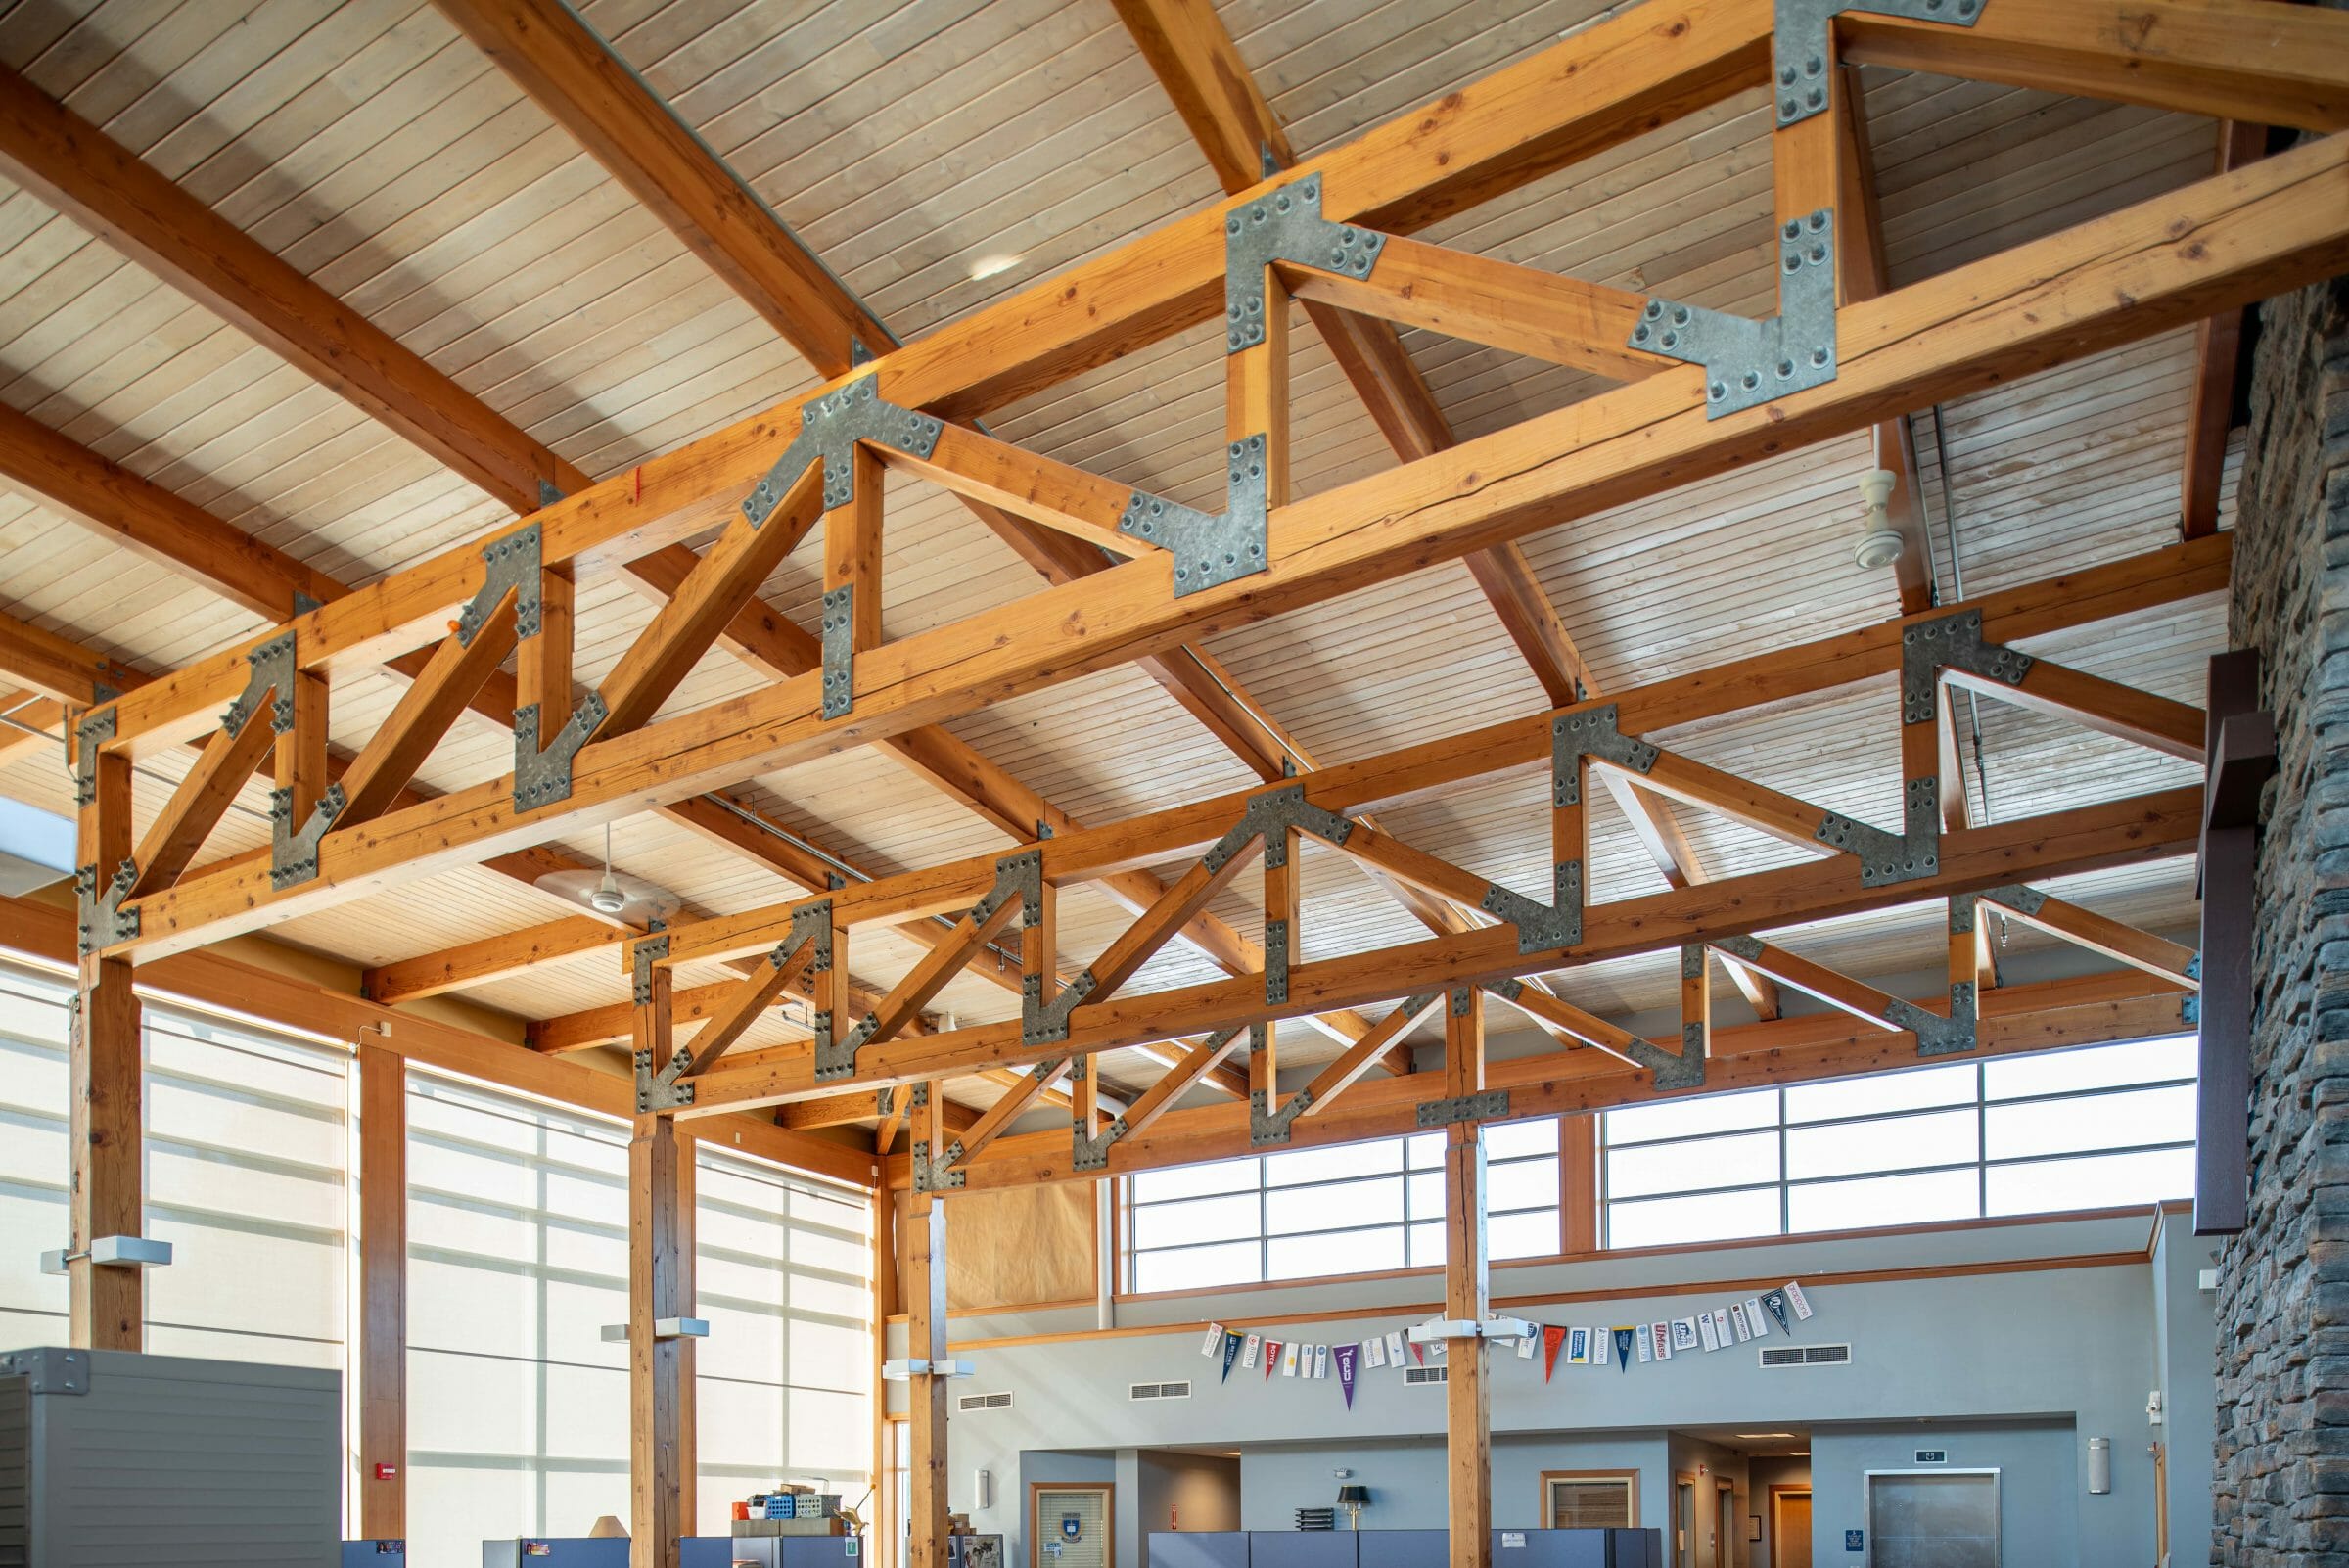
Timber Purlins in a tall room.
Timber Trusses with rafters.
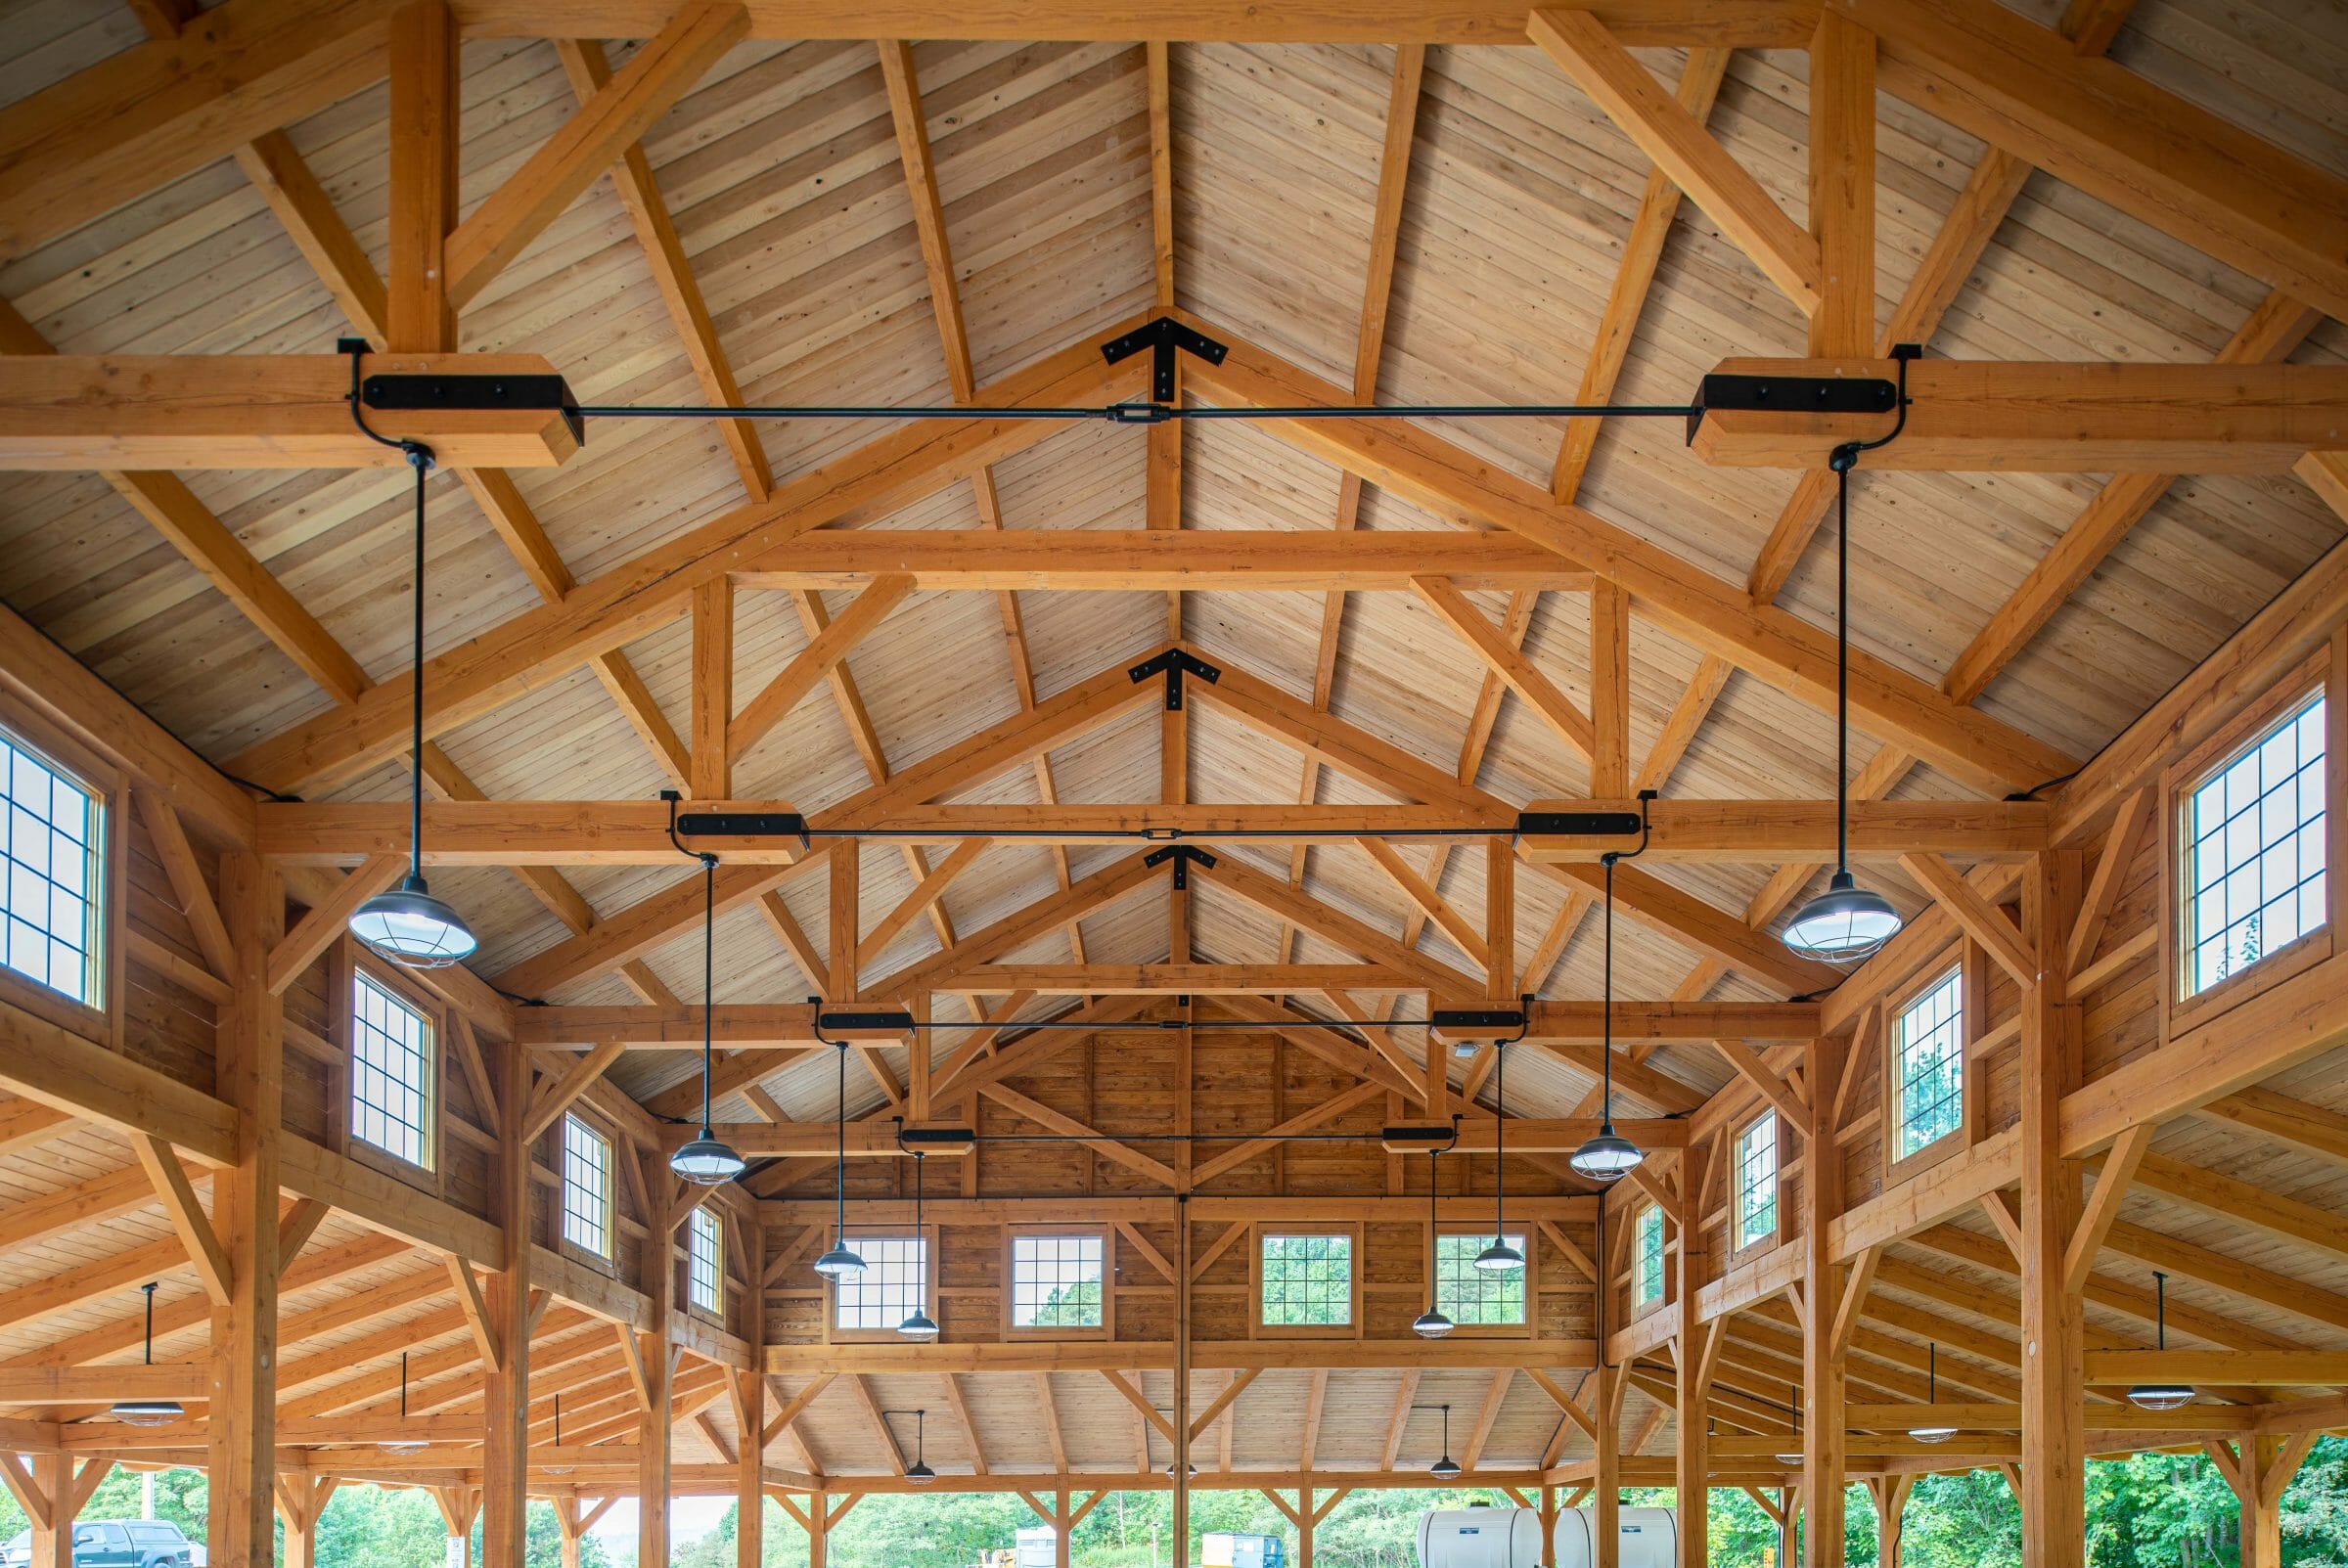
Bechtel Dining Pavilion: Purlins on the high ceiling with rafters on the low ceiling
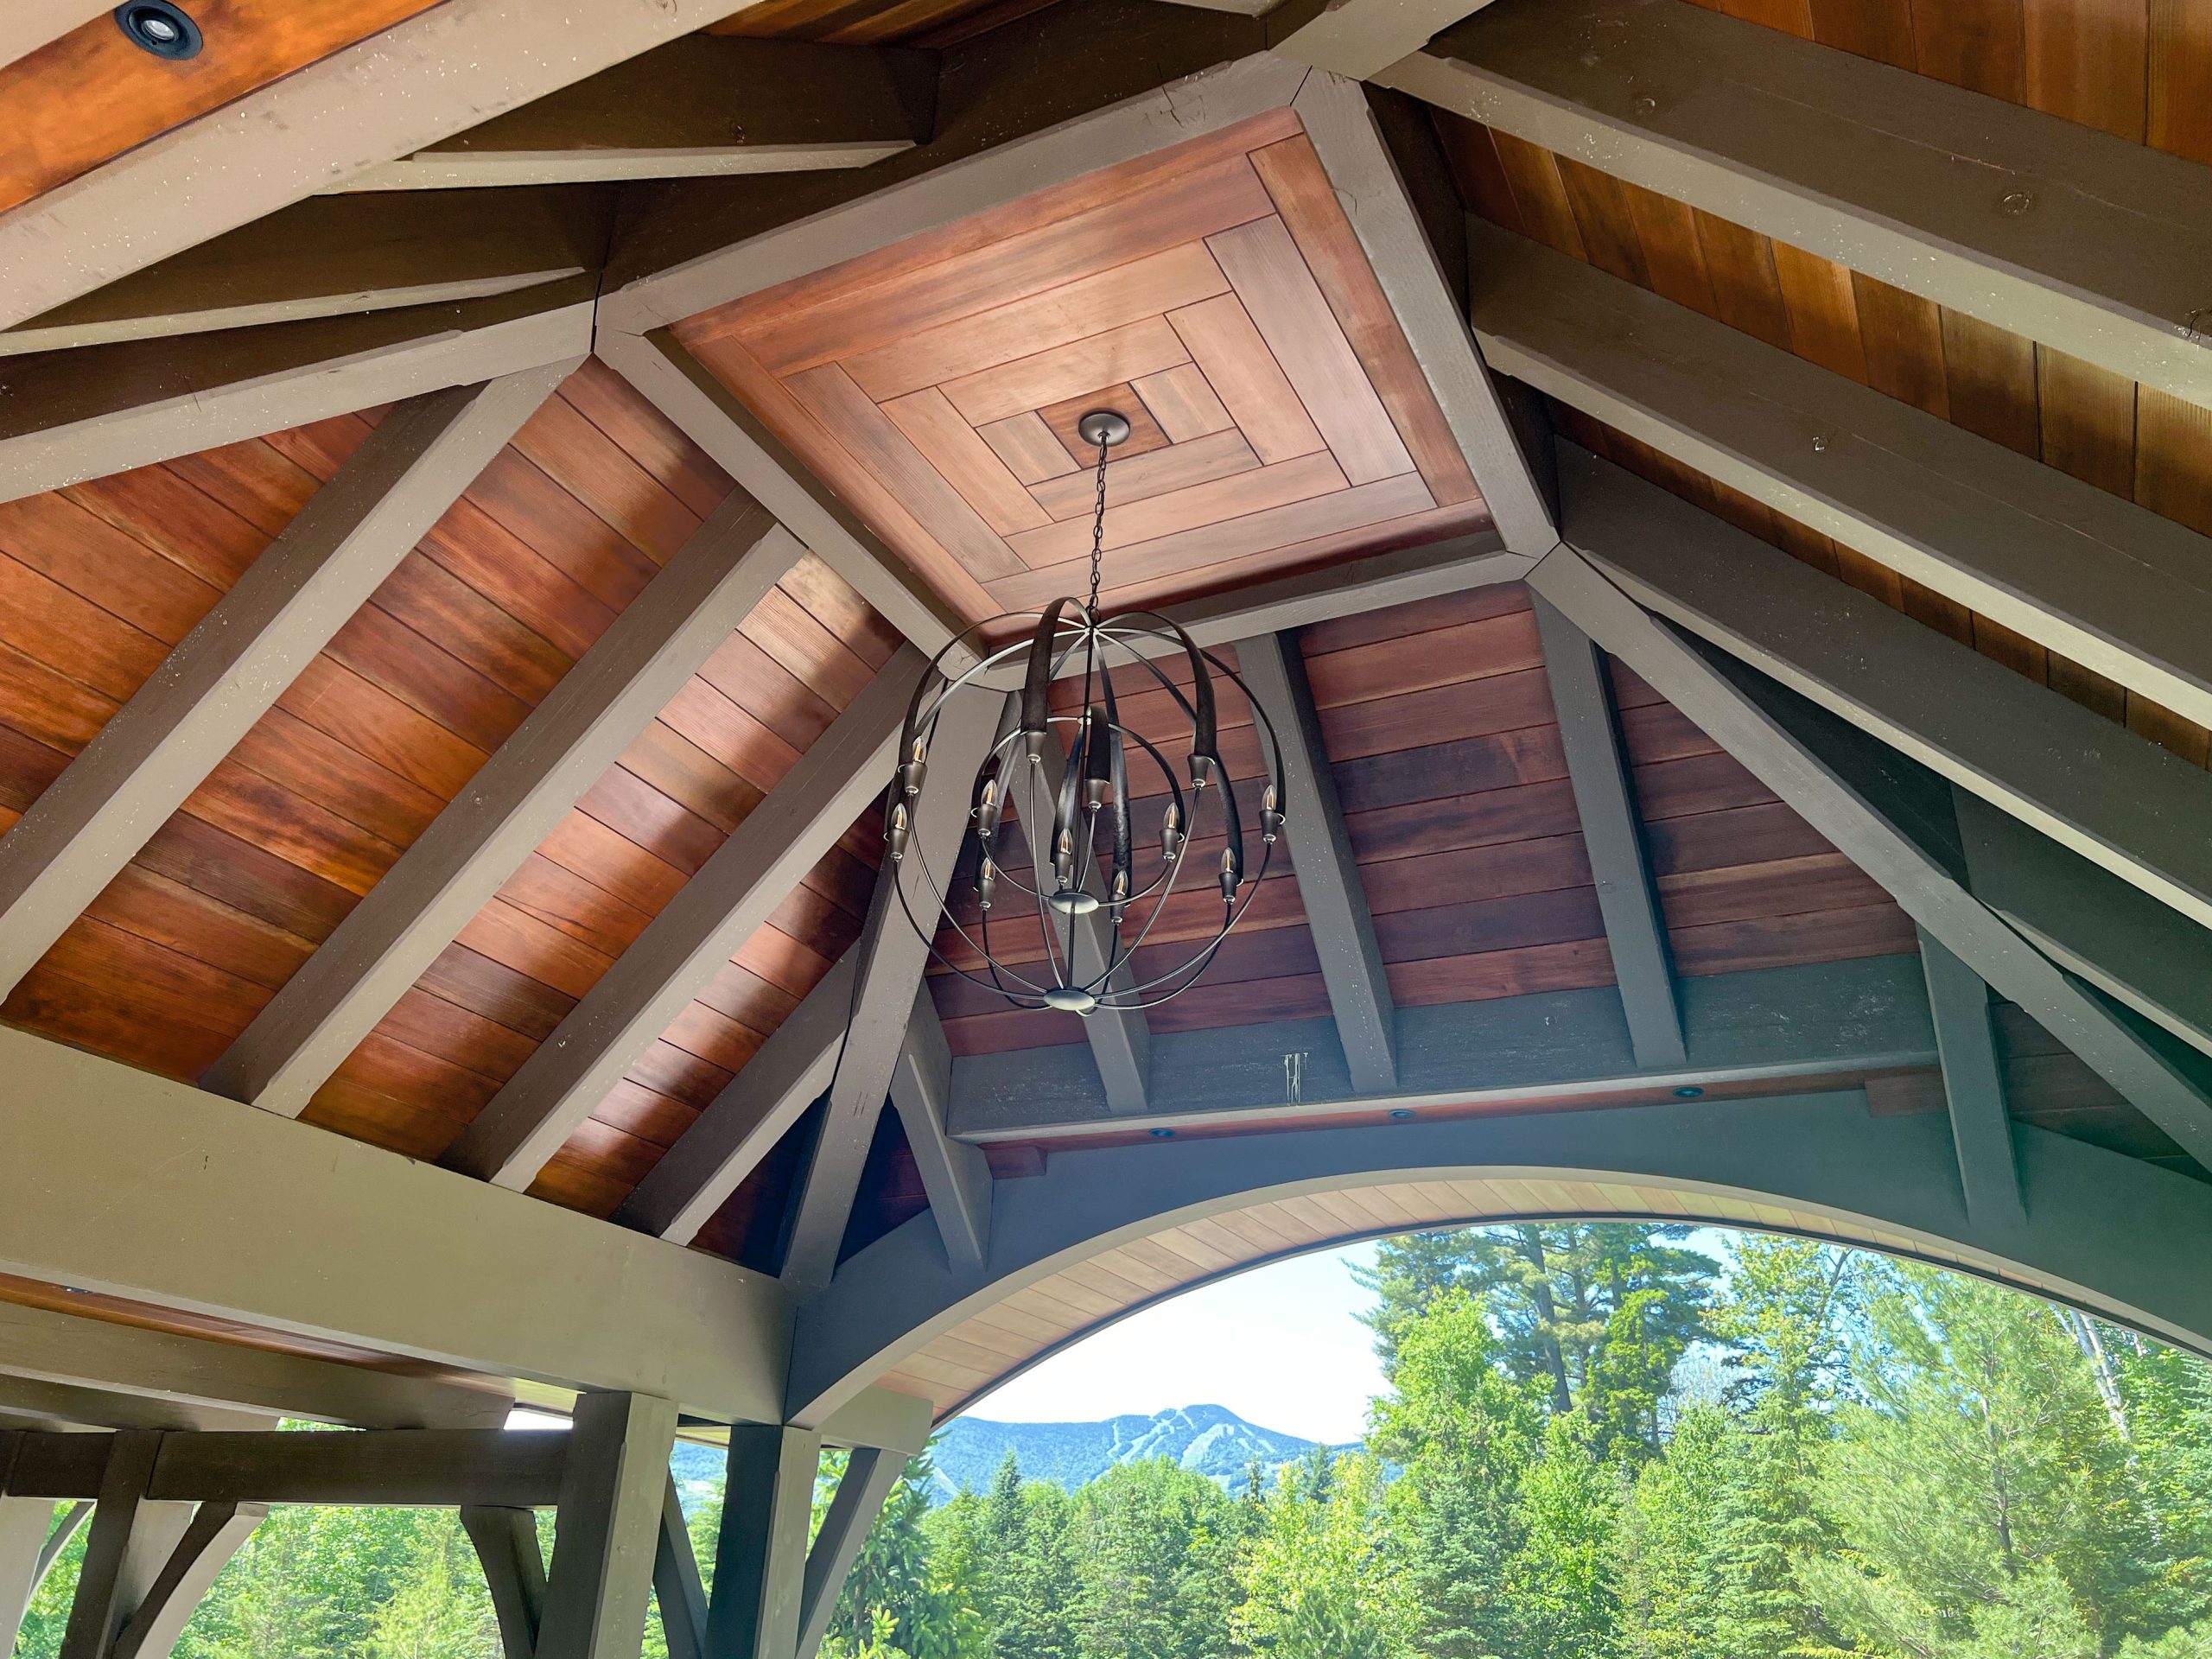
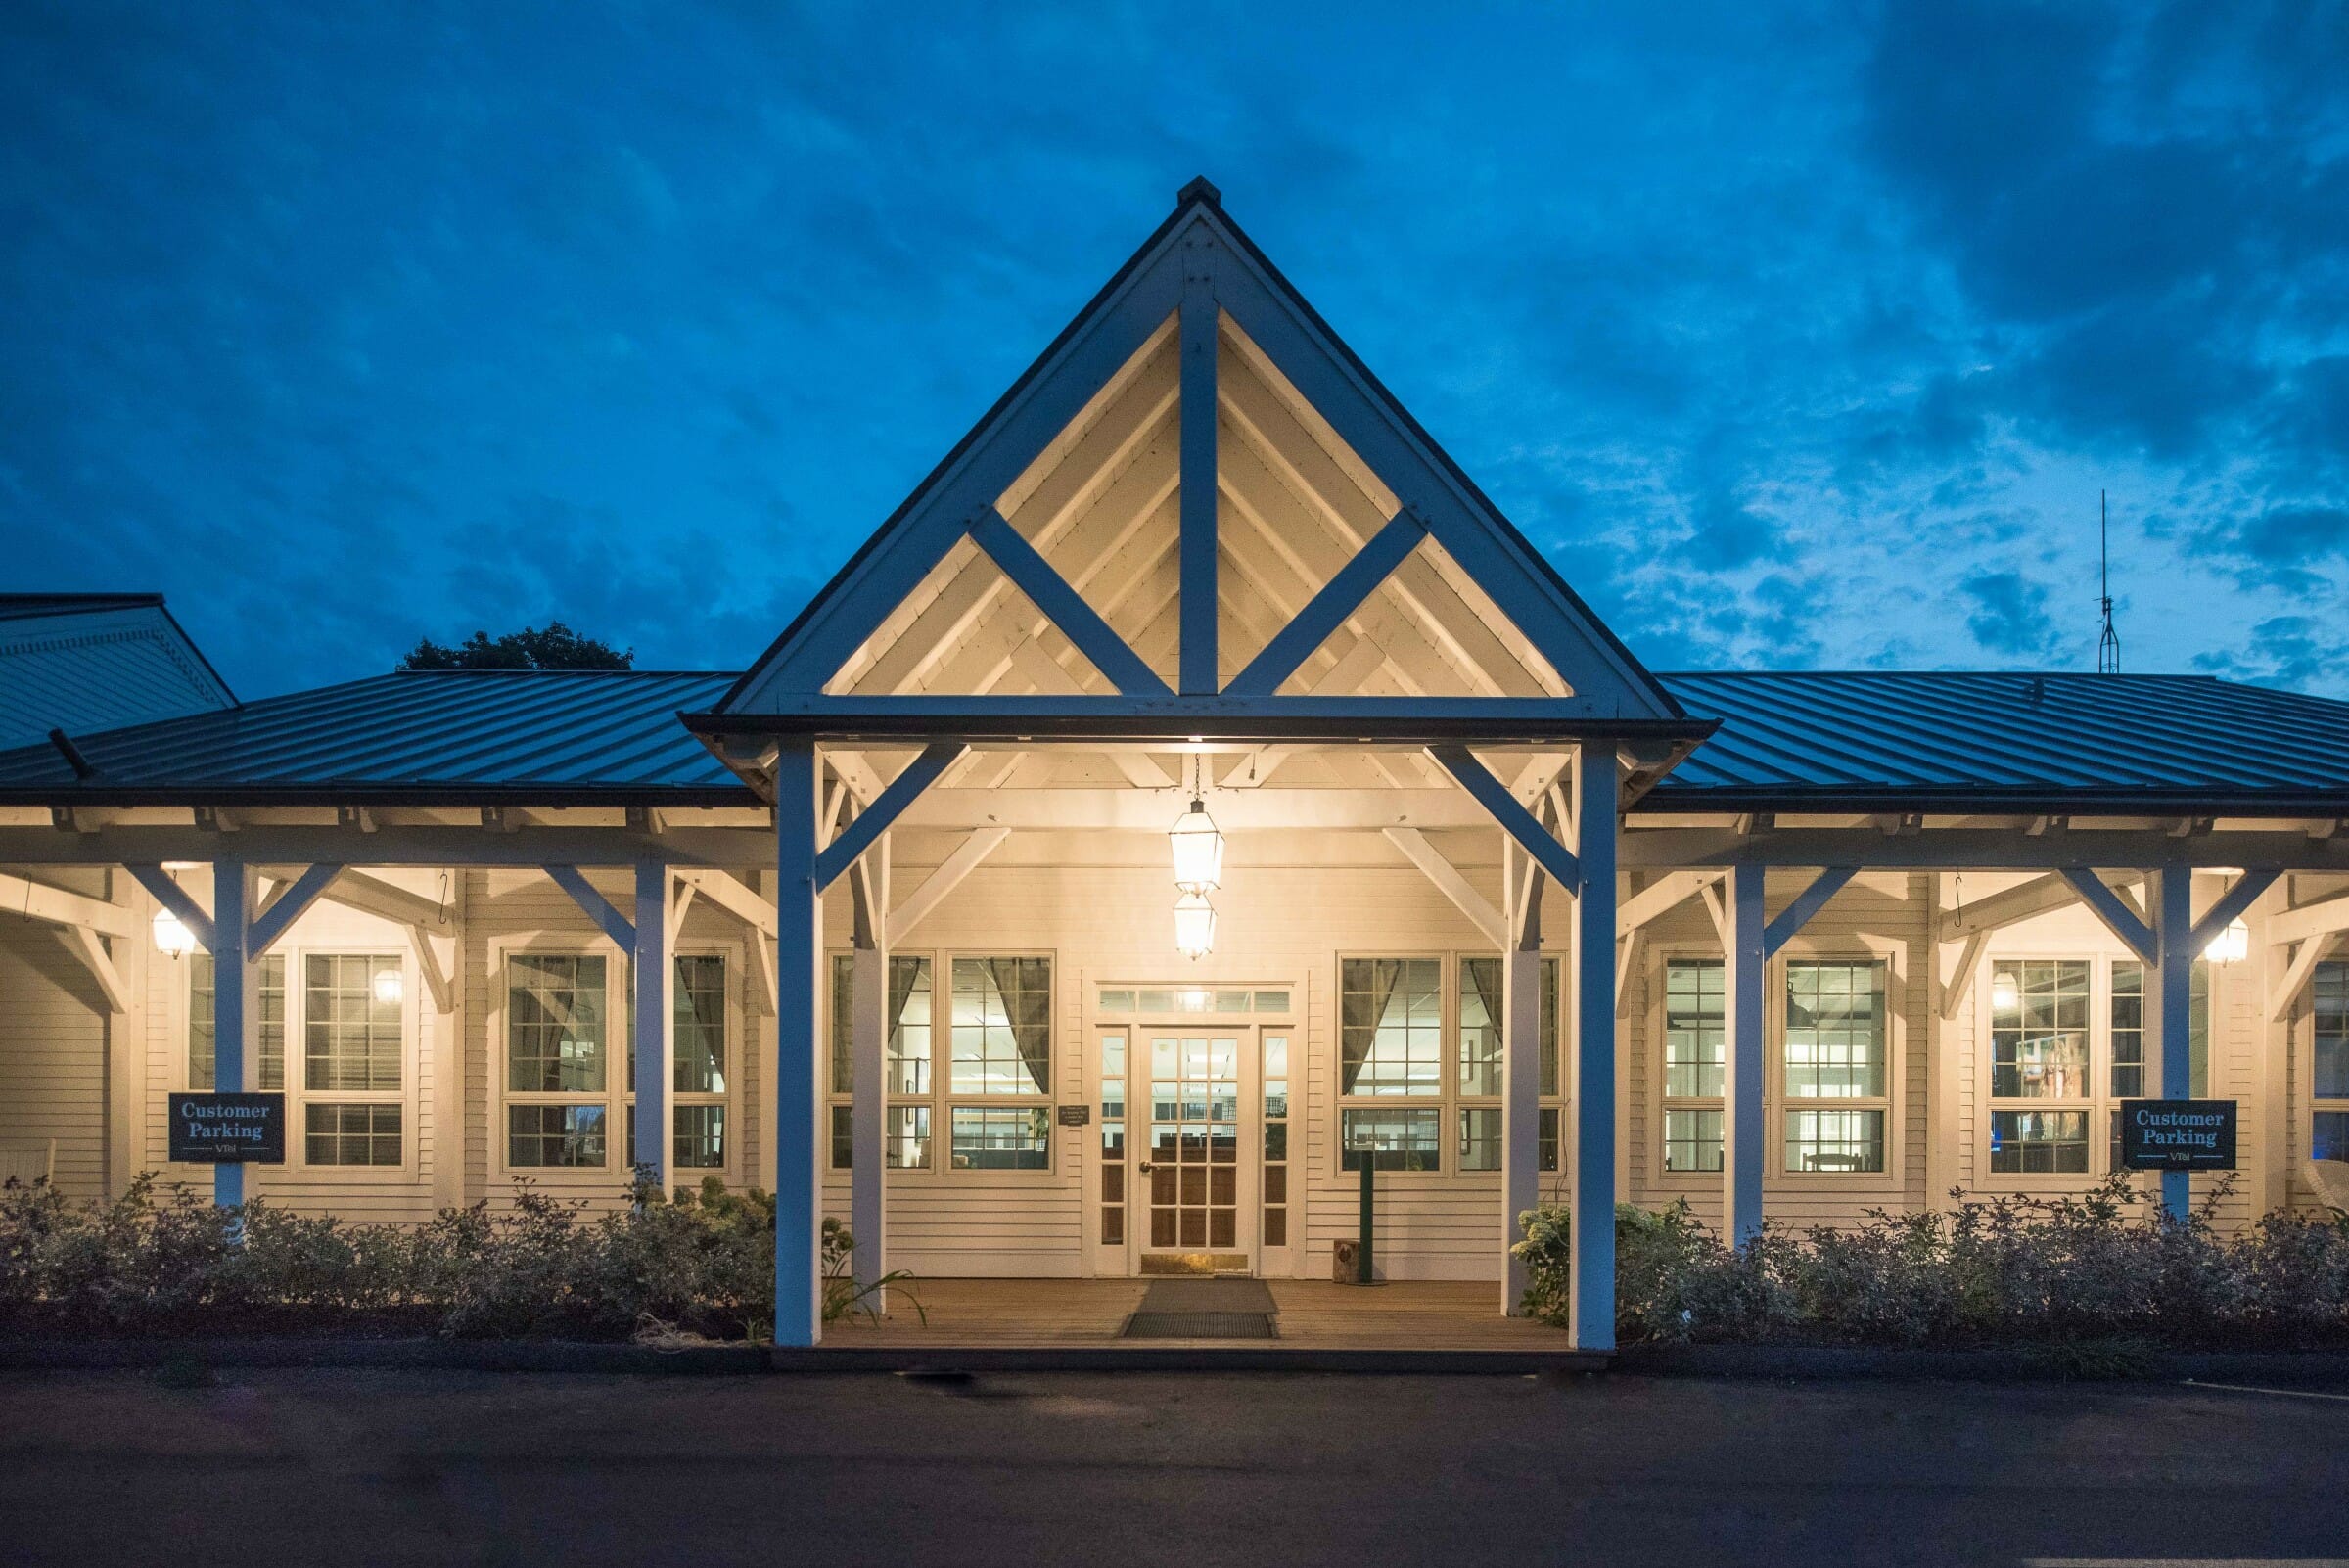
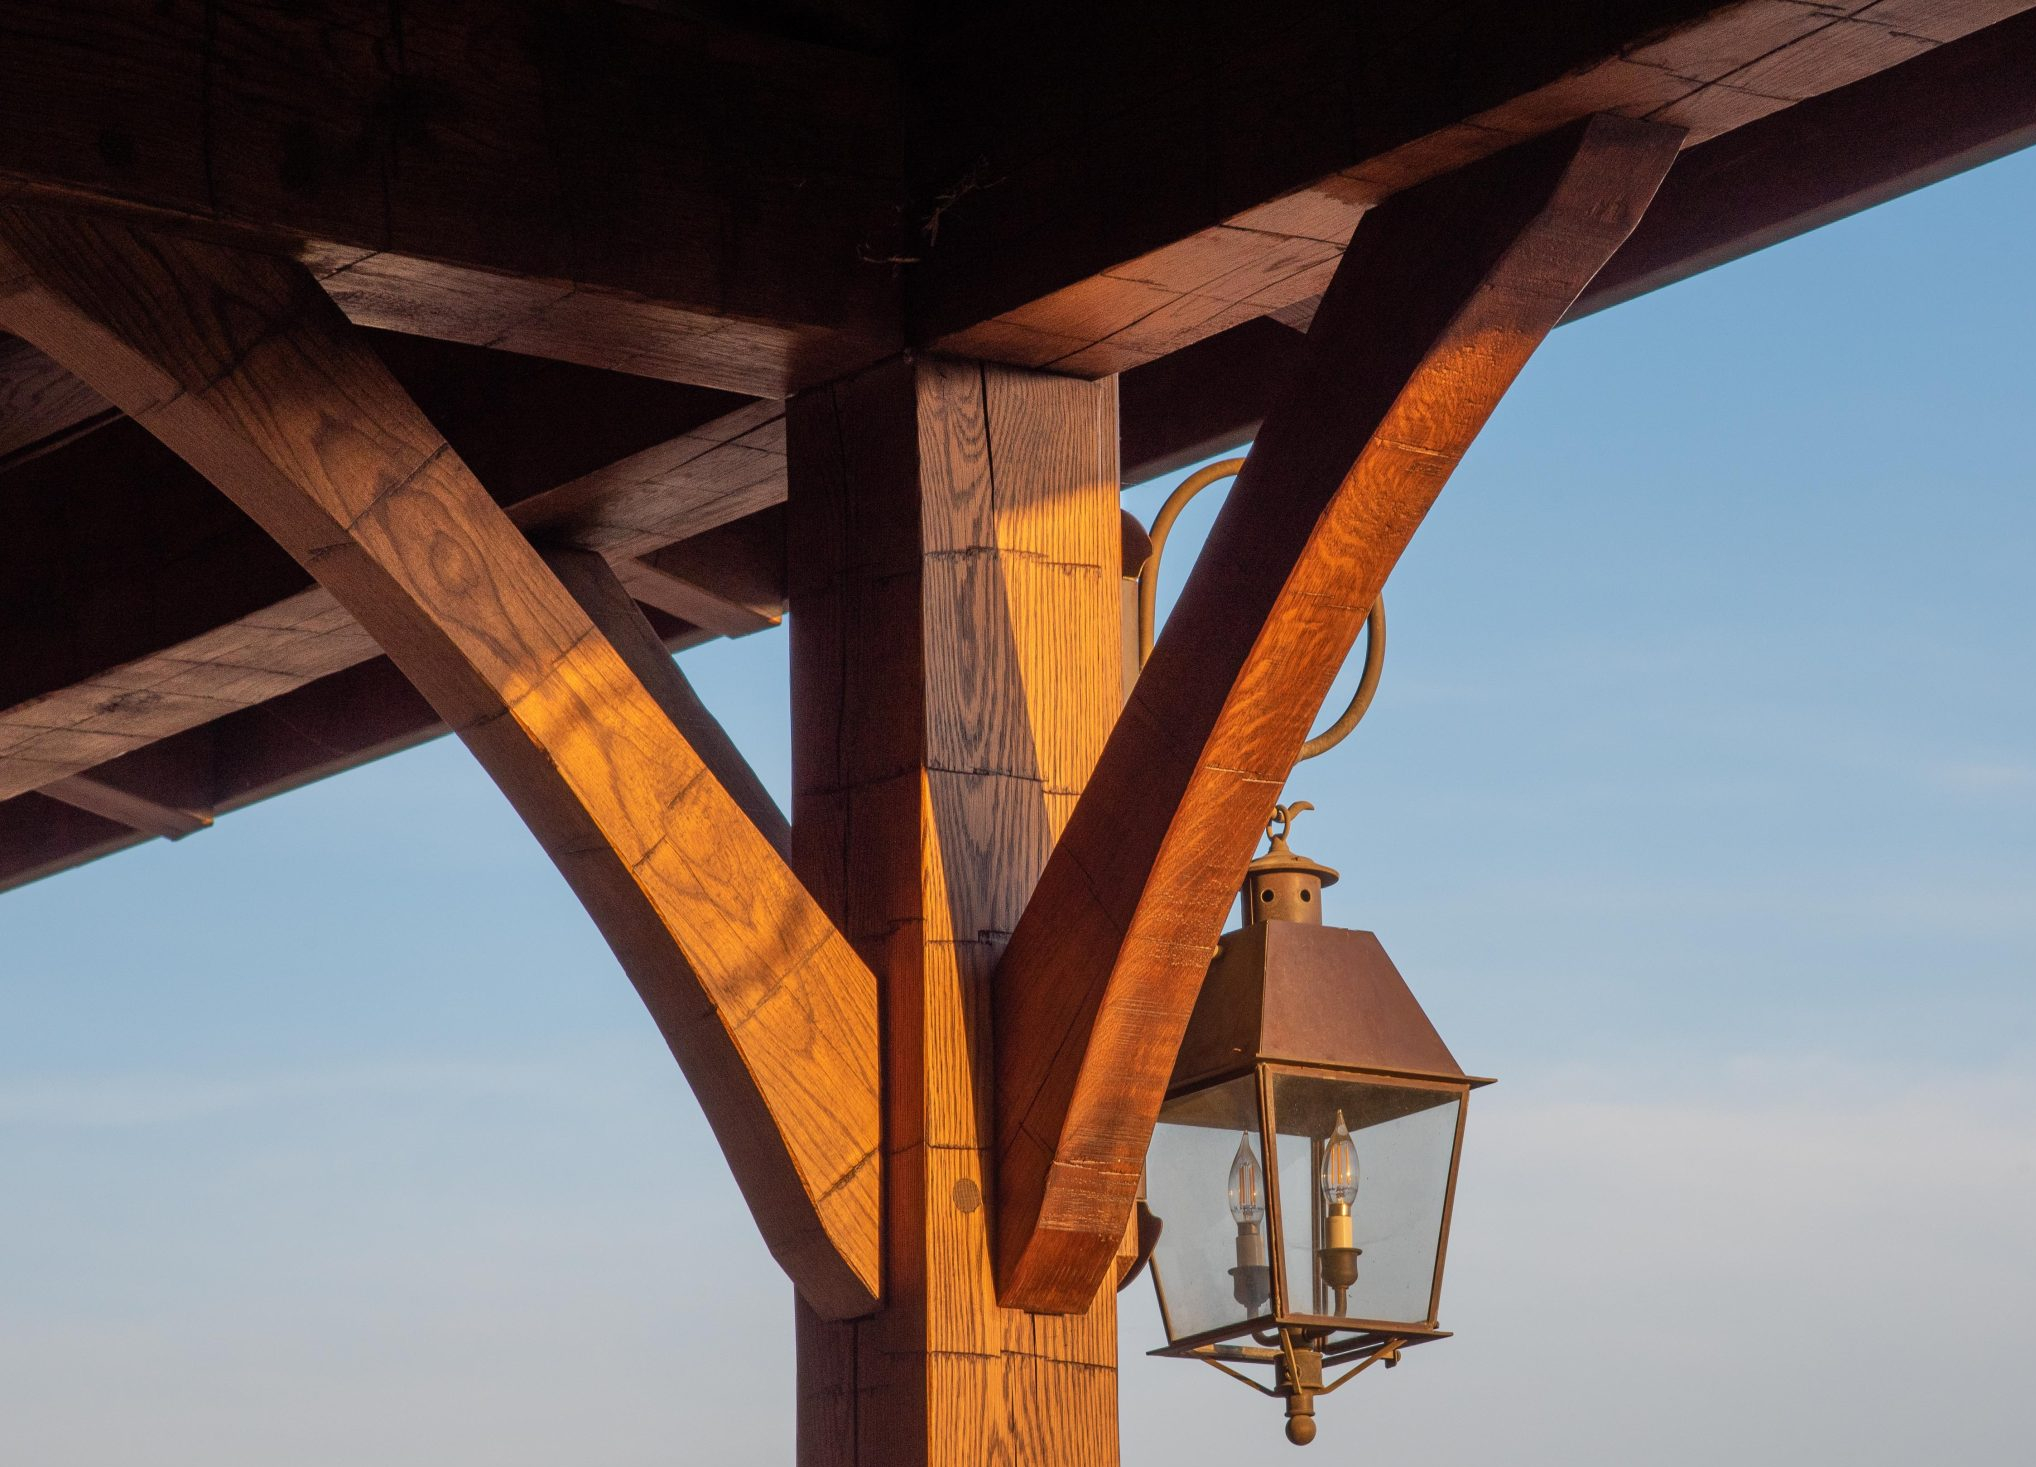
Rafters in a timber framed porte cochere.
Should timber framed purlins be in the plane of the roof, be raised above the roof framing, or rotated vertically?
If timber frame purlins are used as the secondary members in a timber frame roof system, there are several orientation choices to be made, some structural and some aesthetic. The purlins can be dovetailed flush into the top chords of the bents, they can be raised above the top chords and notched in, or they can be rotated vertically and notched into the top of the top chords.
The structural choice is whether to have the purlins perpendicular to the plane of the roof, which is the traditional look, or to rotate them so they are vertical. Vertical purlins are perpendicular to the force of gravity, making them stronger under load. Because vertical purlins are stronger, smaller beam sizes can be used making them a more economical choice.
The aesthetics of purlins is also important to the designer. Dovetailed purlins flush with the roof system are the most traditional look, but raising the purlins above the top chords opens up design possibilities with lighting and shadowing. Mechanicals, like sprinkler pipes and wire chases can also be hidden in the gap between the top chord and the purlin. Please see the photos below to get an idea of the possibilities.
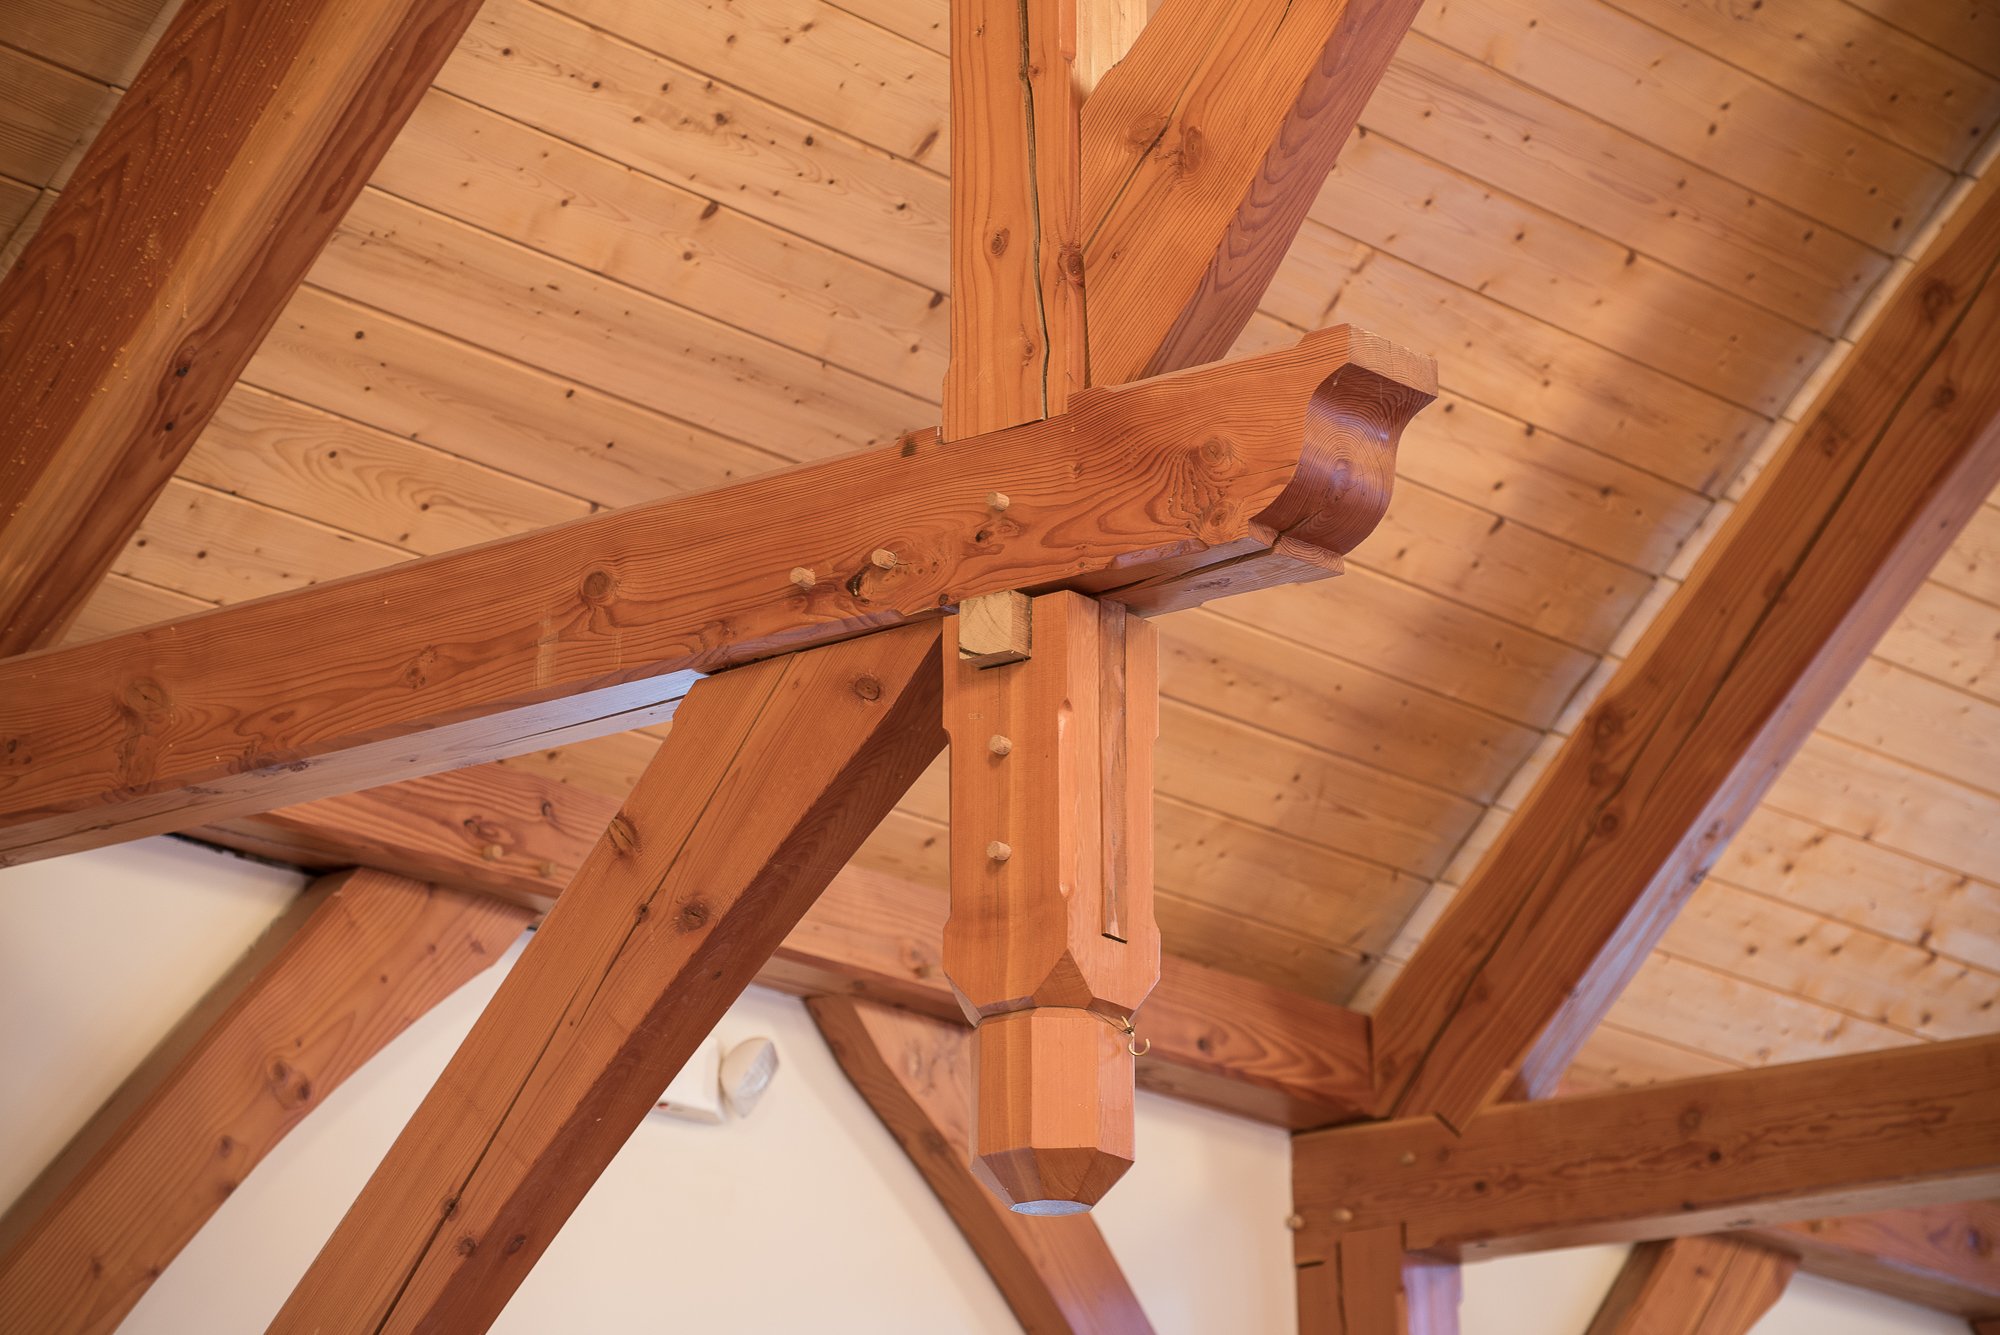
Dovetailed timber purlins in the plane of the roof flush with the top chord.
Vertical purlins above the top chord of the truss. Notice how the gap allows for lighting and mechanicals.
Raised purlins perpendicular to the top chord of the truss.
Traditional purlins in hand hewn oak.
Will using kiln dried timber stop the checking?
Using kiln dried material will help stop checking in timber little bit. It is important to know that KD timber is only dried to a moisture content of 16% 1″ deep into the timber. The center of the timber is not dried and is still susceptible to cause checking at the surface. Kiln drying material also causes the knots on the surface to chip out then the timbers are planed, whereas green knots tend to stay in place for a nicer looking timber.
What is the best roof pitch for the top and bottom chords in a heavy timber scissor truss?
In a heavy timber scissor truss, the bottom chord pitch is usually half of the top chord pitch. So a 12/12 scissor truss would have a bottom chord pitch of 6/12 and an 8/12 would have a bottom chord of 4/12. That rule is not set in stone however. Depending on the configuration and loading on the truss, the bottom chords might have to be less to get the tension forces to work, especially on low pitch roofs. A 6/12 pitch may require a 2/12 bottom chord pitch to get enough depth in the truss to make it structurally sound.
Scissor trusses act like big leaf springs on a truck – they flex under load. In area with high roof loads, either from wind or snow, the geometry of a scissor truss may need to be adjusted to reduce that flex and to make sure that there is enough section at the seat to carry the loads.
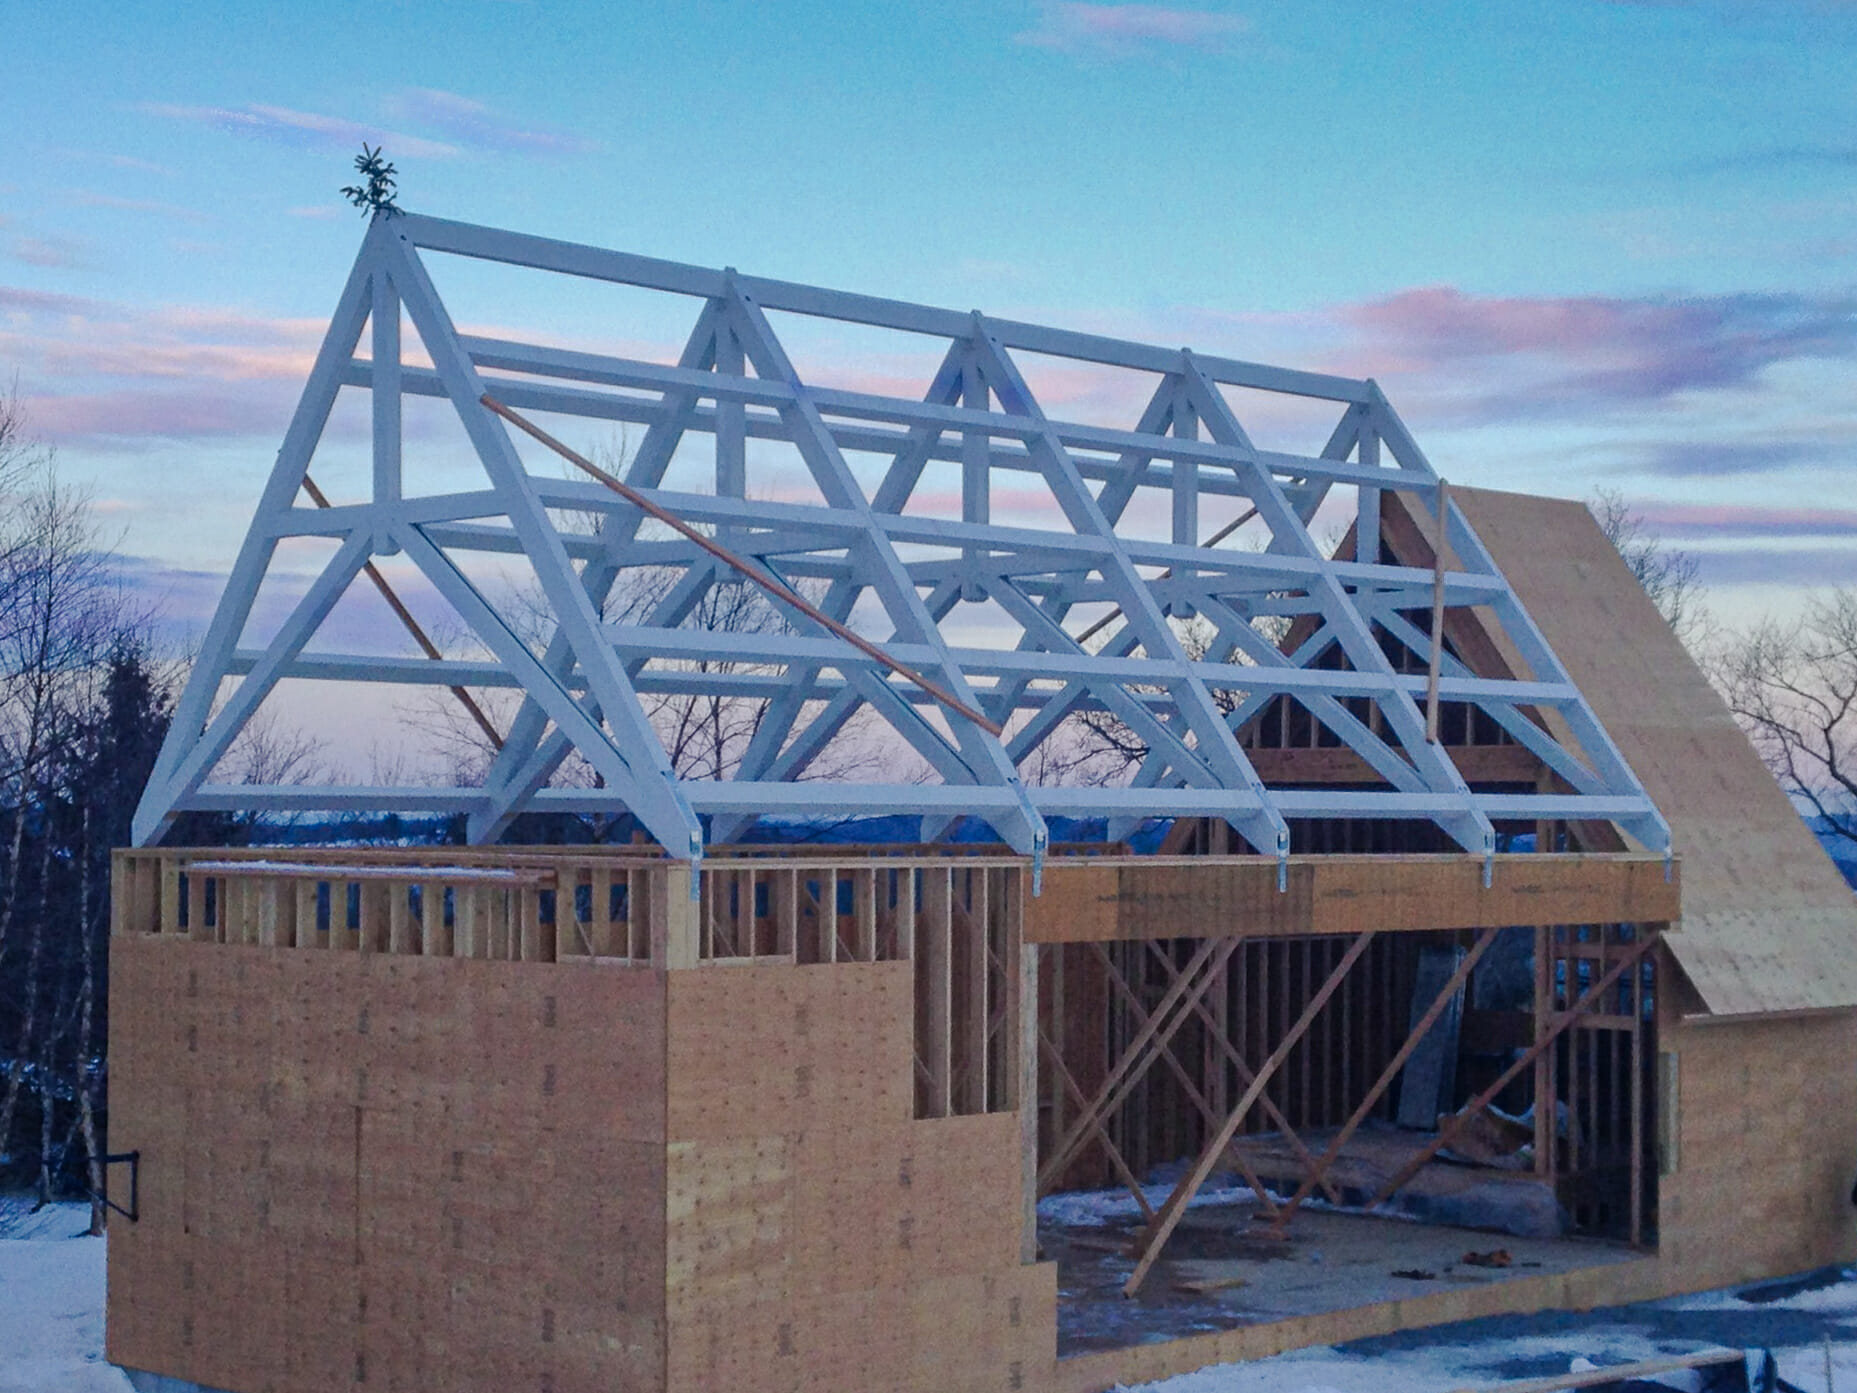
Modified scissor truss on a high pitched roof.
Typical residential scissor truss.
Sixty foot scissor truss in an executive center.

Steep scissor truss with a steel tie rod.
Do open timber trusses really need tie rods?
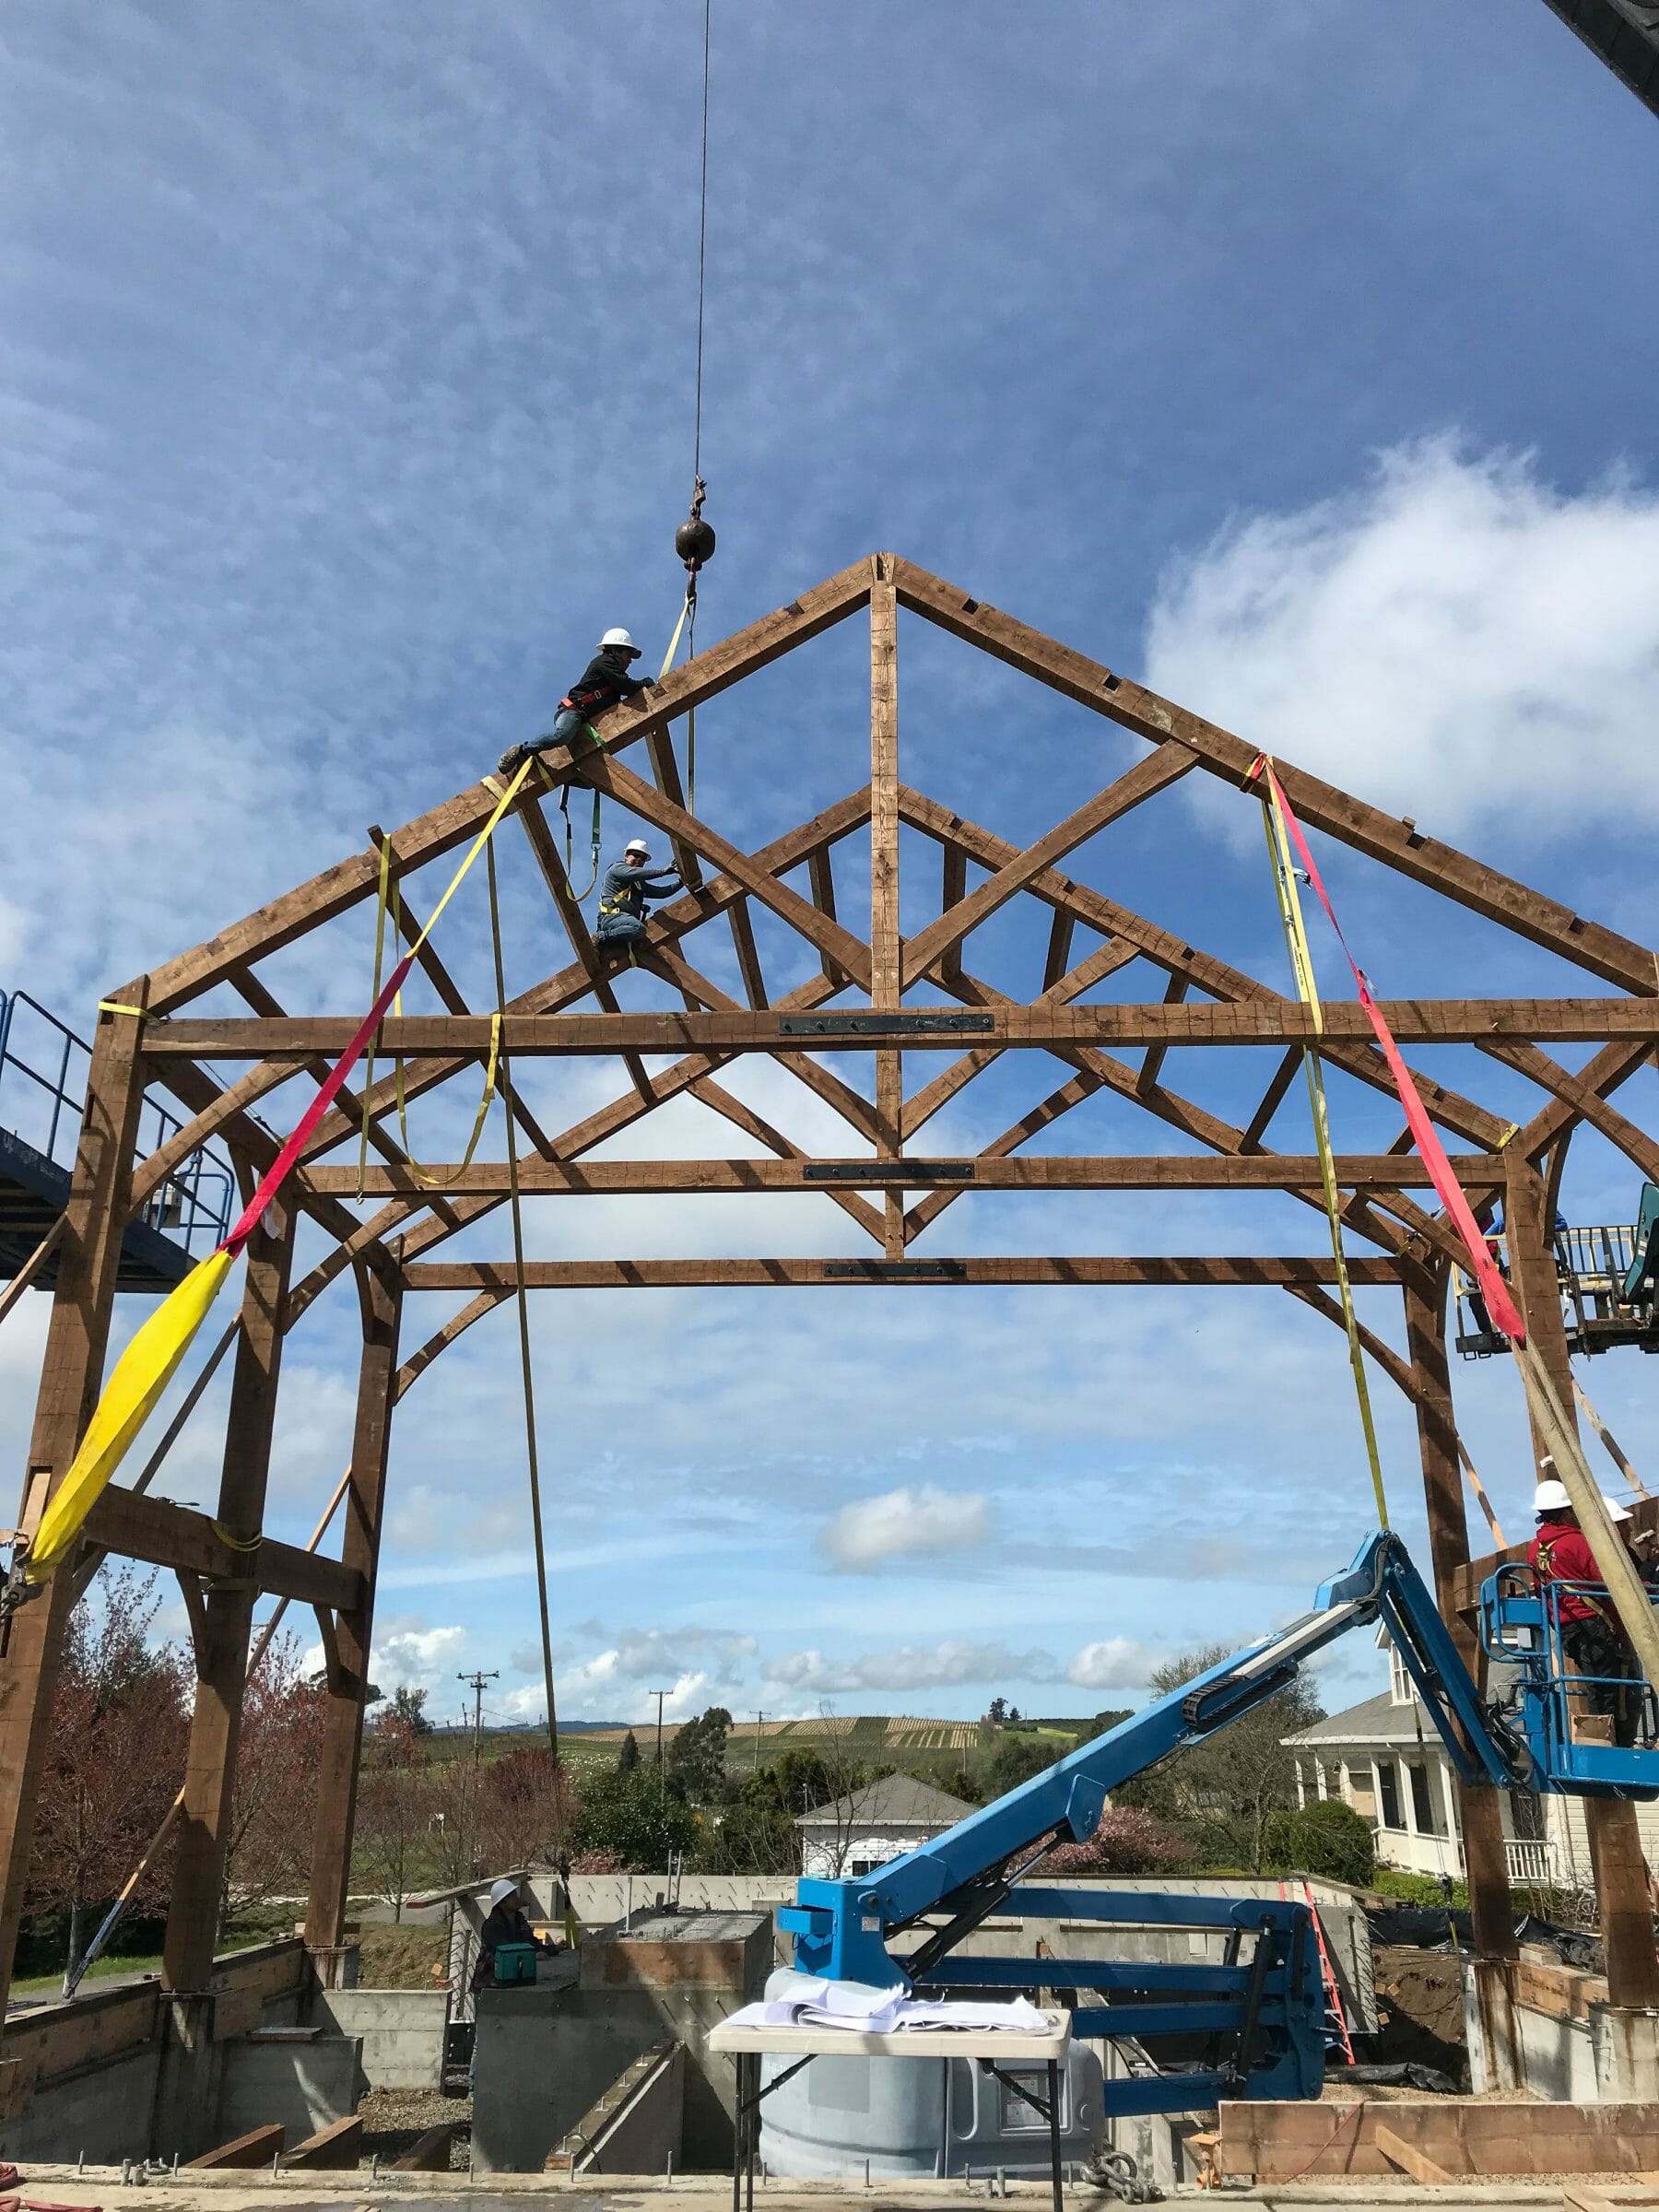
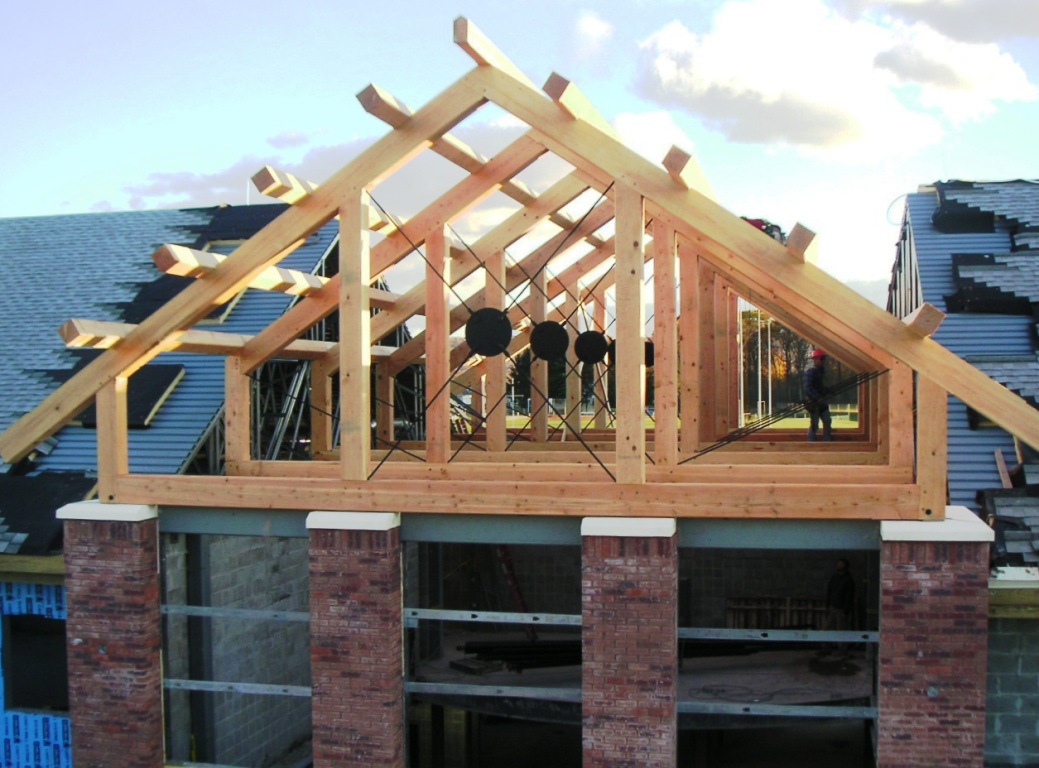
The need for a structural steel tie rod on a timber truss depends on structural load, snow load, roof pitch and truss design. Many people like the look of timber trusses without tie beams or tie rods that run from eave to eave. Not tie rod gives a completely open look. Think of the great arched hammer beam trusses in old European cathedrals. There were no tie rods and the trusses have been standing for hundreds of years, but there is an important caveat – the cathedrals used flying buttresses to push the walls together – without the buttresses, the trusses would have collapsed long ago.
In a truss with high spreading forces the tie rods are required or the truss can be buttressed with either masonry on the outside or steel moment frames inside the walls. In a truss with moderate loads a modified hammer beam truss can be used with a raised wooden tie beam, diagonal webs and hidden steel tie rods in the timber webs.
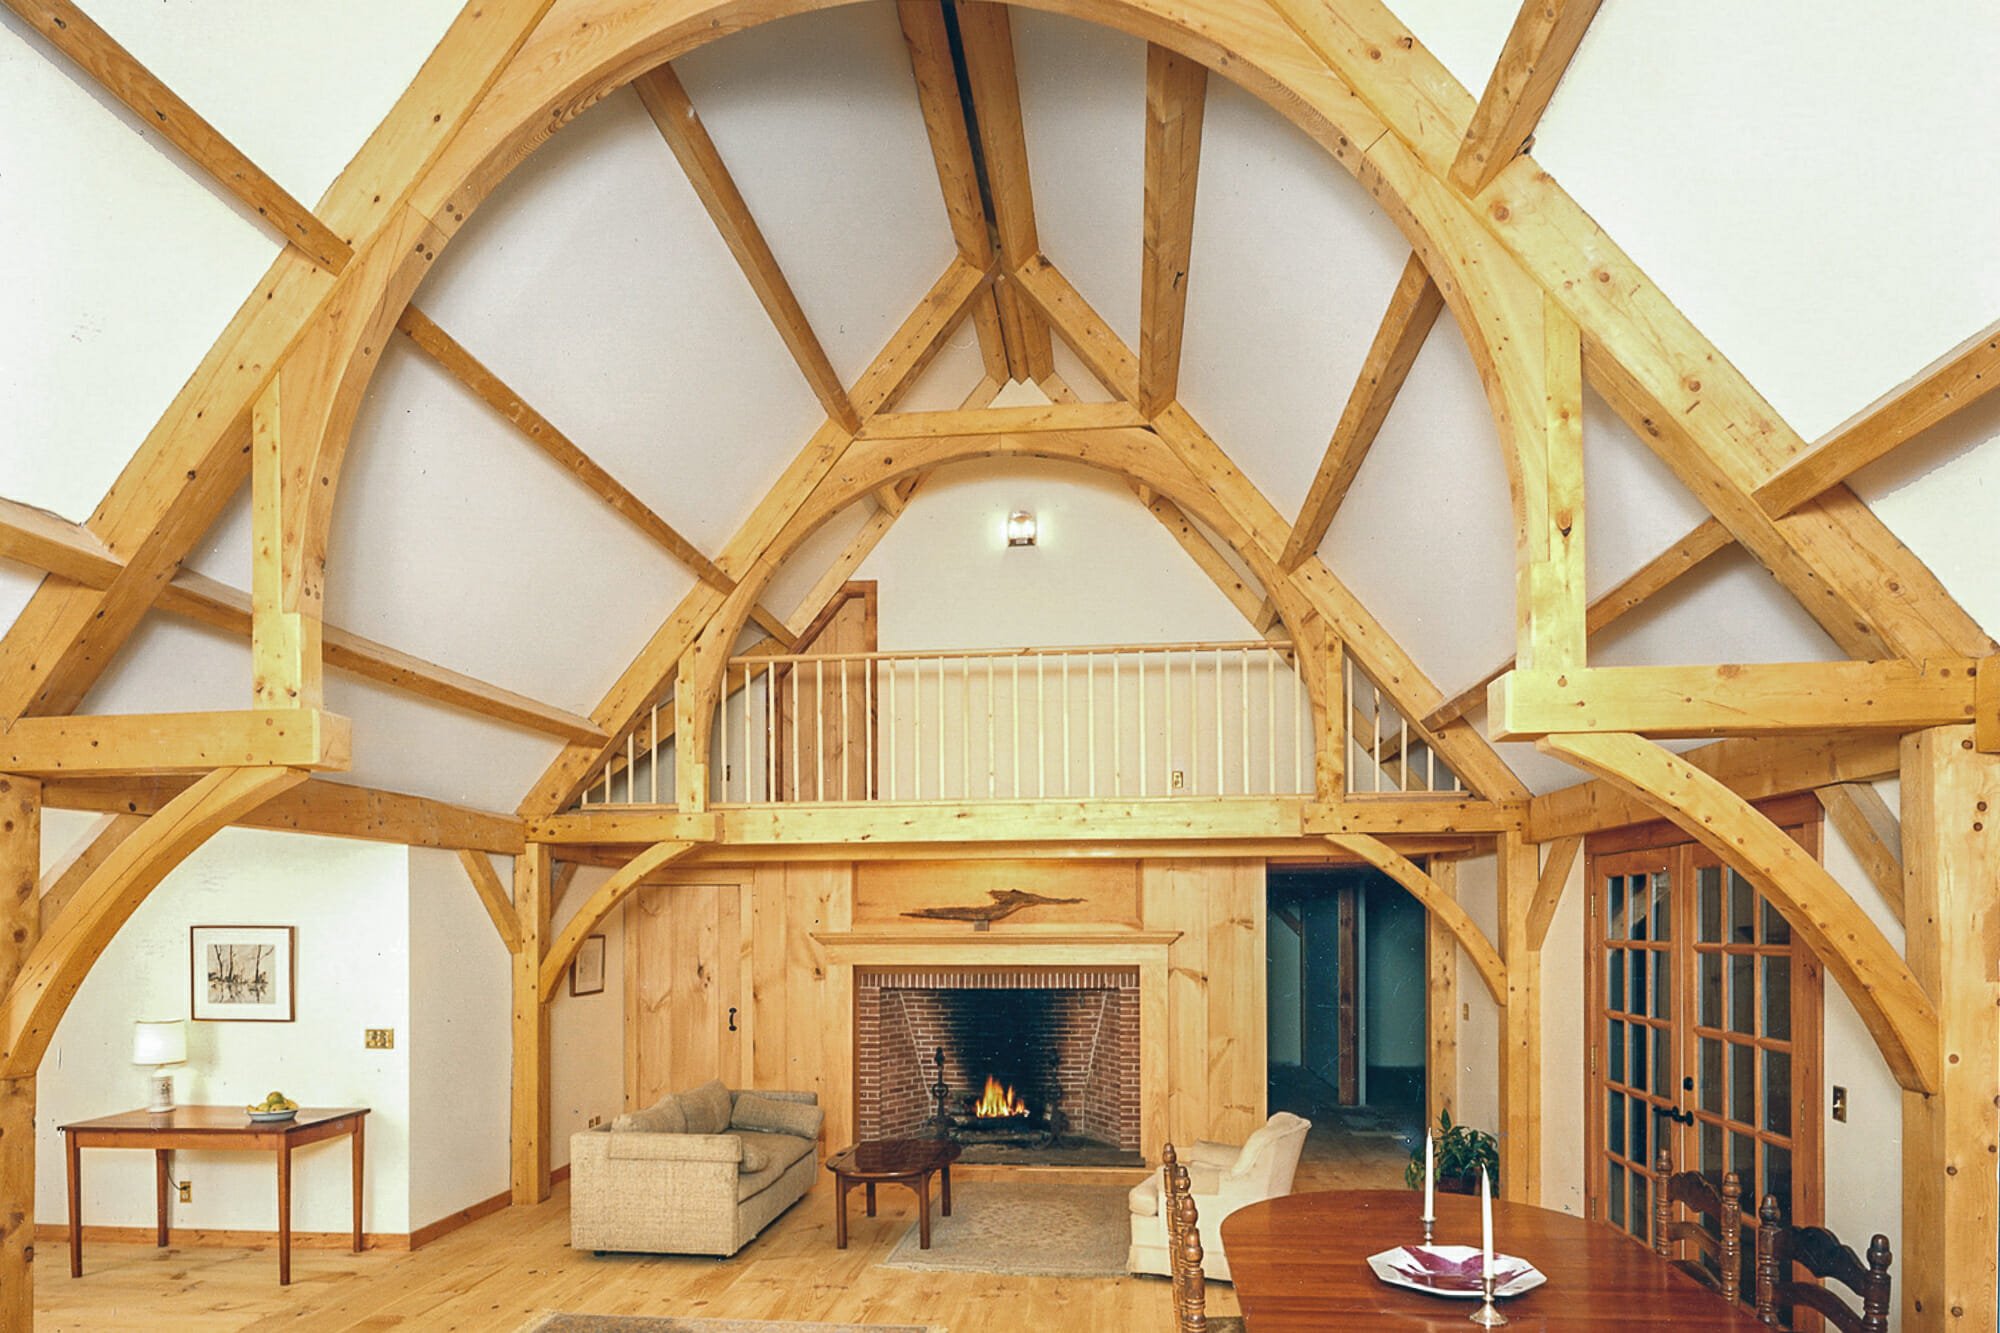
Classic hammer beam truss with buttressed walls.
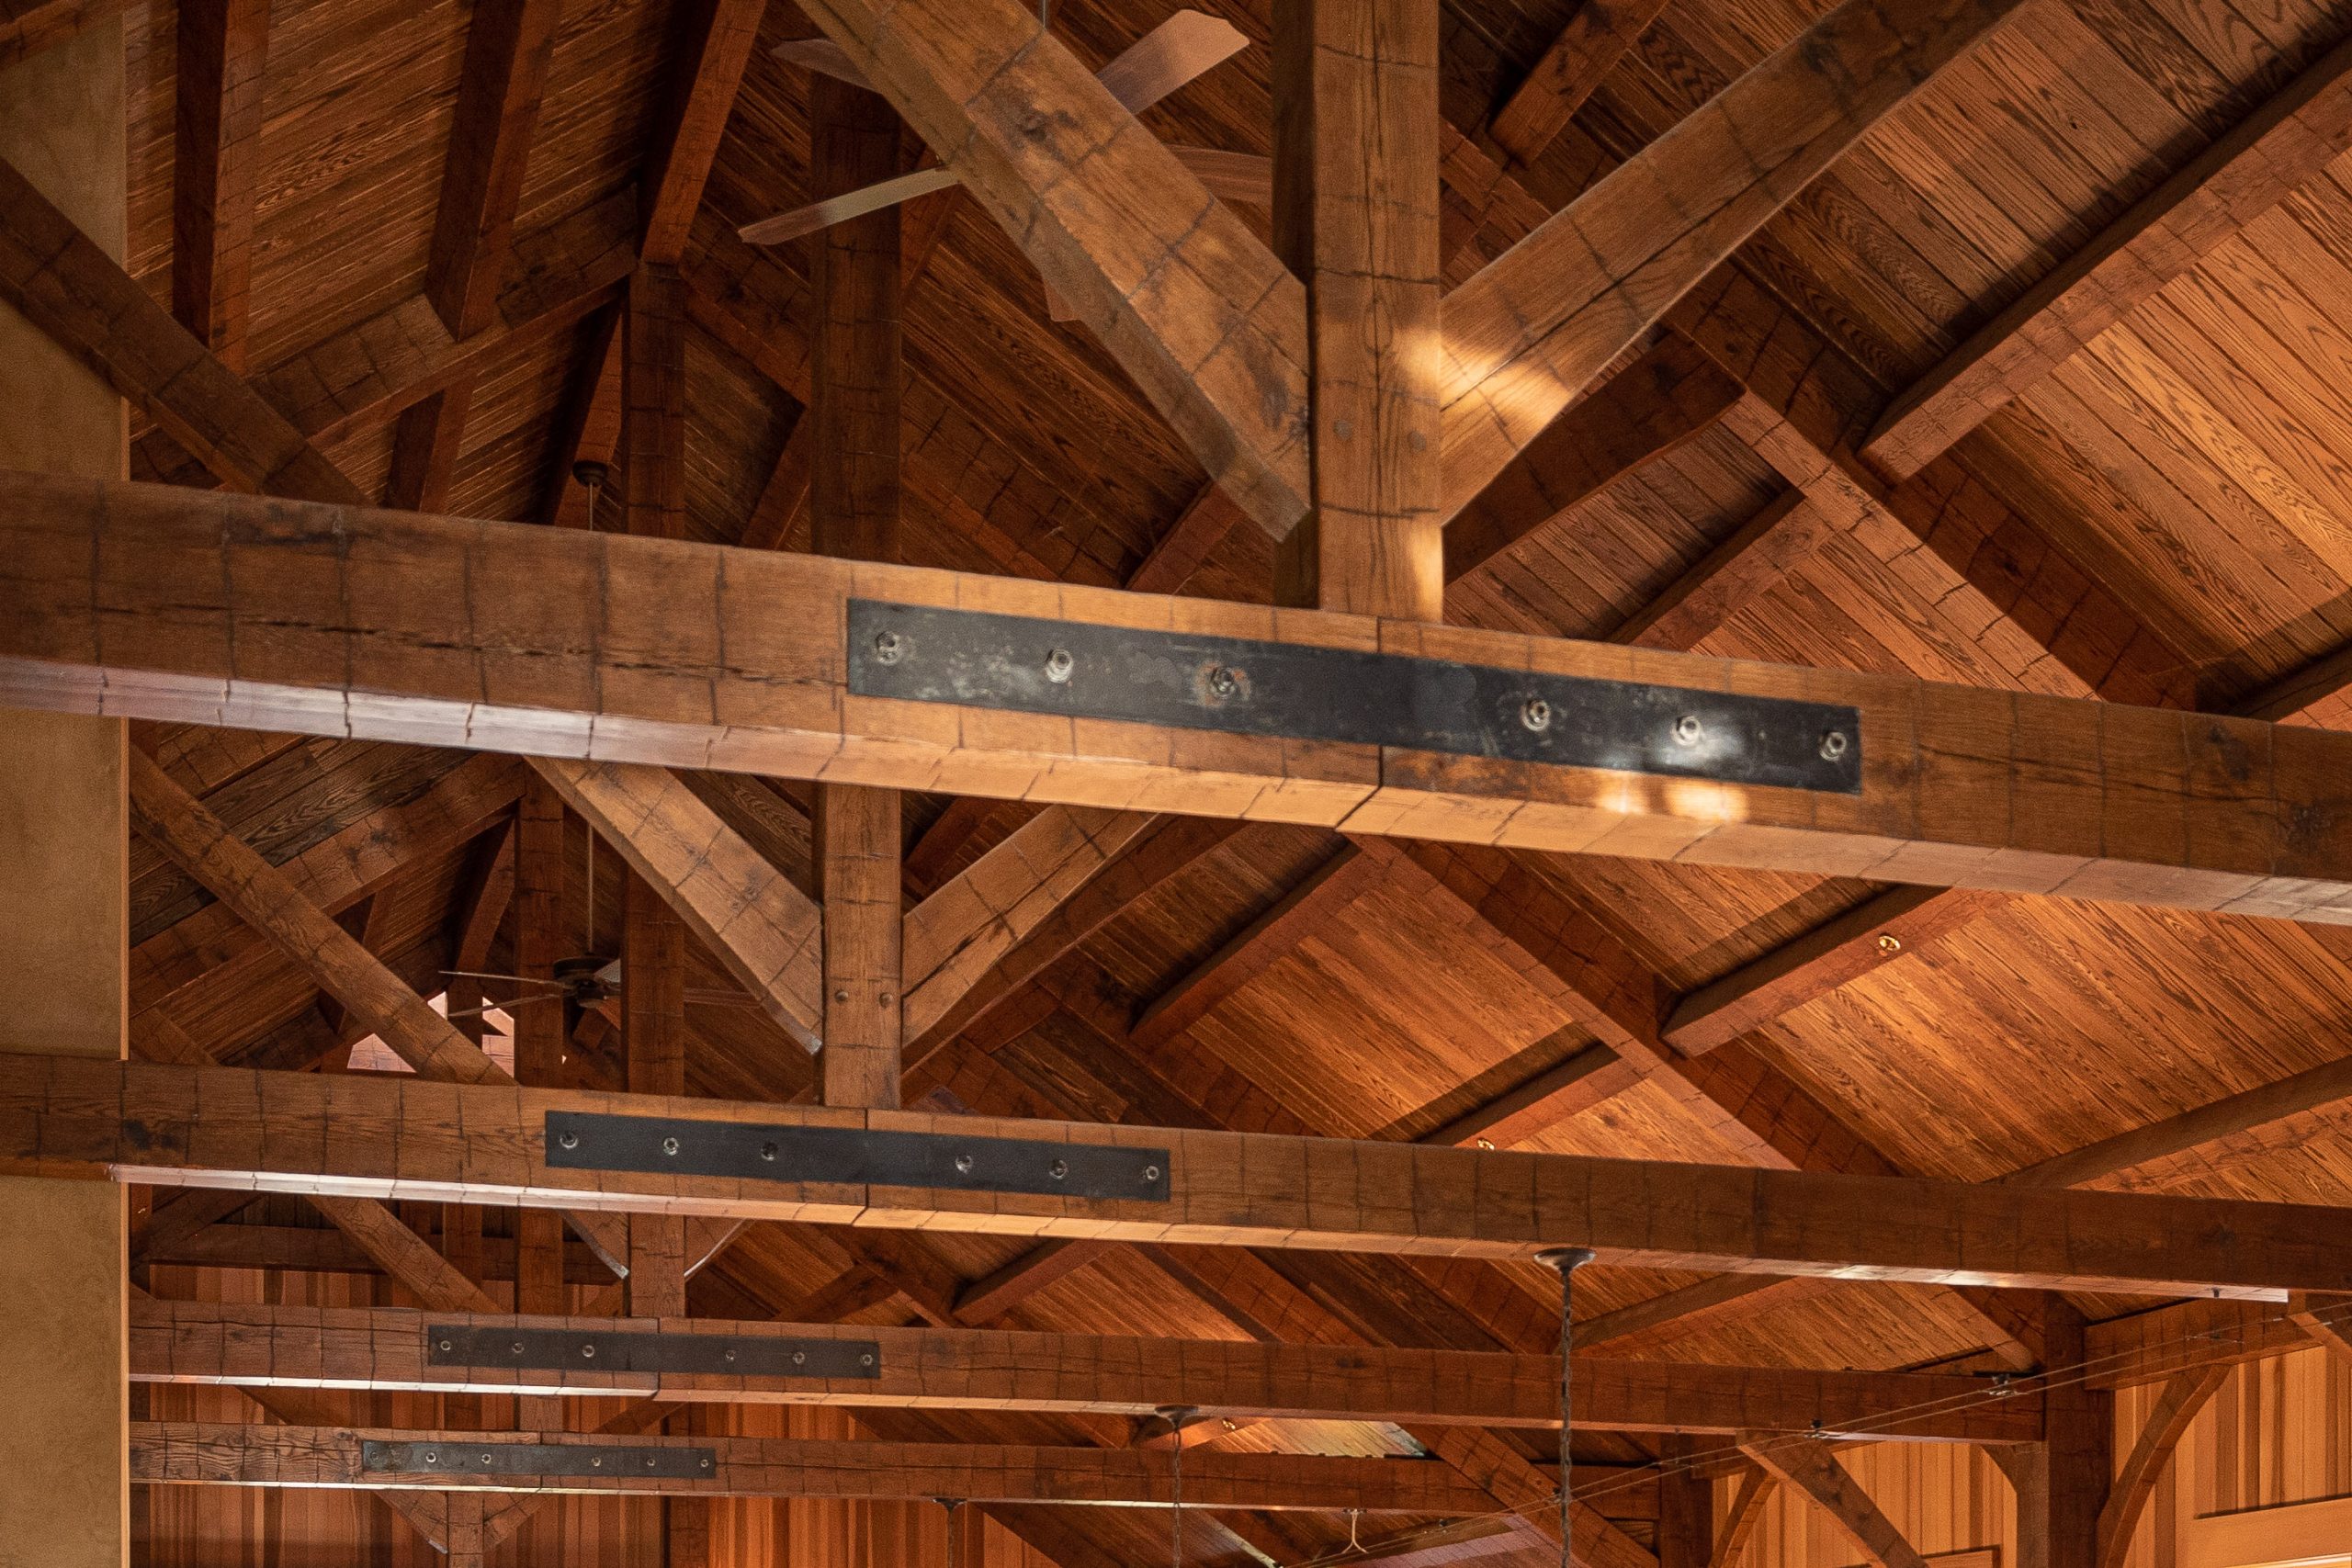
Modified hammer beam truss with steel tie rods hidden in the webs.
Open timber truss buttressed by a steel moment frame.
Modified hammer beam truss with fixed post bases and traditional joinery.
How do you sound insulate the floor of a timber framed home?
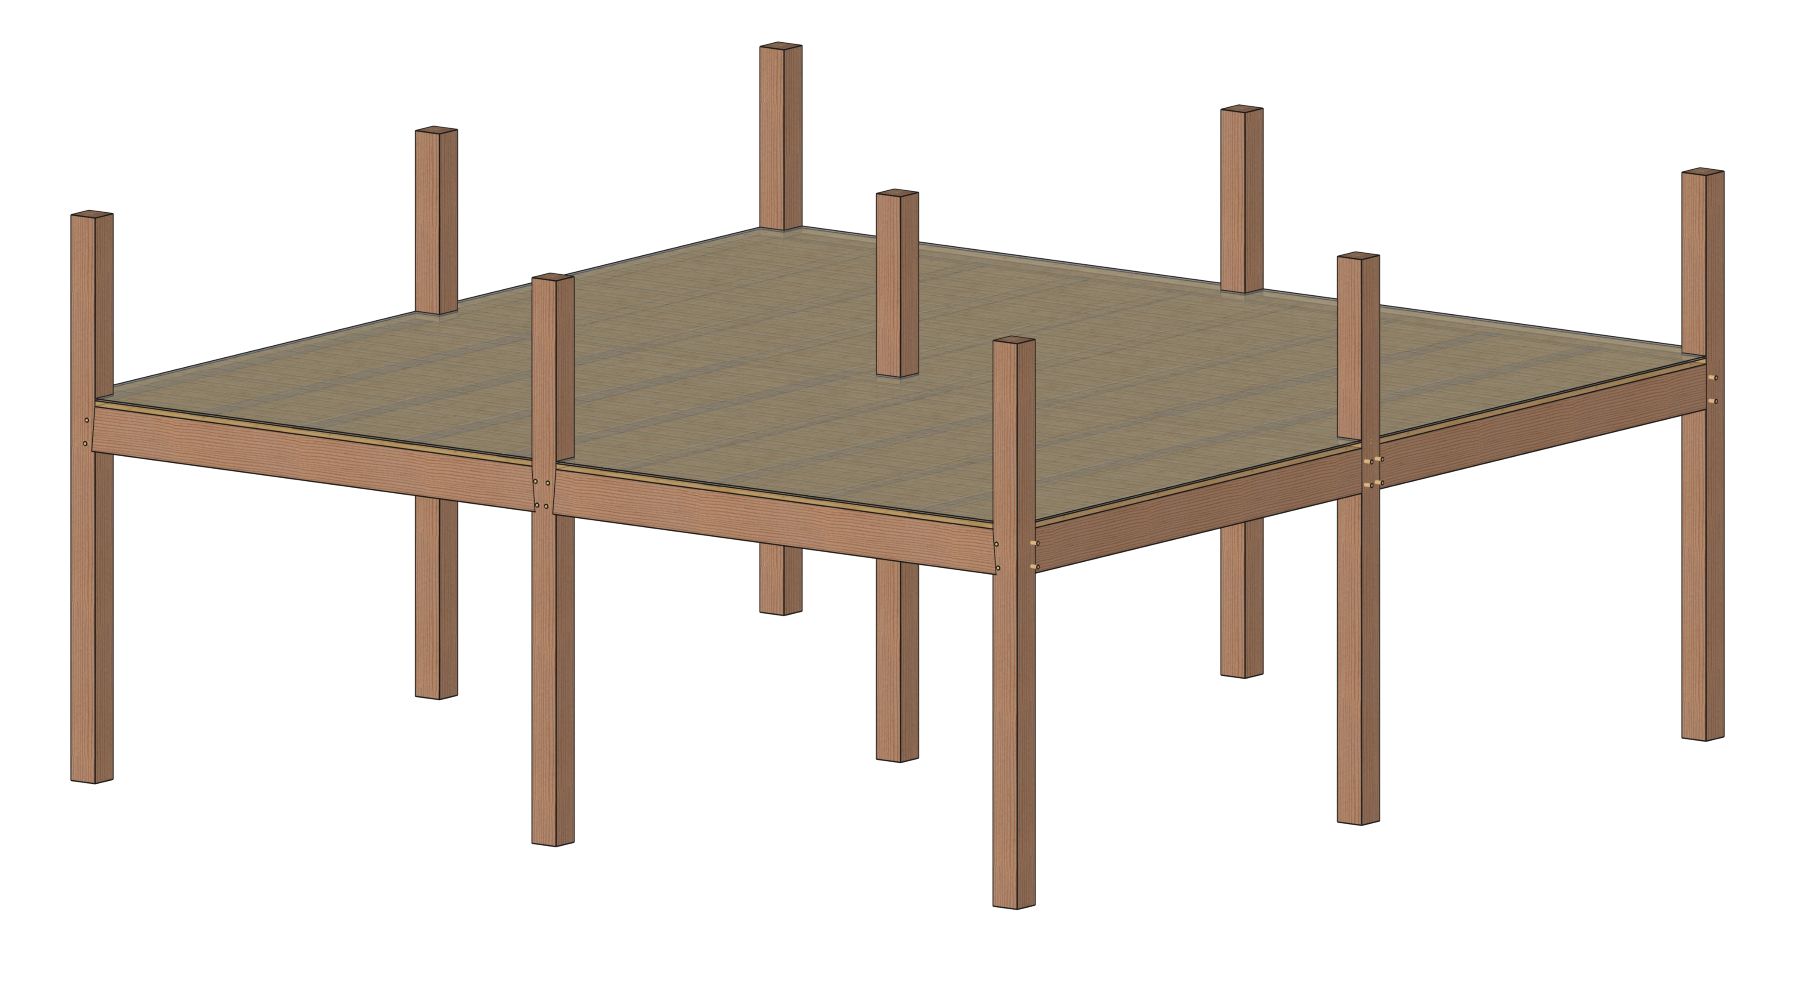
Sound transmission between floors of a timber framed home can be a concern. Ski houses, where the budgets are tight, often have the 2x decking sanded and finished right on top of the joists – every step a person takes upstairs could be heard downstairs. That might be fine for a party house, but in a family home hearing people walk around upstairs can get old.
There are a few different solutions to mitigate the sound. The easiest and least expensive one is to put down a layer of Homasote on top of the decking, then either put carpet down or a finished wood floor down on top of the homasote. The homasote and carpet will soften sound transmission through the floors, but not eliminate it entirely.
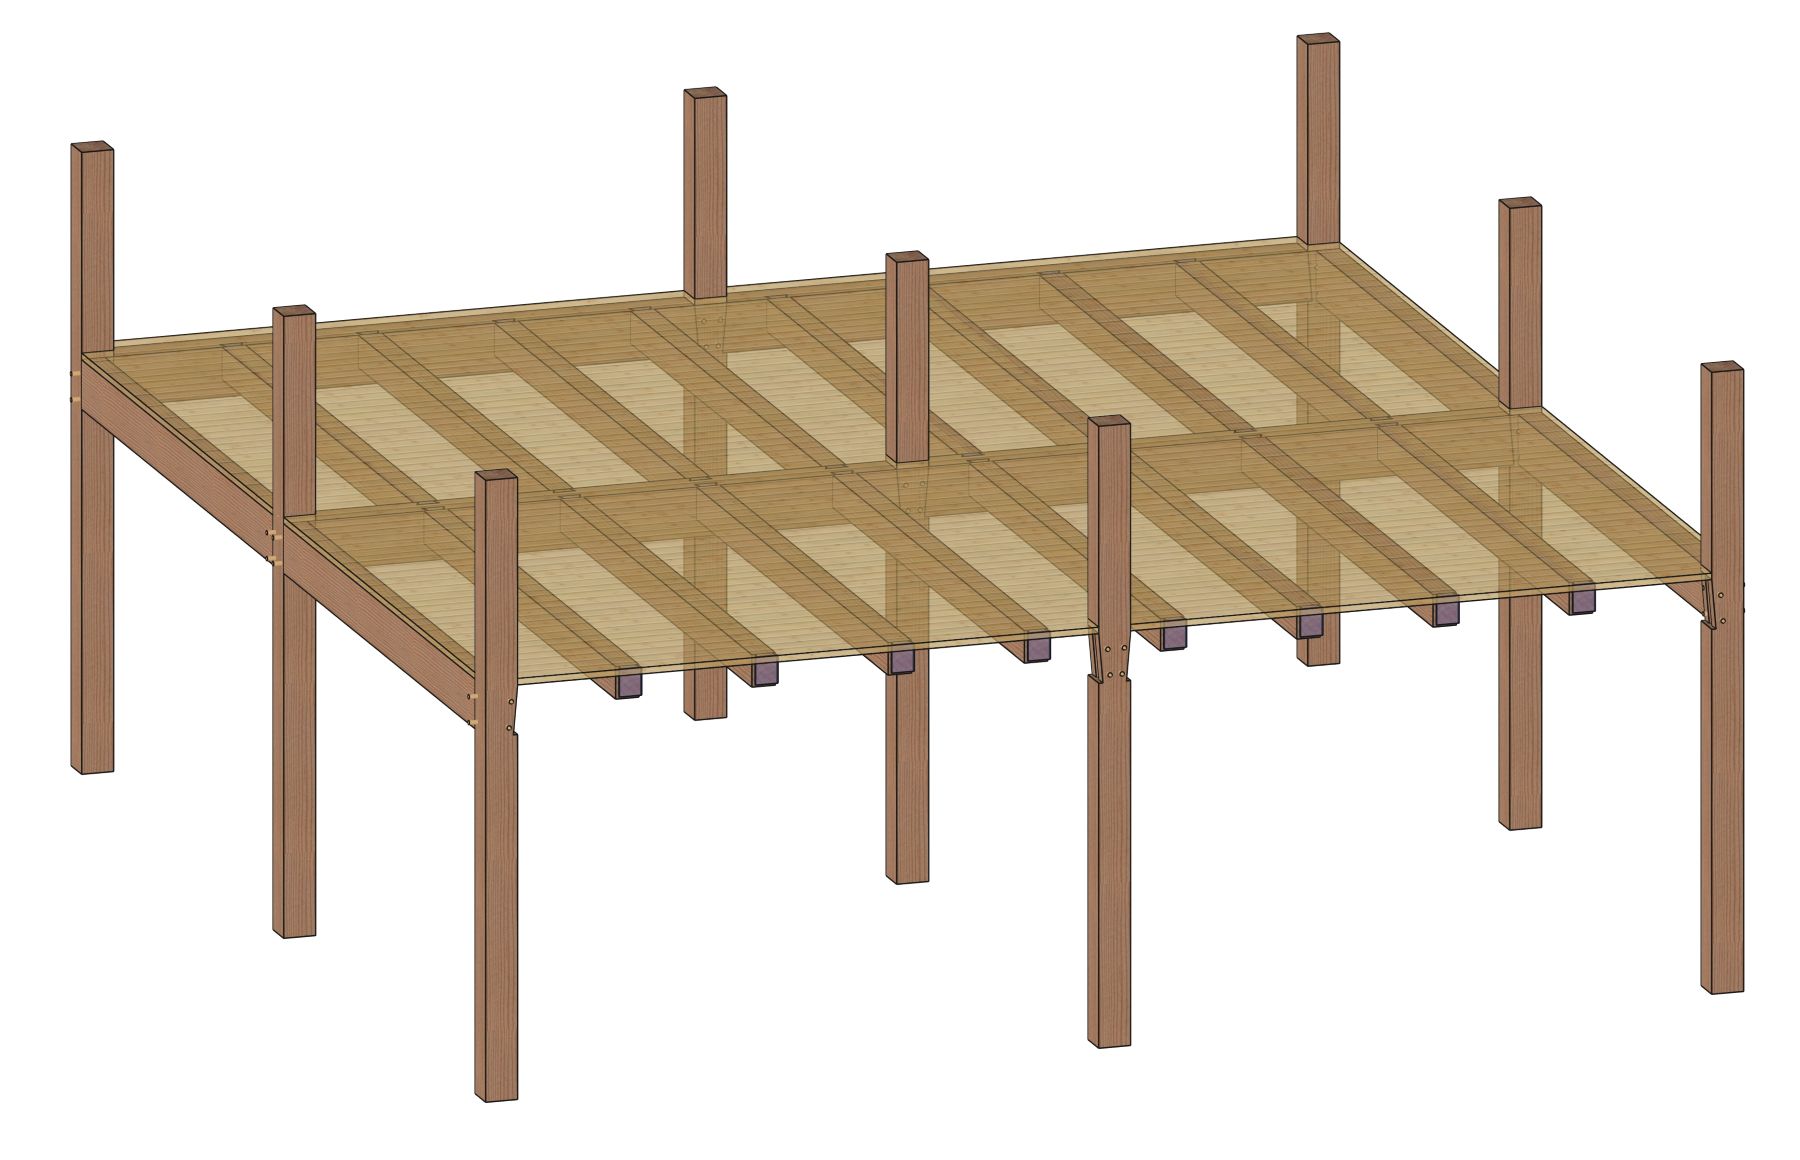
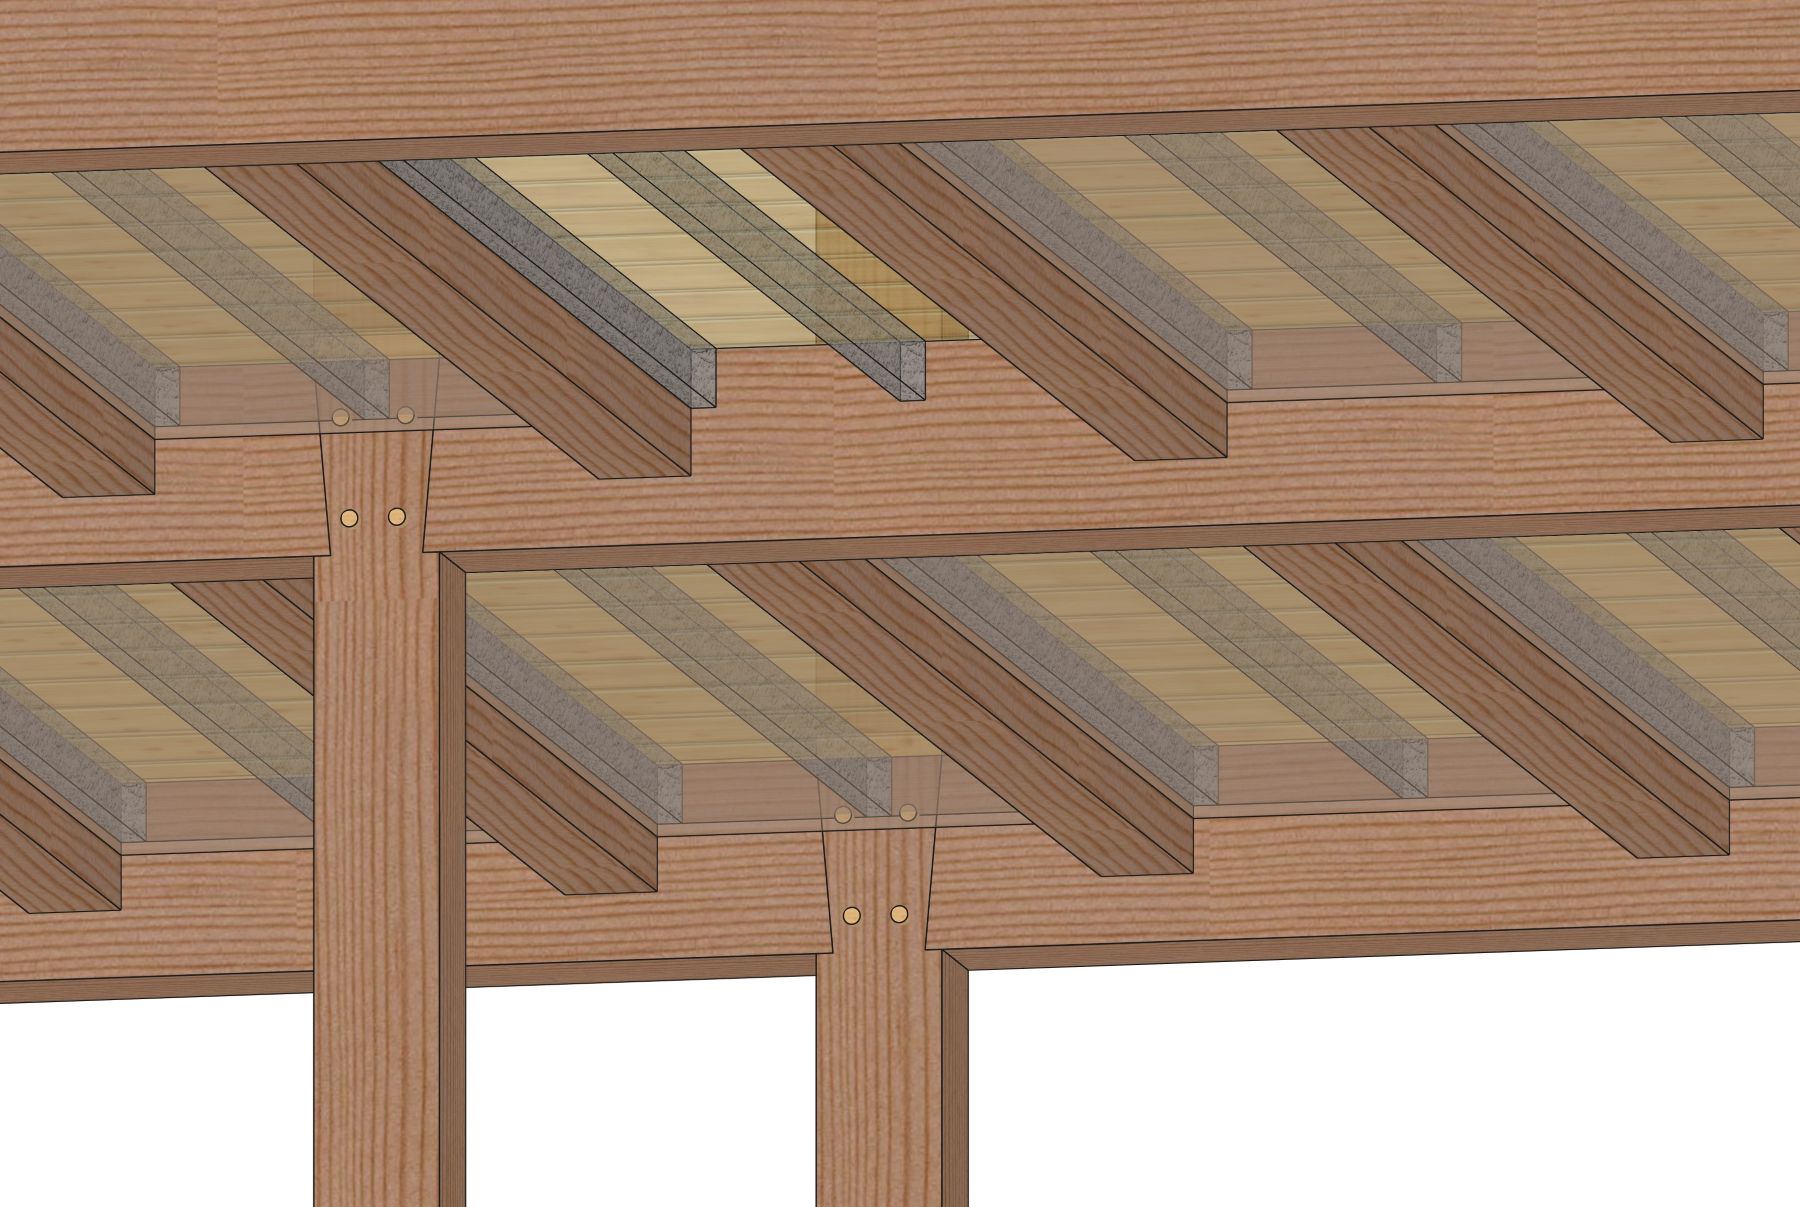
Another solution is to frame a 2×8 floor on top of the decking. While it sounds structurally redundant, there are advantages: mechanicals, like plumbing and electric, can be easily run through the 2x floor and either fiberglass or rock wool sound insulation can be installed to deaden the sound to a level comparable with conventionally framed home.
A third solution is to use tall timber joists, like 4×12’s, and install a soffit below the decking and in between the joists to hold mechanicals and sound insulation. The bottom of the soffit can be finished with 1x T&G paneling or sheet rock. It is a nice solution that is less expensive than doing a full floor frame above.
Wood Decking on Timber Joists
Homasote on wood Decking and Timber Joists
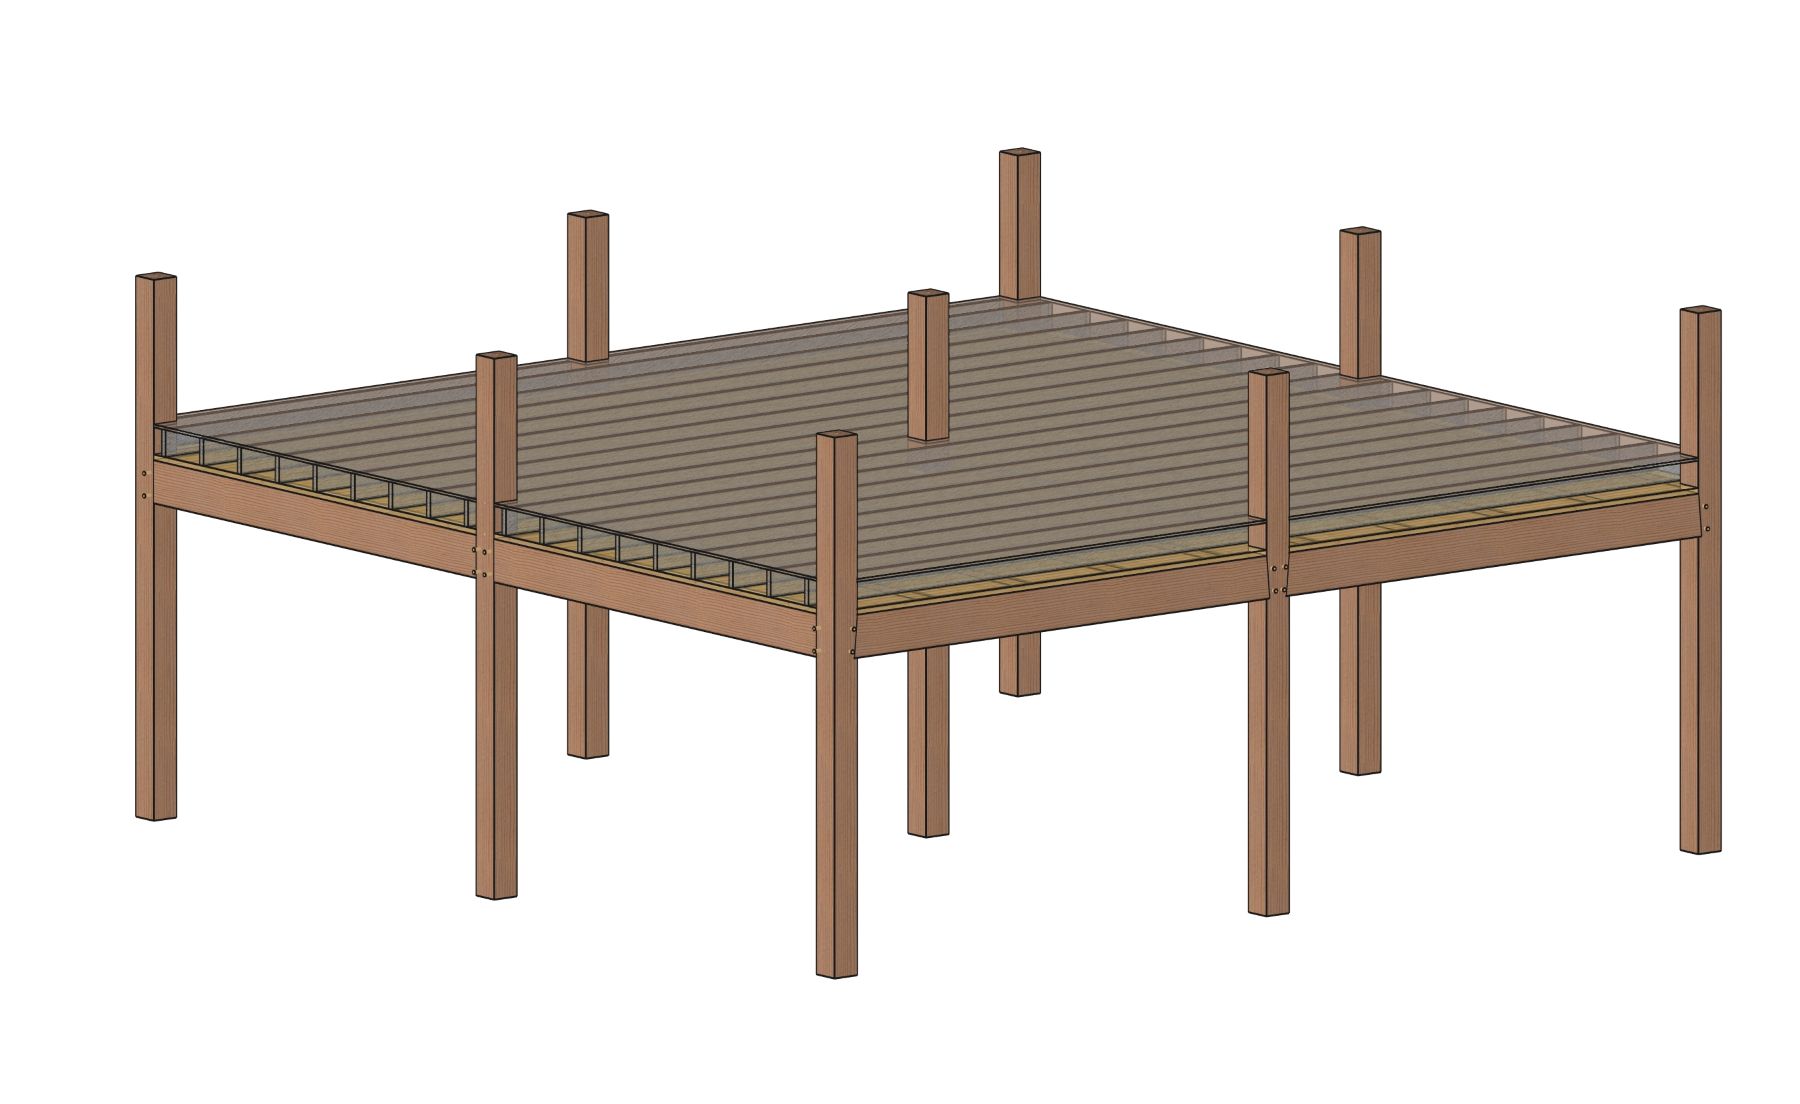
2x Floor System on Timber Joists and Decking.
Timber Frame Floor and Ceiling Soffit.
How big is a typical knee brace in a timber frame?
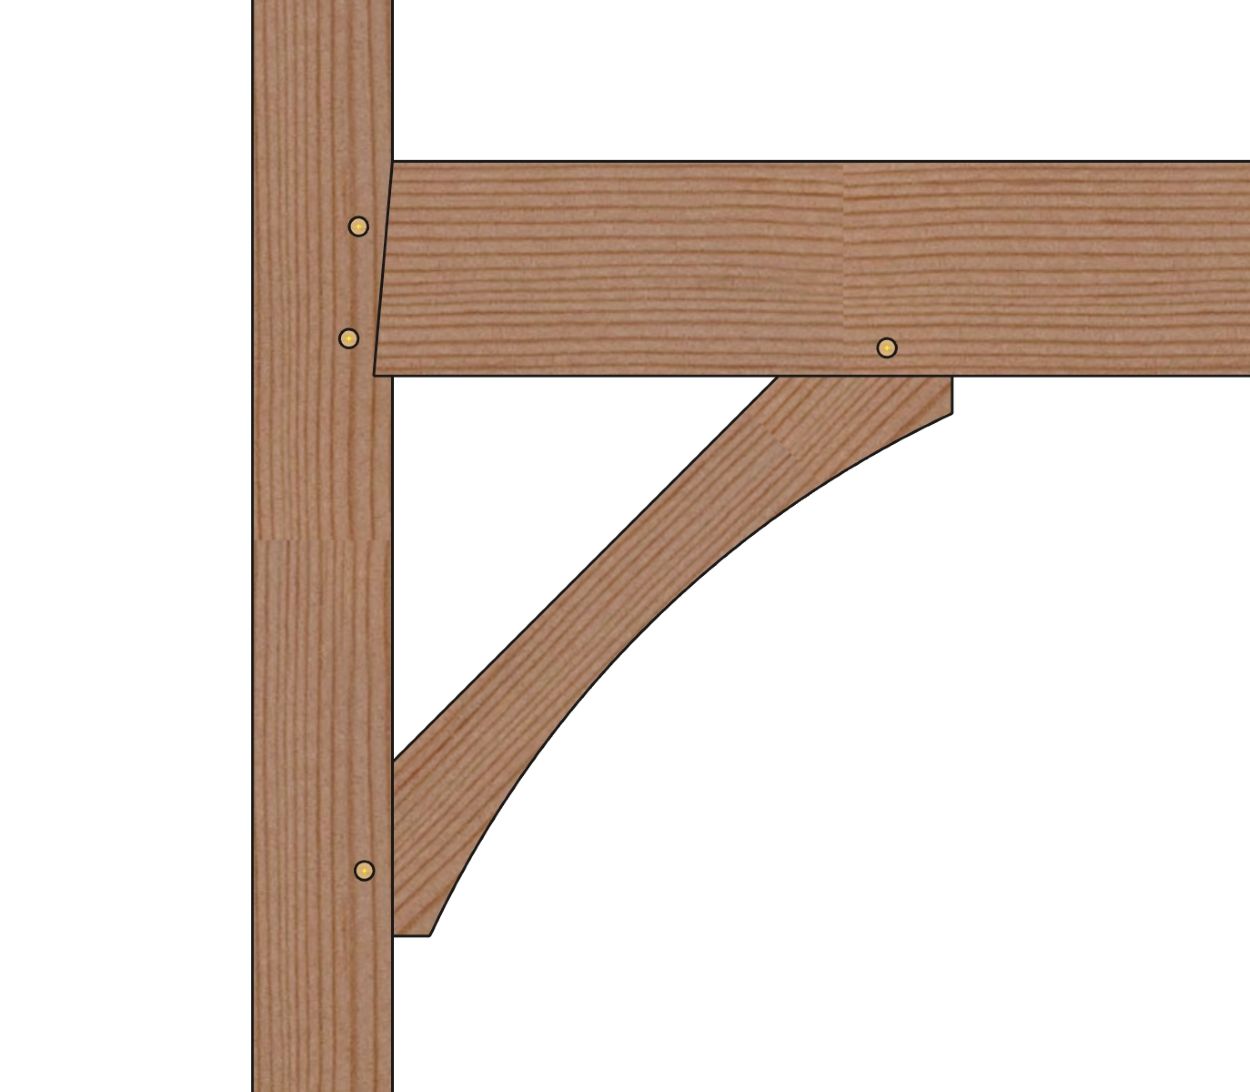
A typical knee brace in a timber frame is 4″x6″ in section and runs 2’6″ horizontally and vertically, although they can be larger or smaller in section and run shorter or longer depending on the owner’s tastes and structural requirements. Knee braces can also have decorative curves cut into them to add grace and elegance to a timber frame. When curves are added, the brace becomes deeper, perhaps to a 4″x8″ or 6″x12″ depending on the depth of the curve.
Knee braces can be structural if they are required to resolve lateral loads, or decorative if the lateral loads are being resolved by the wall sheathing. If the braces are decorative, they can be omitted if they interfere with window or door openings. Knee braces can have different shapes and angles too. Some examples are shown below:
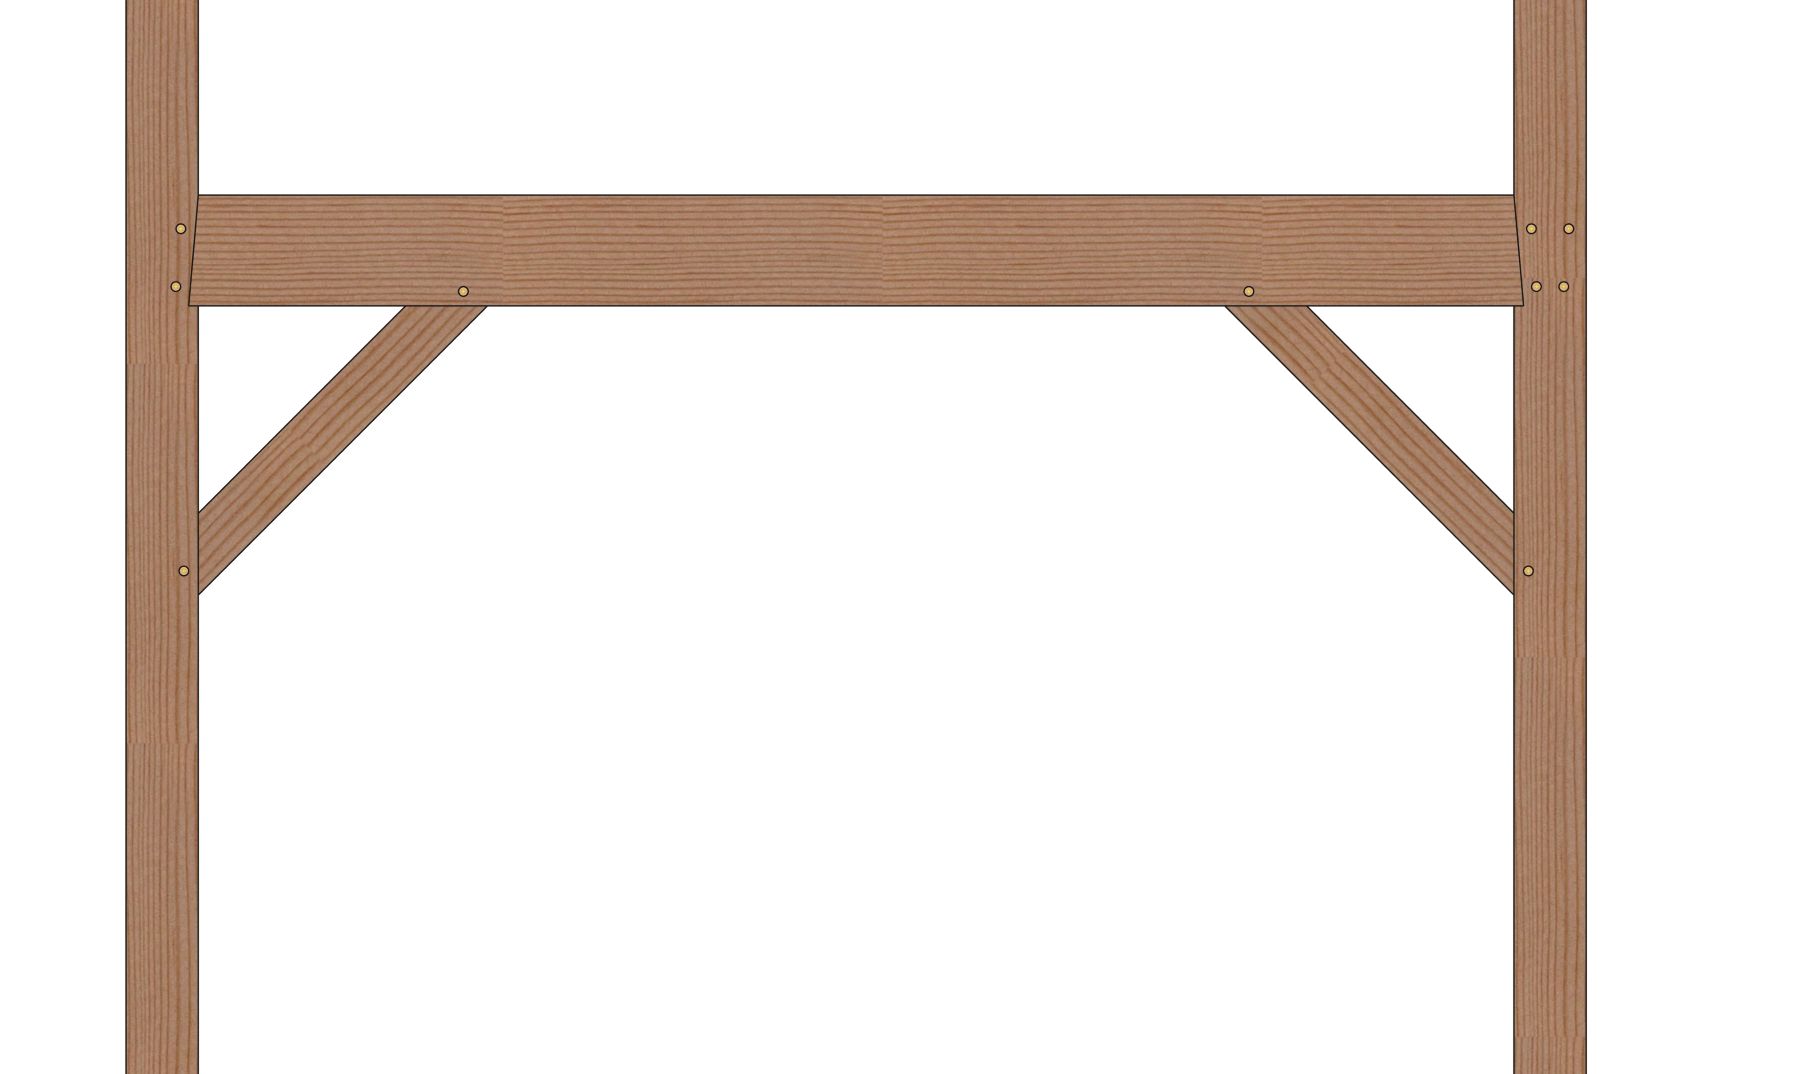
Straight Knee Brace
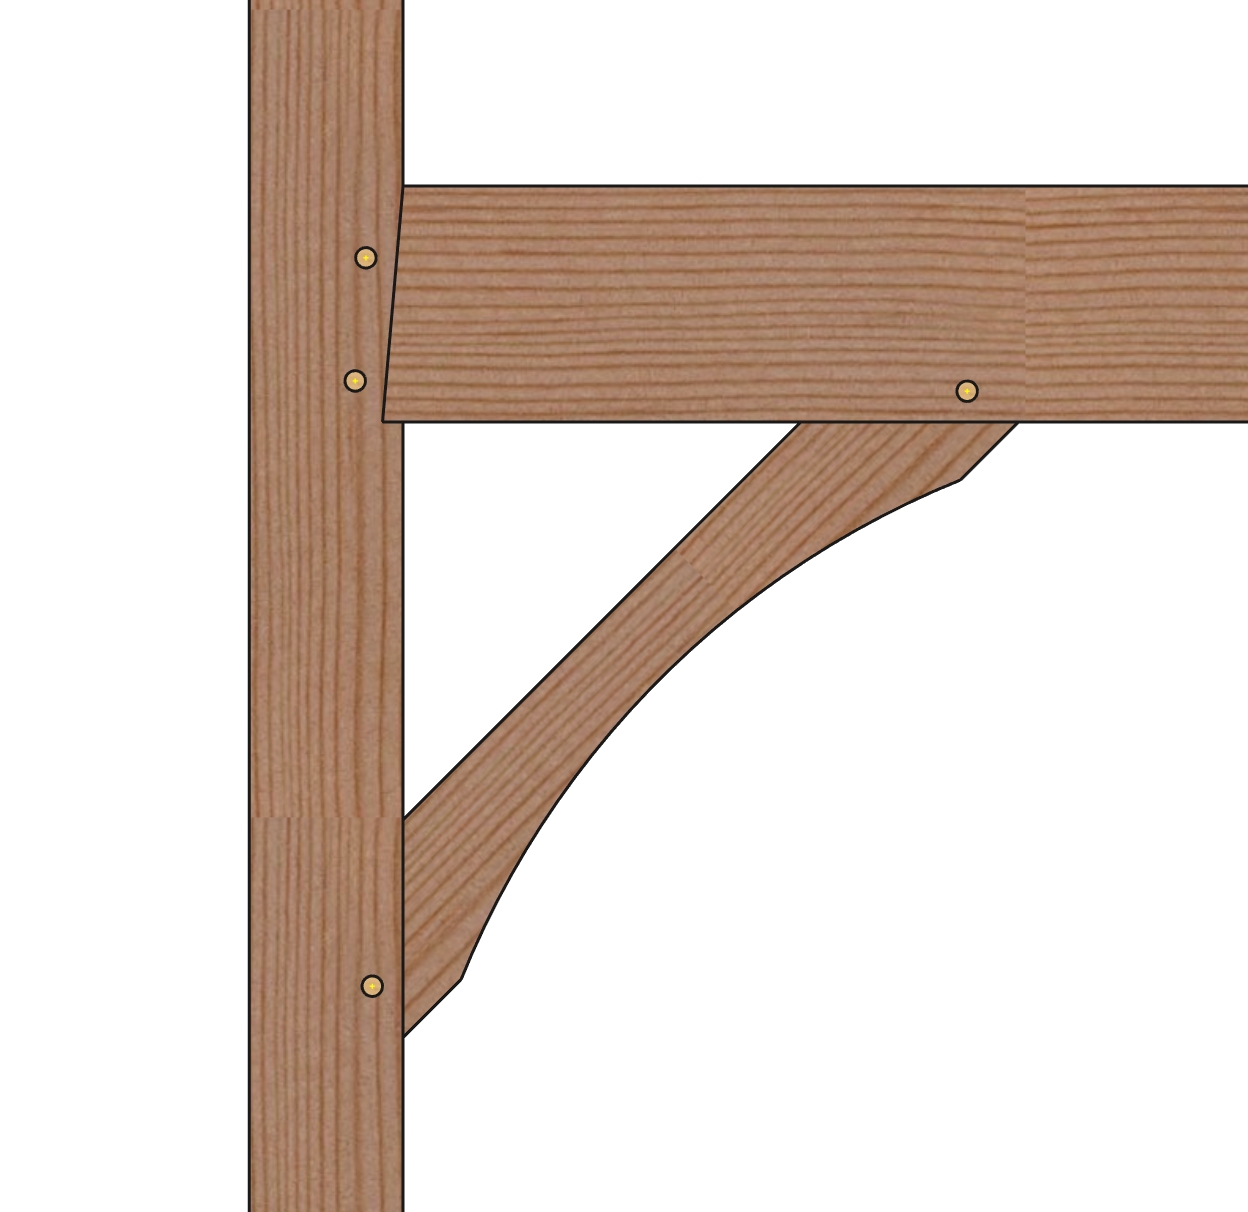
Curved Knee Brace
Curved Step Knee Brace

Steep Knee Brace
Do all wood Timbers Check in a Post and Beam?
Yes all wood timbers will check to some extent. While not all of the timbers in a particular timber frame will check, many of them will – it is the nature and part of the beauty of framing buildings with heavy timber. Checks occur as a timber dries out. As the exterior of the timber dries out, it shrinks a little bit, then a little bit more and a little bit more. The interior of the timber is still moist, so it doesn’t shrink as much. The heart wood of interior core is also more dense which keeps it from shrinking as much as the sap wood, which is found on the outside.
As the outside of the timber shrinks eventually it needs to find relief and it “checks” or splits a little bit. The check radiates in toward the core of the tree in a wedge shape and stops at the tip of the wedge (coinciding with the center of the rings of the tree, also called the heart of the tree). True checks are not “splits” they stop at the heart wood and don’t travel to the other side of the timber. The bull’s eye, or heart, can be found anywhere, or nowhere in the timber. It is the original center of the tree. Timbers can be ordered FOHC (free of heart center), which means that there is no heart wood in that timber. FOHC timbers are sawn from larger trees and check much less than “boxed heart” timbers will.


Is there a way to keep a timber from checking?
While eliminating checking in heavy timber is virtually impossible, it is possible minimize checking. When using Douglas Fir, ordering FOHC (free of heart center) minimizes checking quite a bit. Since the heart wood is denser and the checks tend to radiate out from the heart, going to FOHC material reduces checking. FOHC is generally only available in Douglas Fir, trees like pine, oak and hemlock don’t grow big enough to saw the heartwood out of a timber. Different species of wood with check more than others. Oak checks a lot and gets small surface checks easily. Hemlock and white pine will check moderately and douglas fir will check the least.
The most important thing to do is to slow down the drying process. Buildings in the winter months can have a relative humidity of 20% or less. Exposing a green timber to such a dry environment causes the outside of the timber to dry out too quickly and shrink rapidly, drawing checks. To slow the drying process, we recommend finishing the timber on all sides in the shop and keeping the temperature down and the humidity level up in the building where it is being installed for the first year.
What is checking in Heavy Timber?
Checking is a crack that forms in a timber as it loses moisture and shrinks. A full explanation can be found on our “Shake & Checking” page. Timbers are more dense toward the heart wood at the center of a tree and less dense toward the sap wood toward the bark of a tree. Because of the difference in density, a crack will form in the sap wood and diminish and disappear as it reaches the center of the timber.
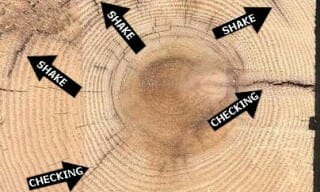
Shake and Checking in Timber
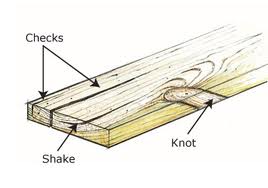
Shake | Checking | Knots

Pre-Stained Exterior Timber Frame